2-Ingredient Homemade Paneer Recipe
In India and across the South Asian diaspora, Diwali is celebrated with festive lights, vibrantly colored rangoli arrangements, and lots and lots of sweets. And while paneer typically appears in savory preparations, the cheese can be used in several desserts that are just as celebratory as the Festival of Lights, from paneer kheer (think rice pudding with cheese instead of rice) to fudgy, thumbprint cookie-shaped sandesh.
Just in time for Diwali, Chowhound Lead Recipe Editor Ryan McPhee shares his foolproof recipe for homemade paneer, ready to be used in all dishes, sweet or savory. McPhee, who is half-Indian, has fond childhood memories of scarfing down any and all dishes containing paneer, ideally prepared by his Gujarati grandmother. "I wouldn't say I was a picky eater," he says, "but I was far more likely to eat spinach, peas, and other greens if they were studded with cubes of paneer."
You can find paneer in South Asian grocery stores or supermarkets with a well-stocked cheese section, but nothing beats the freshness of homemade paneer, made with just two ingredients (plus water and salt). After the initial steps, the length of the pressing stage will determine the firmness of the final product, similar to tofu. So regardless of how you intend to use your paneer, this recipe has got you covered.
Gather the ingredients for 2-ingredient homemade paneer
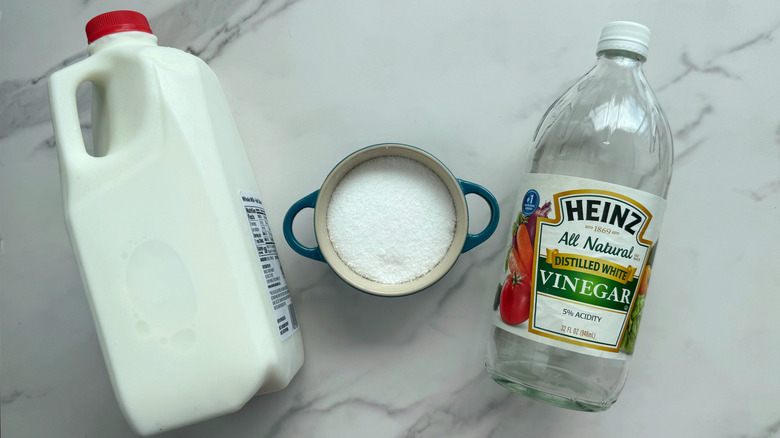
Homemade paneer requires only two ingredients (four if you count salt and water, which we're not): whole milk and distilled white vinegar. You need that fat content, so now's not the time to use 2% or skim milk.
As for the acid that helps separate the curds from the whey, some people opt to use lemon juice instead of vinegar. They work in the same way by dropping the pH and thus causing the proteins to coagulate. That said, for a small, quick batch such as this, we stick with vinegar; distilled white vinegar (which is essentially just diluted acetic acid) has less going on chemically than lemon juice (which, in addition to citric acid, contains sugars and various other compounds). The purer acid will get to work faster, leading to a firmer, denser curd than lemon juice would in the same amount of time. Taste-wise, the paneer will get rinsed before setting, so you won't taste either in the final product.
Step 1: Heat the milk
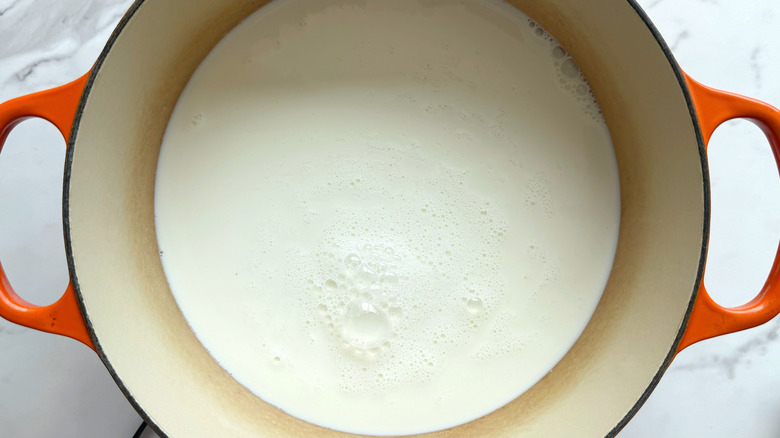
In a large, heavy-bottomed pot, heat the milk over medium heat. Stir occasionally to prevent scalding.
Step 2: Dilute the vinegar
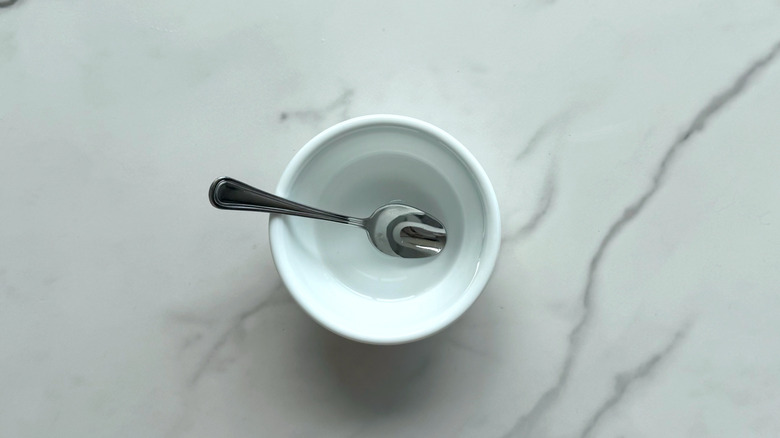
As the milk heats, dilute the vinegar in 2 tablespoons of warm water.
Step 3: Let the milk reach the proper temperature

Monitor the milk and continue to heat until it reaches 190 F. Small bubbles should start to form around the edges and steam should emanate from the pot.
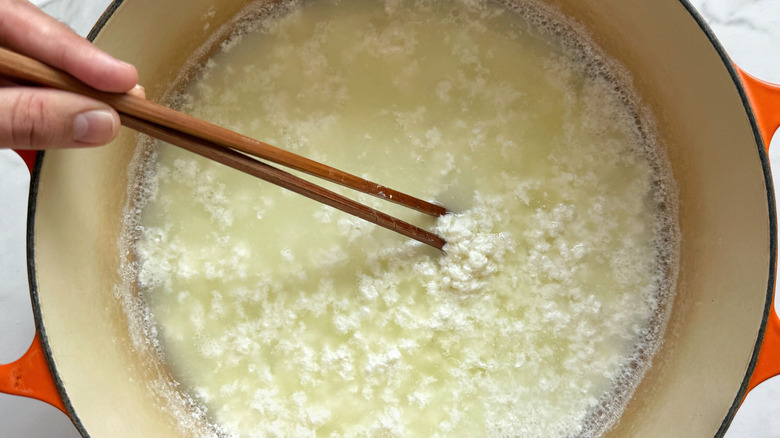
Step 4: Add the vinegar to the milk
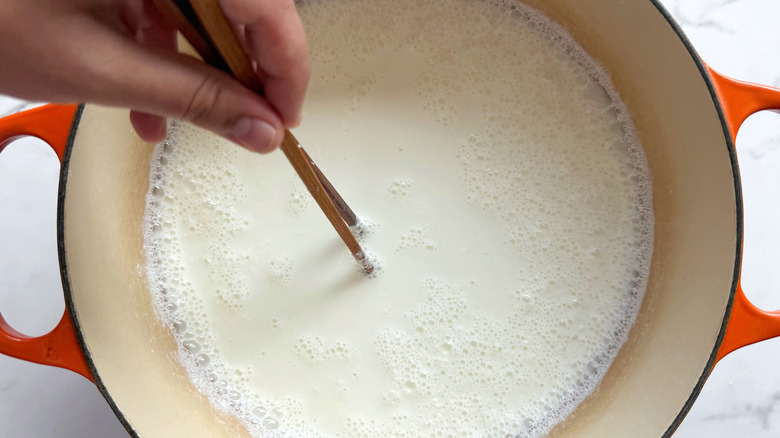
Slowly pour the diluted vinegar into the milk while gently stirring.
Step 5: Stir the milk as curds form
Continue to stir just until curds start to form, about 1 minute. Turn off the heat.
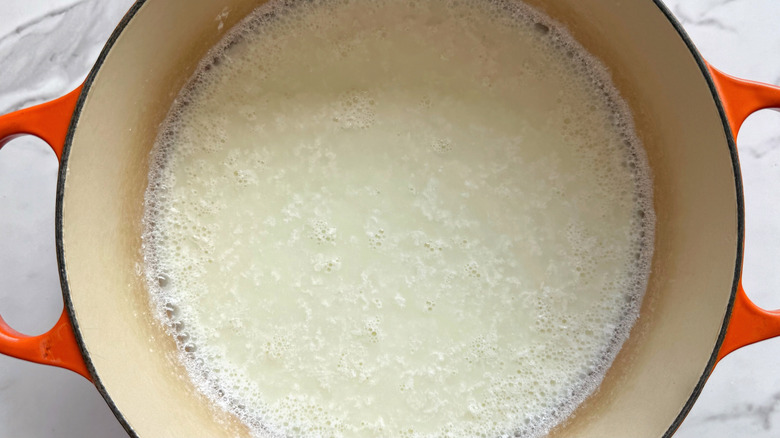
Step 6: Let sit as the curds and whey separate

Let the pot sit undisturbed and allow the curds to form for another 5 minutes, or until the whey has gone from opaque to a more translucent, greenish-yellow.
Step 7: Prep a colander
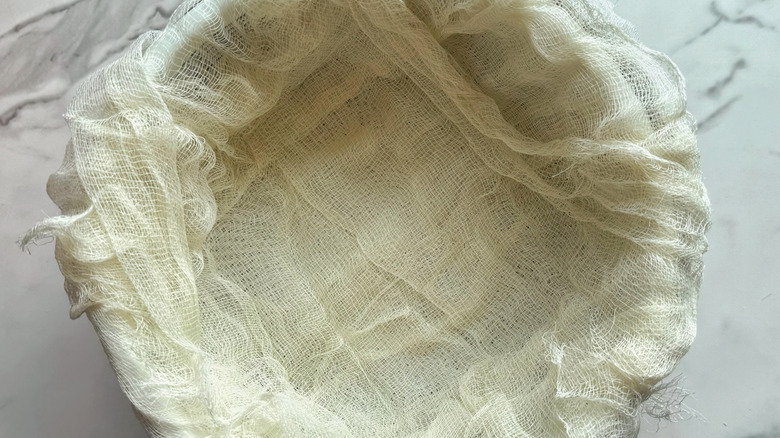
Line a colander with cheesecloth and set it over a large bowl.
Step 8: Strain out the curds
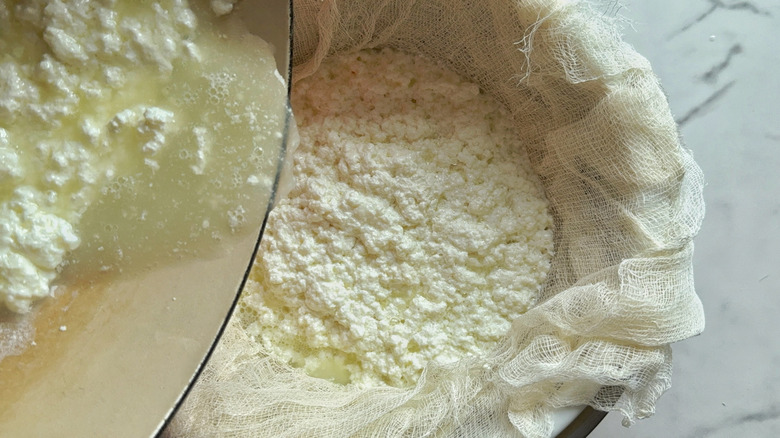
Strain the curds into the cheesecloth-lined colander. Reserve the whey for another use or discard it.
Step 9: Rinse the curds
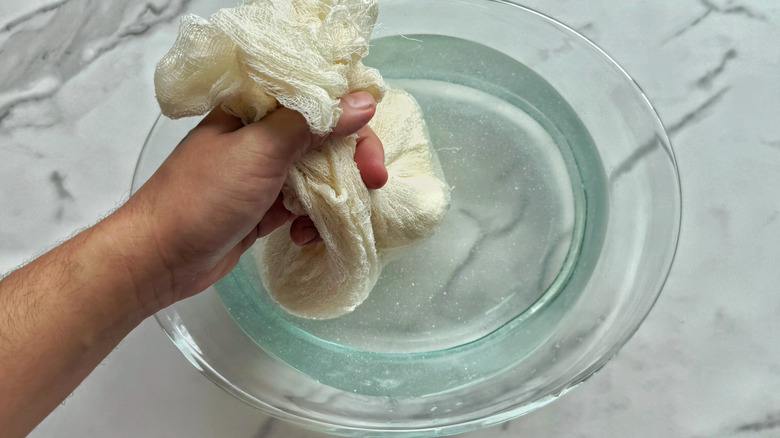
Loosely bundle the strained curds in the cheesecloth and rinse them in a bowl of cold water. Wring out the excess water.
Step 10: Season with salt
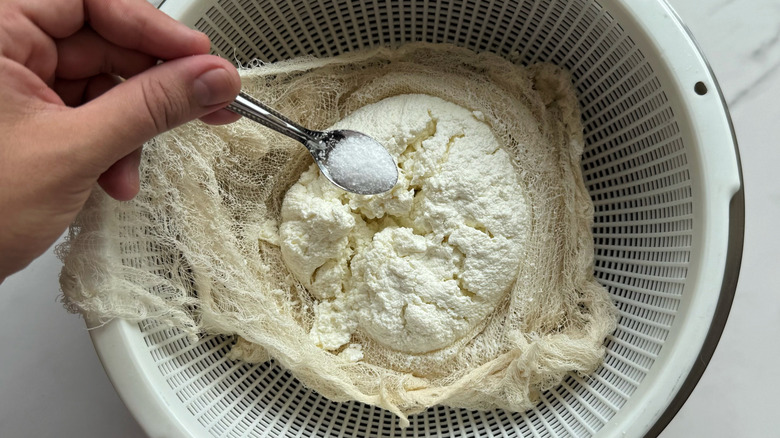
Fold the salt into the curds.
Step 11: Shape the paneer block
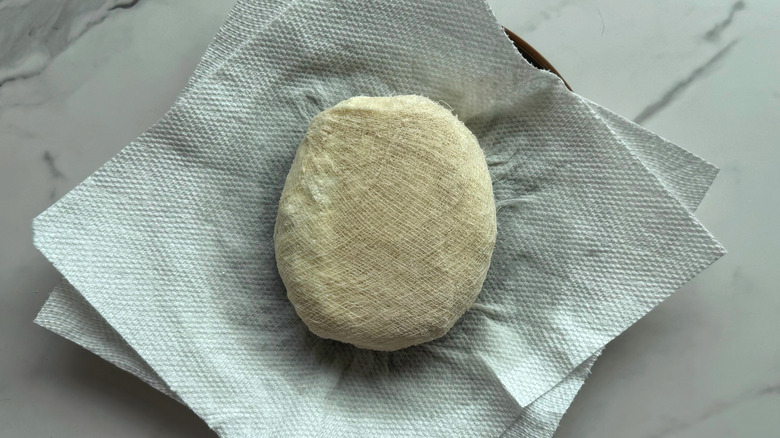
Form the cheesecloth bundle into a disk and place it on a plate lined with paper towels.
Step 12: Add some weight
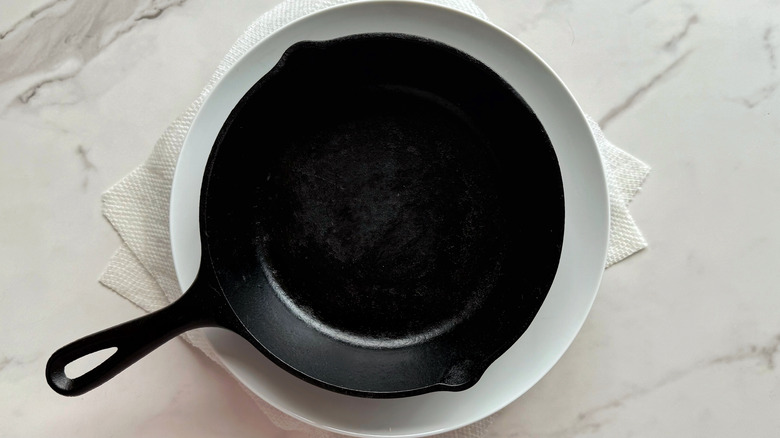
Set another plate on top of the bundle and weigh it down to press the curds.
Step 13: Press the paneer to desired firmness
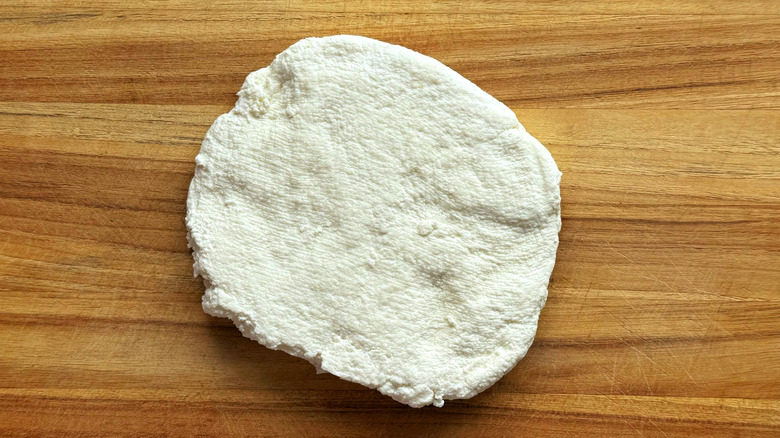
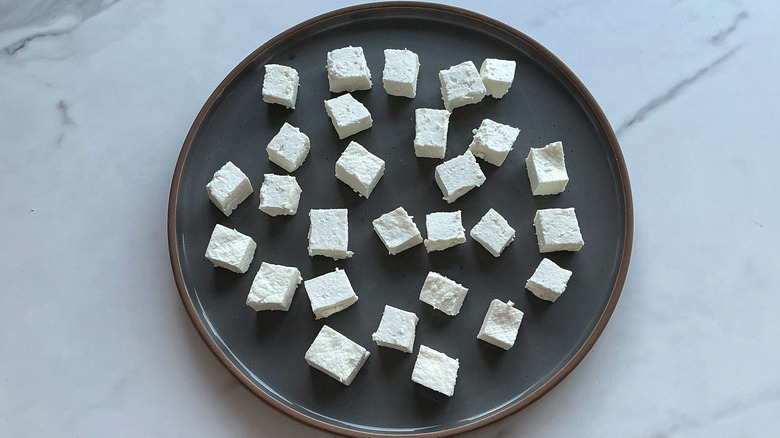
Let sit at room temperature for 15 minutes (for a soft texture) to 2 hours (for sliceable and sear-friendly pieces). Paneer can be pressed for longer in the refrigerator for a very firm final product suitable for grating.
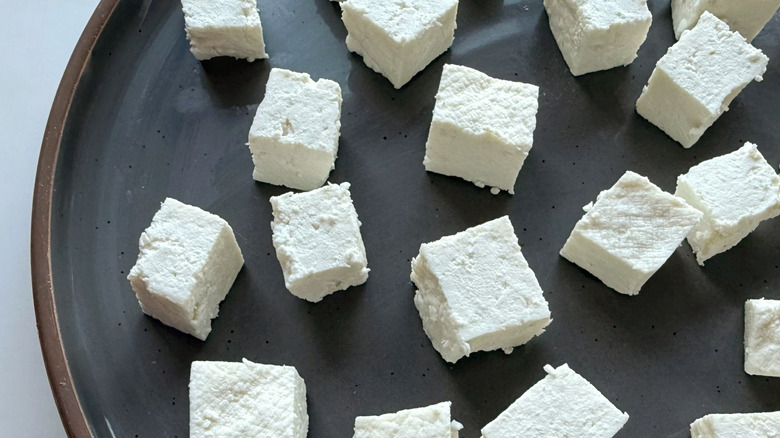
Step 14: Store or use the paneer

Store paneer in the refrigerator in an airtight container; use within 3 days. Crumble, cube, or grate based on desired use.
Creative recipes to try homemade paneer in
2-Ingredient Homemade Paneer Recipe
Paneer is an Indian staple, and you can make your own from scratch with barely any ingredients. The fresh cheese is great in sweet and savory dishes alike.
Ingredients
- ½ gallon whole milk
- 2 tablespoons distilled white vinegar
- ½ teaspoon kosher salt
Directions
- In a large, heavy-bottomed pot, heat the milk over medium heat. Stir occasionally to prevent scalding.
- As the milk heats, dilute the vinegar in 2 tablespoons of warm water.
- Monitor the milk and continue to heat until it reaches 190 F. Small bubbles should start to form around the edges and steam should emanate from the pot.
- Slowly pour the diluted vinegar into the milk while gently stirring.
- Continue to stir just until curds start to form, about 1 minute. Turn off the heat.
- Let the pot sit undisturbed and allow the curds to form for another 5 minutes, or until the whey has gone from opaque to a more translucent, greenish-yellow.
- Line a colander with cheesecloth and set it over a large bowl.
- Strain the curds into the cheesecloth-lined colander. Reserve the whey for another use or discard it.
- Loosely bundle the strained curds in the cheesecloth and rinse them in a bowl of cold water. Wring out the excess water.
- Fold the salt into the curds.
- Form the cheesecloth bundle into a disk and place it on a plate lined with paper towels.
- Set another plate on top of the bundle and weigh it down to press the curds.
- Let sit at room temperature for 15 minutes (for a soft texture) to 2 hours (for sliceable and sear-friendly pieces). Paneer can be pressed for longer in the refrigerator for a very firm final product suitable for grating.
- Store paneer in the refrigerator in an airtight container; use within 3 days. Crumble, cube, or grate based on desired use.
Nutrition
| Calories per Serving | 299 |
| Total Fat | 15.9 g |
| Saturated Fat | 9.1 g |
| Trans Fat | 0.0 g |
| Cholesterol | 48.8 mg |
| Total Carbohydrates | 23.4 g |
| Dietary Fiber | 0.0 g |
| Total Sugars | 24.6 g |
| Sodium | 445.4 mg |
| Protein | 15.4 g |
How do I cook with paneer after it's pressed?
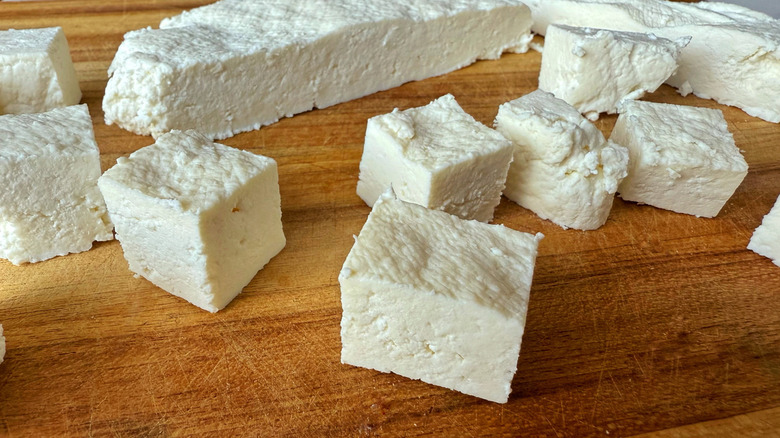
You've made your paneer. Now what? There are myriad ways to showcase paneer, from mains to sides, breakfasts to dinners, sweets to savories. It all depends on what you're in the mood for — and how much you strain it before using.
Minimize the pressing time for a soft, spreadable paneer similar to farmer's cheese. Kala jamun, a variation of the dessert gulab jamun, starts with fried dough balls made from soft paneer and milk solids. Another sweet option is ras malai, which sees the soft paneer shaped into patties before being soaked in a sweet milk flavored with saffron and cardamom.
After about 30 minutes, the paneer will firm up a bit but still be soft enough to crumble. These crumbles make a delicious scramble known as paneer bhurji; seasoning them with turmeric and sulfur-rich kala namak will give them the taste and appearance of scrambled eggs. Crumbled paneer is also perfect for stuffing into flatbreads and samosas. If you press your paneer even longer (at least 2 hours), it'll be dense enough to slice into cubes or slabs. This is closer to the squeaky blocks of paneer you'll find in grocery stores. Marinate the pieces in spiced yogurt before grilling or searing for an easy homemade paneer tikka. You can also fry the cubes (or leave them plain) before making them the star of a creamy paneer tikka masala or a spinach-packed saag paneer. It's about time we start treating cheese like the vegetarian protein it's begging to be.
What can I use leftover whey for?
When making paneer, you're left with a whole lot of whey, that not quite clear, not quite opaque liquid that the curd separates from. While it's tempting to just discard it down the sink, consider transferring it to a container and keeping it in the fridge for a later culinary use.
Try adding some to the cooking liquid for beans, rice, grains, pasta, and more; you'll get a richer flavor, and the whey will help promote digestibility. It also does wonders for bread baking, creating a softer product with a slight, sourdough-like tang. We've even used it as a base for a dairy-tinged sorbet, sweetening it with honey and adding a bit of orange blossom water.
As long as the whey is strained well and free of milk solids, it will last for a few weeks in the fridge, so you have plenty of time to get creative. For longer storage, you can also freeze it (perhaps in ice cube trays if you intend to use a bit at a time).