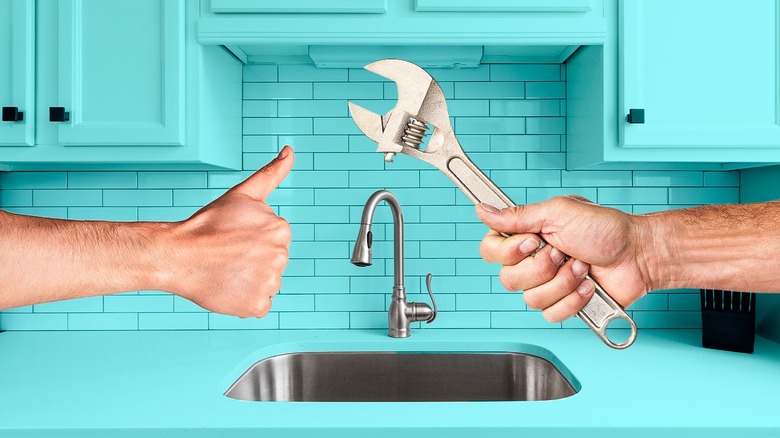
How To Install A Kitchen Sink Like A Total Pro
We may receive a commission on purchases made from links.
Staring at your old, stained, dinged kitchen sink, you might be dreaming about a new one. However, calling in the pros isn't always the way to go. Perhaps you live out in the boonies where service is harder to get; maybe you'd like to save money on labor costs. Perhaps you've simply been wanting a DIY project for a long time ... in which case, you're definitely wondering how to install a kitchen sink like a pro. Like everything, though, it's easier said than done, and much can go wrong.
"A common mistake is not verifying whether the sink and faucet are compatible with the existing plumbing layout," says TJ Laury of Ben's ProServ. "This can lead to unnecessary modifications and added costs." Other mistakes include forgetting to turn off the water supply, failing to realize you'll need carpentry skills, not accounting properly for the sink's weight, or giving caulk and sealant too little time to cure and ending up with a leaky kitchen sink.
"Rushing the installation without the right tools or preparation often results in poor sealing, loose fittings, or long-term durability issues," adds Kevin Vander Hyde, vice president at Vander Hyde Services. Here's how to avoid these issues and install your sink as though you've been doing it all your life.
Take your measurements
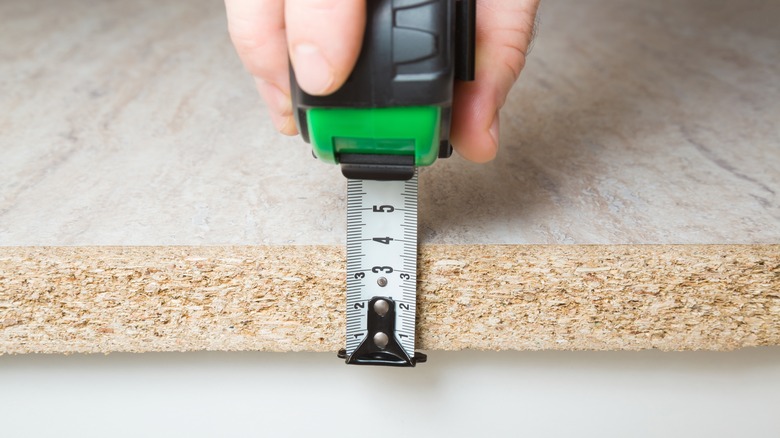
All right, first, let's acknowledge that you're unlikely to do the job like an actual pro. That being said, it is possible to learn how to install a kitchen sink with passably good results, as long as you go carefully. First step in going carefully: taking your measurements.
"This is No. 1 for a reason," says Dino Rachiele, founder of Rachiele Custom Sinks. "Never assume your sink template or spec sheet matches what's actually in front of you." Cabinet interiors and countertop openings can be off by as much as a quarter inch, he says, which is more than enough to ruin your fit and cause major issues. "For instance, if a person buys an undermount sink that's slightly wider than the cabinet hole, it cannot be installed flush," explains Eric Kotlyar, a home renovations expert at True Form. "They may need to make a much harder repair to the countertop."
To prevent this, measure the top opening in your cabinet, the space below the cabinet, and its inside width. Then, measure your new sink; don't trust the specs on the outside of the box. Compare cabinet and sink measurements to ensure they fit. "Be sure there's room for clips, drains, and faucets," Rachiele warns. "Double-check twice. Cutting a countertop wrong is one of the costliest mistakes you can make." Use a reliable tool, such as the Amazon Basics Self-Locking Tape Measure. If you're having trouble fitting your tape measure into tight spaces, consider measuring tape for fabric.
Decide what type of sink you want
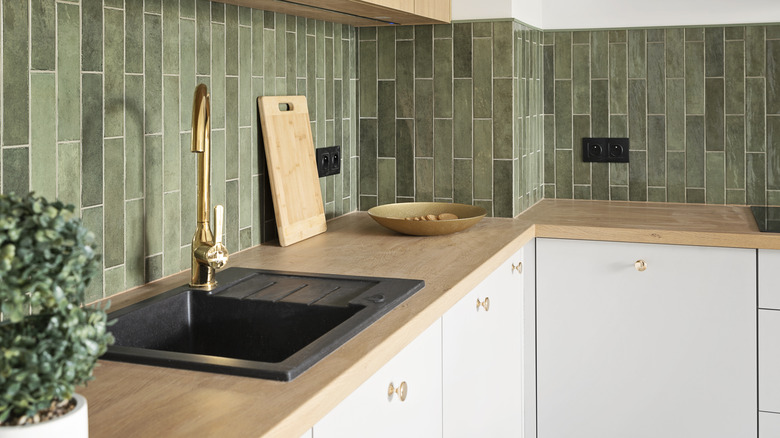
Many folks consider choosing the model the fun part. Do you want a single-basin sink or one that has two sections? Do you cook a lot? If so, a sink with an integrated ledge might make the most sense for washing tons of dirty dishes. Are you able to withstand the back pain that might come with a super-deep sink? Moreover, have you taken fit and compatibility into account? In other words, does the type of sink you want match the counter situation you've already got going on?
"The type of sink needs to fit perfectly in the cutout of the current countertop, plumbing, and the cabinet structure," says Alexzandra Aguirre, an interior designer at Phoenix Interior Design LLC. "The discrepancy in size or type of mounting may result in an upward cost or problematic delays in the installation."
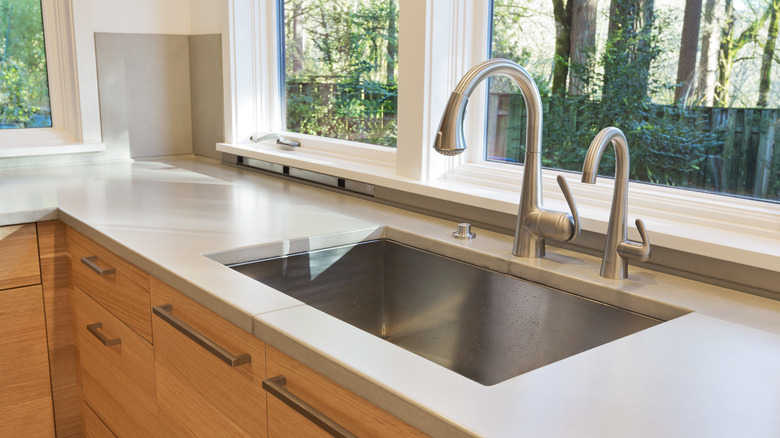
While you may have already taken measurements, have you accounted for how the sink will need to be mounted? Top-mount, undermount, and farmhouse-style sinks all bring different maintenance challenges to the table and require different installation pathways. "Top-mount sinks are simpler to install as well as replace, whereas an undermount design has a clean line look that suits a modern and minimalist kitchen," Aguirre says. Make sure you don't choose based on design alone — function matters, too.
Choose a material
Kitchen sinks come in a variety of materials, from stainless steel to copper, porcelain to enamel, fireclay to stone composite, and more. Choosing the right one for your lifestyle is important because even if you learn how to install a kitchen sink like a total pro, you don't want to have to replace it all the time.
"Stainless is very forgiving and doesn't show scratches easily," says Shaun Barr, owner of Barr Plumbing. Alexzandra Aguirre agrees. "High-end designs are known to have sound-deadening pads and brushed surfaces that conceal water spots well," she adds. However, to get these benefits, as well as reduce noise and dents, you'll need to invest in a heavier gauge of steel.
There are, of course, options beyond stained steel, but be careful. "Lots of colored sinks can chip and scratch," Barr says. Porcelain, while classy, will also chip, says Eric Kotlyar, while copper has antibacterial properties and needs frequent polishing. If you're looking for a heavy-duty, no-scratch option, granite composite might be the one for you. Lastly, don't dismiss the possibility of buying it online: Options such as a Sarlai 33 Farm Sink Stainless Steel or Tuktuk White Fireclay Farmhouse Sink can be both lovely and cost-effective ... but always read reviews!
Collect your tools

When learning how to install a kitchen sink, as with any DIY, it's critical that you make sure you gather tools and materials upfront. "Having everything on hand — wrenches, plumber's putty, silicone caulk, and screwdrivers — before you start avoids delays and frustration mid-installation," Kevin Vander Hyde says. In addition to these tools, Dino Rachiele adds, you may need a jigsaw if you have to enlarge the space into which you're dropping your sink. "Keep rubbing alcohol and paper towels close by for cleanup," he adds.
Shaun Barr prefers Chanellock tools, and he brings a PVC saw along as well in case any adjustment to the pipes is needed. If you're worried you might misplace all your goodies in the process, consider a large tote or toolbox for keeping them all nearby. The DeWalt TSTAK Tool Box is highly reviewed.
Turn off the water
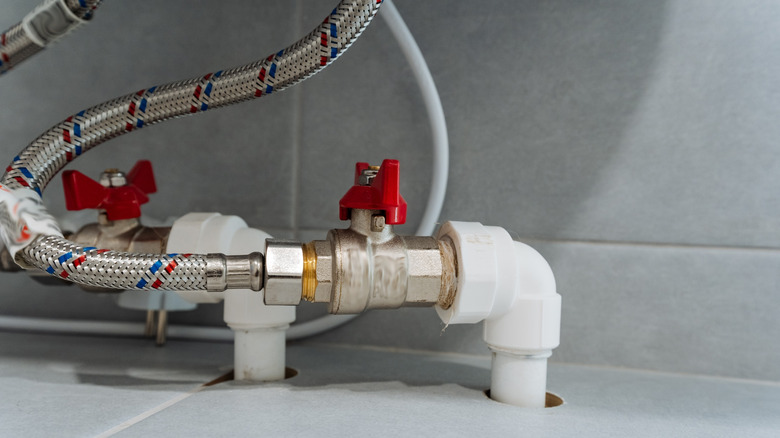
Don't forget to shut off the water. You know what? It's worth saying this twice: Don't forget to shut off the water. "People underestimate the importance of turning off the water and properly disconnecting existing plumbing," Kevin Vander Hyde says. Forgetting, however, can cause leaks or damage, so it's critical you do more than turn off the faucet before you proceed; you have to shut off the valves under the sink. If the valves are old, fussy, or stuck, you can turn off the water at the main line.
Keep in mind, says Shaun Barr, that just because the water stops are off doesn't mean they won't drip. "It's always a good idea to cap them or put a bowl under them to keep from getting water in the base of your cabinet." Lastly, Dino Rachiele says, you should briefly turn the faucet back on to release any pressure before you disconnect anything.
Disconnect garbage disposal and dishwasher lines

Not all sinks have dishwashers and garbage disposals attached, especially in older kitchens. If you do, however, you've got to disconnect the lines that lead to them before you pull out your kitchen sink. You'll want to disconnect them carefully to prevent damage. "Unplug the disposal first, then remove the drain and dishwasher hoses," Dino Rachiele instructs. "Keep a bucket or towel nearby — there's always leftover water in the lines. If you're replacing a shallow sink with a deeper one, check your water supply and drain line lengths before reconnecting." It's a bummer to install everything, he says, only to find out that those hoses are too short.
"Labeling or snapping photos of connections helps make the installation smoother," TJ Laury adds. Especially if you're a newbie, make sure to go slowly and take careful notes, keeping all pieces and parts you pull off, so you can put everything back together correctly. Otherwise, you may end up having to call a plumber and spending almost as much as you would have to get the sink installed in the first place — or more, if you end up causing leaks.
Carefully remove the old sink

The next step when learning how to install a kitchen sink is to pull the existing one out safely. "Removing the old sink should be done with caution, prying carefully so as not to crack countertops or tiles," Eric Kotlyar says. TJ Laury agrees that going slow is crucial: "Removing old caulk and loosening sink clips properly prevents countertop damage, which can be costly to fix," he says.
Start by cutting through the old caulk with a utility knife, Dino Rachiele says. If you have extra caulk you need to remove, use a tool such as the Saker Silicone 3-in-1 Caulking Sealant Finishing Tool, Grout Remover, and Scraper to gently get it off the countertop. Then lift the sink out carefully, which may be a two-person job. "For top-mounts, gently pry up from underneath," he says. "For undermounts, release the clips before lifting. Never force it — stone and laminate can crack easily."
Cut the countertop if necessary
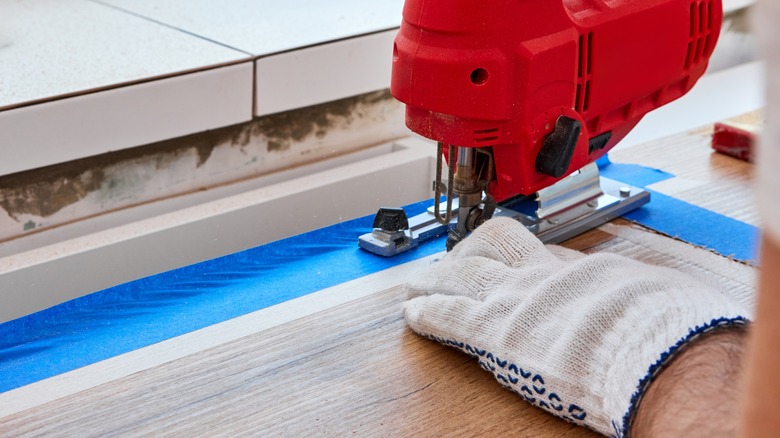
In some cases, you may need to widen the hole in the countertop to accommodate your new kitchen sink's shape or size. Dino Rachiele advises you to first carefully mark the new cutout using a template and painter's tape to create the outline. Eric Kotlyar explains that the painter's tape, through which you will cut with a jigsaw equipped with a fine-toothed blade, keeps the counter from chipping as you go. Cut from the top, and as always, go slowly. "It's better to spend 10 extra minutes here than to replace a countertop later," Rachiele says.
The countertop may need other updates that should happen at this time as well. For instance, Alexzandra Aguirre says, you might want to replace or refinish the countertop edges at this point. This will make them more resistant to moisture, as well as lend them a clean and unified appearance. This can make the whole DIY look prettier and more cohesive.
Add faucet and accessory holes if needed

You may need to cut new faucet and accessory holes, depending on the differences between your current sink and the new one. Your goal, Kevin Vander Hyde says, is a clean fit without any chips or cracks from forcing elements through existing, ill-fitting holes. This is one of the trickier skills in learning how to install a kitchen sink, but it's worth it because a poor fit can result in leaks, low water pressure, and annoying and costly re-plumbing later.
This requires a bit of thinking through when buying the faucet. "The faucet should be centered over the sink and placed close enough that you're not reaching or bending under the spout," Dino Rachiele says. "That's ergonomically uncomfortable. A faucet with a 9- to 11-inch reach is ideal for most workstation sinks." Factors to take into account when choosing placement include your handedness, prep areas, how far you want the faucet to reach, and your general use of the kitchen sink, he says. That's why it's critical you cut the holes and then test everything before sealing the sink and its fixtures.
"Drilling holes for faucets or soap dispensers demands precision," Eric Kotlyar says. "I often use a hole saw for straight, even cuts." Rachiele agrees with this approach, advising that you go slow and clean up any metal or stone dust right away to prevent them from scratching the sink or other surfaces.
Install sink clips if necessary
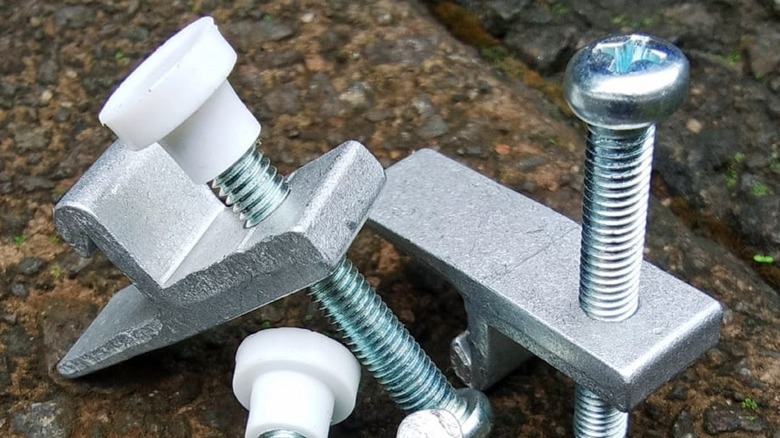
Before learning how to install a kitchen sink, many folks don't realize that sink clips — also called mounting clips — are necessary for undermount sinks. Basically, with an undermount sink, you're not placing the sink on top of the cabinet, which supports the sink as it floats above the space beneath. Instead, you hang the sink underneath the cabinet using clips, which allows you to wipe the counter straight into the sink without having to deal with the hindrance of the rim.
Now, the temptation here might be to use the old clips so that you don't have to learn another new skill. "Don't do it," Dino Rachiele says. "Old clips, screws, and gaskets rarely match up with new sinks and can easily cause leaks or loosened mounts." You should always use the exact hardware that comes with your new kitchen sink, he says, especially since some sinks (such as the ones he designs), use unique mounting methods that may not require clips in the first place.
First, Rachiele says, dry fit the sink to make sure you cut the countertop correctly. Then mark your clip locations using the new sink's instructions. "Tighten the clips just enough to hold the sink in place and check that it's level before finishing," he says. If you need to, you should next level the countertop by adjusting the cabinet using shims. This will prevent water from pooling on the edges, preventing mold and water damage, Eric Kotlyar says. Take your time if you want a lasting product, he adds: "Proper installation prevents the sink from shifting after some time."
Attach faucets to sink
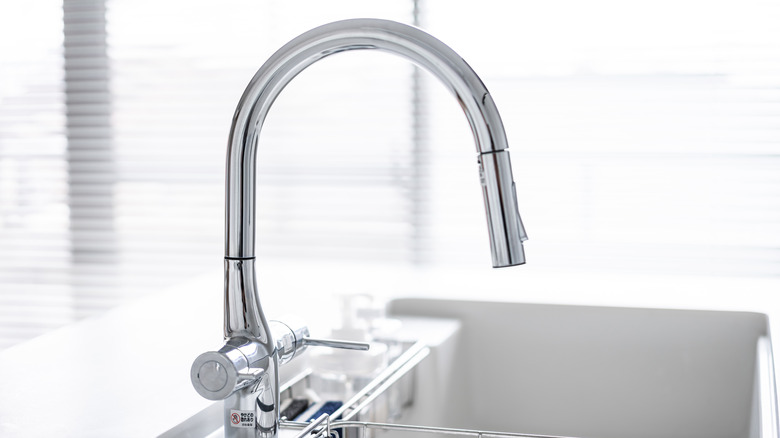
Next up, it's time to attach your faucets. Whether you choose a standard setup or a modern touchless faucet, there's a right and a wrong way to do this when learning how to install a kitchen sink. The right way? "If possible, attach the faucet and accessories before setting the sink," Dino Rachiele says. "It's much easier to do this on a work surface than while lying on your back inside a cabinet." Plus, Eric Kotlyar adds, it's a much better approach than torquing yourself in cramped spaces.
Next, do your test fit by setting the sink in place and giving everything a go. "Make sure the faucet clears the backsplash, the accessories fit properly, and the clips align," Rachiele says. Seal it only when you're sure everything fits. "This one step prevents a lot of frustration later," he says. Ensure all the fittings are tight but not overtightened, Kevin Vander Hyde adds. Lastly, TJ Laury says, "Use Teflon tape on threaded fittings to help prevent leaks."
Apply caulk before or after setting sink in
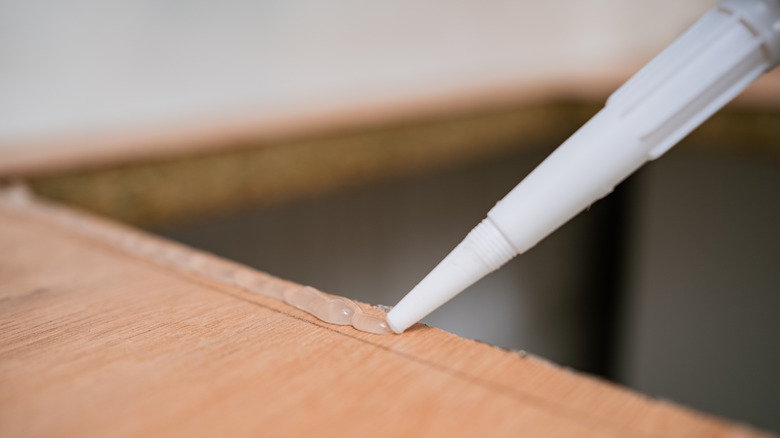
Depending on how you mount the sink, you will either apply the caulk before or after you set it in place. "On drop-ins, I apply a thin bead underneath the rim prior to installation," Eric Kotlyar says. "On undermounts, caulk comes between the countertop and sink rim after installation." It's a good idea to practice running a bead of caulk along a straight line if you've never used a caulk gun before; it's not as easy as it looks, and you really need an even result. "Not enough and water trickles in behind the cabinetry; too much, and it looks messy and is a pain to clean up," he says.
As for which type of caulk to use, high-quality silicone is the way to go. "Metals like copper, bronze, and brass can react with certain silicones, so use what the manufacturer recommends," Dino Rachiele says. Once you apply it, smooth it properly using a finger or a tool. (It wouldn't hurt to watch a YouTube video here to help master the technique.)
Once you've got your caulk in place, check the sink's level before you tighten your hardware. "Even a small tilt can cause water to pool instead of draining properly," Rachiele says. Then give it time to cure properly. He recommends a full 24 hours. "Rushing this step almost guarantees leaks or messy joints," he says.
Reconnect lines
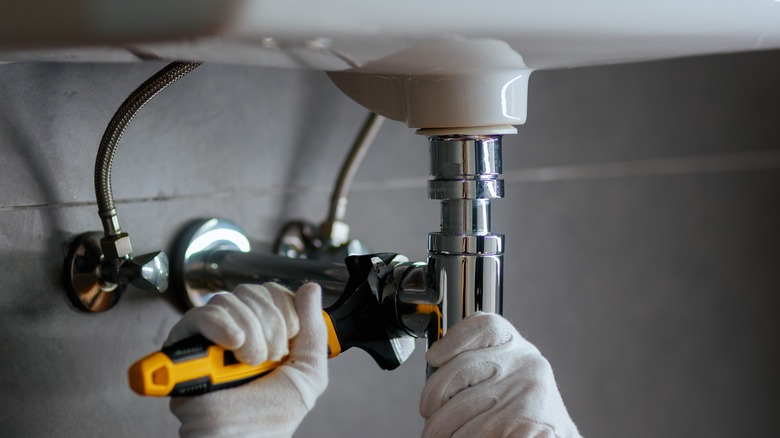
The penultimate step when figuring out how to install a new kitchen sink is to reconnect all the lines you disconnected at the beginning. Faucet supply lines, dishwasher lines, and garbage disposal connections need to be reattached snugly and correctly. "I prefer braided stainless lavatory supply lines if your new faucet doesn't have supply lines made onto it," Shaun Barr says. "They're flexible and forgiving." If you're installing new lines in addition to the sink, make sure to follow the directions closely. This will add an extra dimension of expertise, so read through everything beforehand and get all your tools in place for this step as well.
It's also important not to overtighten fittings, which can damage the threads or crack the entire fitting. "Hand-tighten fittings first, then give them a gentle snug with a wrench," Dino Rachiele advises.
Turn the water back on
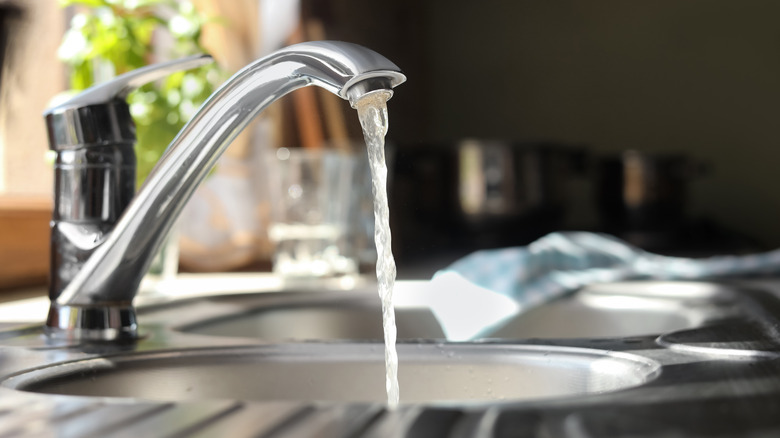
The last step in making your sink functional again? Turn the water back on. As with every other step, don't rush it. "Once everything is in place, slowly turn the valves back on," TJ Laury says. "Check for leaks at every connection point before considering the job complete." Make sure to inspect the stem on the water shutoff for seeping as well, Shaun Barr says, adding, "Older water valves will have packing nuts and can be tightened."
There's no such thing as being extra cautious here. "Let the water run for a few minutes while watching underneath," Dino Rachiele says. Test both hot and cold water. "If everything stays dry after an hour, you're in good shape," he says. If you want to be really cautious, Barr says, put the stopper in the drain, fill the sink up multiple times with hot water, and then let it drain to test the plumbing for leaks. Extra precautions like this will help ensure that you don't damage your cabinets and are happy with your kitchen sink for years to come.