Our 16 Favorite Baking Tips We Learned From Alton Brown

We may receive a commission on purchases made from links.
Alton Brown has been television's reigning food scientist for over 25 years, ever since his cooking show, "Good Eats," first aired on Food Network in 1999. His unique blend of humor, hijinks, and a healthy helping of stone-cold facts distills even the most mystifying culinary complexities into simple, logical concepts that just make sense.
This is all evident in the way he breaks down fundamental food phenomena like the Maillard reaction and home-brewed beer, but Brown's Bill Nye-esque flavor of food science lends itself especially well to the ultra-scientific world of baking. Unlike cooking, baking employs a series of carefully balanced chemical reactions, and things go awry when proportions get out of whack, so scientific precision is essential. Brown is the perfect instructor to clarify the key concepts necessary for home cooks to execute recipes perfectly and even experiment on their own. Here are a few of his best baking tips.
1. Use the right flour for the task
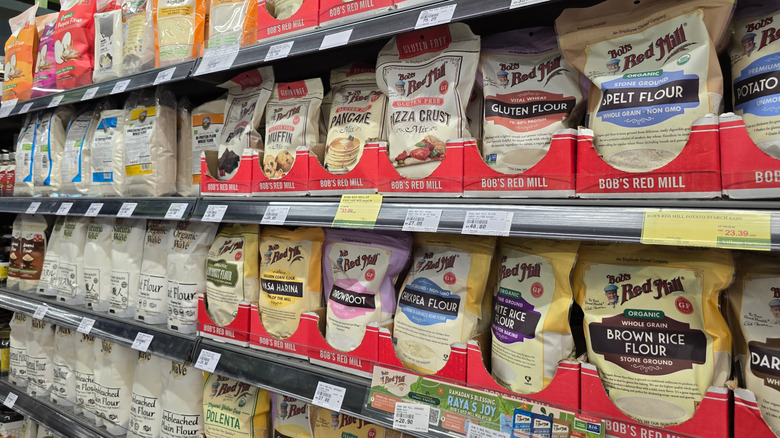
When setting out into the world of baking beyond pre-packaged mixes, most of us venture into the baking aisle and head straight for the package with the gold seal on the front. But although all-purpose (AP) flour is versatile, it is not truly all-purpose. It's great for cooking, cookies, and quick breads, but for most baked goods, there's usually a better choice.
High-protein flours like bread flour are great for producing gluten, so they're ideal for crusty breads like baguettes and sourdough. Pizza dough, especially, benefits from extra gluten, so for a nice chewy crust, look for bread flour made for bread machines, which has even more protein than ordinary bread flour.
Alton Brown's late grandmother, Ma Mae, used self-rising flour for her biscuits, but Brown prefers soft wheat flour (usually marked "better for biscuits"). It has less protein, so it produces less gluten, which is perfect for softer baked goods like pastries and biscuits. It's easier to find in the Southern U.S., though, so if you can't find it, Brown says you can mix three parts AP flour with one part cake flour.
Cake flour, of course, is perfect for cakes. It has less protein and a finer grind than AP flour, which means less gluten and a finer texture, and it holds more moisture and fat, resulting in finer bubbles and a lighter, more tender cake.
2. Weigh, don't measure
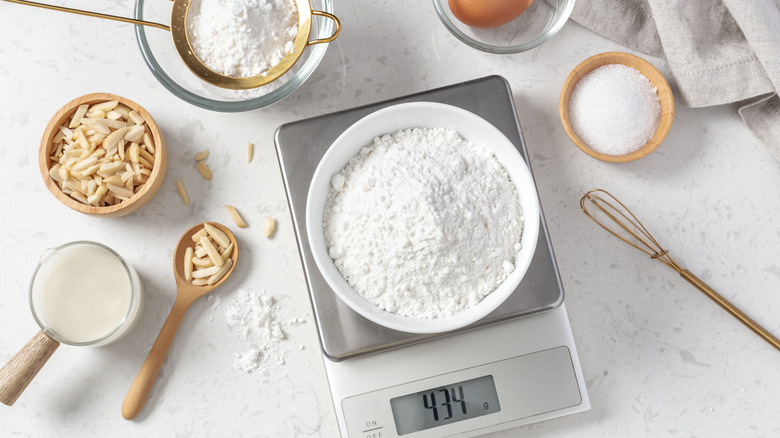
While most recipes published in the U.S. list ingredients volumetrically, Alton Brown recommends breaking out the scale when baking. Portioning ingredients by weight rather than volume offers more consistency and precision, as many dry ingredients, especially flour, can compact, meaning the weight of a cup of flour can vary as much as 20 to 30 percent. Using weight as your unit of measure also allows you to measure in smaller increments — all the way down to the gram — which matters in the highly chemical process of baking, where achieving balance between reactive ingredients is critical.
It works for liquids, too! After all, a pint's a pound the world around, as Brown often says. And though it's not strictly true — a pint of water weighs roughly 1.04 pounds, and a pint of vegetable oil weighs about 0.97 pounds– the discrepancy is less than 10 percent, which will have much less of an impact on the consistency of the dough.
3. Give yeast a chance
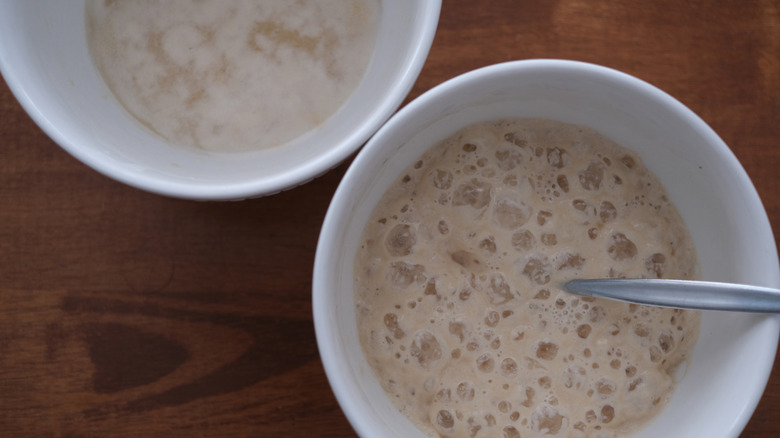
Yeast can be a tricky beast to work with, but it's essential for giving chewy, crusty breads their lift and lightness. For the most consistent quality in your yeast doughs, you need to give it the best start possible, and that means avoiding ingredients that can interfere with yeast.
Start with the right water. Municipal water is chlorinated, and chlorine kills yeast. Distilled water and softened water have too few minerals, so reach for bottled spring water, or filter your tap water through a home filter, like a Brita UltraMax filtering dispenser, for your yeast breads. And if your recipe calls for butter in the dough, add it last, after letting the rest of the dough hydrate for 10-15 minutes. Fat interferes with gluten production, so giving the yeast a head start will ensure your dough rises fully.
4. Mix bread in stages
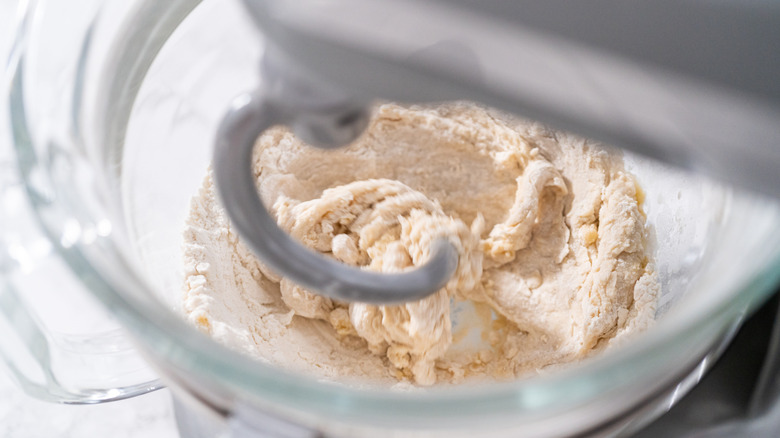
Though Alton Brown has, in recent years, warmed up to active dry yeast, he long preferred instant yeast for most yeast doughs. Active dry yeast is composed mainly of dried yeast colonies surrounding a kernel of dormant yeast, so it needs to be proofed in water to release the living yeast before being mixed with dry ingredients. Instant yeast, on the other hand, is dried more gently, so it has more live cells and can be added directly to the dry mix — no proofing required.
But instant yeast rises quickly — too quickly to allow for proper gluten and flavor production — so if you use it, it's best to mix your bread in stages. First, do a pre-ferment (or "sponge") with all the water and sugar, half the yeast, and a third of the flour, letting it go to work in the fridge overnight. Then, the next day, add the pre-ferment to the remaining flour, yeast, and salt, then let it rise 20 minutes before kneading. The overnight pre-ferment will develop flavor and texture slowly, and the second stage gives it an added boost right before kneading and rising.
5. Proofing pro tips
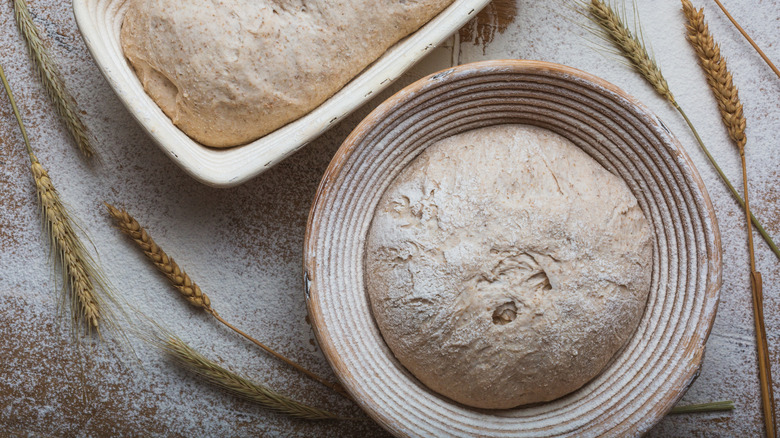
The rise is one of the most critical stages of baking with yeast, as it allows the air bubbles that give bread its lightness and texture to develop, and Alton Brown has plenty of pointers on how to get it right. Rise rates can vary dramatically depending on the weather, so he recommends using a pan of hot water in a cold oven to provide just enough warmth to encourage the yeast to go to work. You can (and should) also leave it in there during baking to keep the crust from hardening before the bread is done rising.
Do the proofing in an oiled, clear, cylindrical vessel, like this borosilicate glass beaker, with a rubber band marking the top of the dough pre-rise. This allows you to see when the dough has doubled easily. Then, after rising, fold, don't punch. You don't want to release all the bubbles — you just want to redistribute them. Brown recommends a tri-fold process, folding the sides into the middle, rotating 90 degrees, and repeating.
6. Freeze yeast rolls to bake later
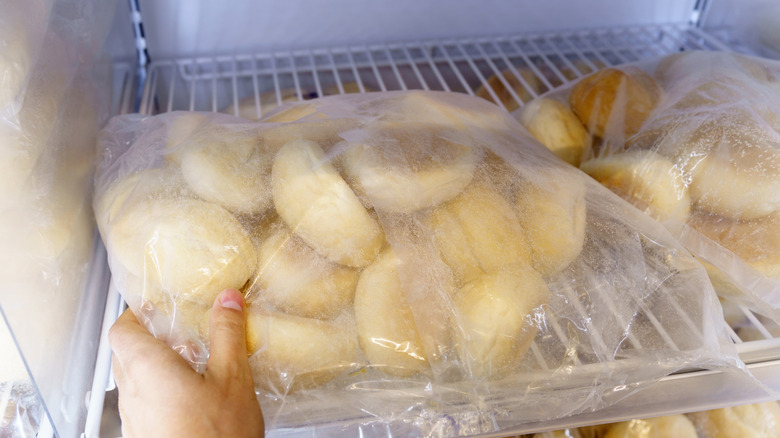
Even with instant yeast, proper gluten production takes time, but you can still have delicious yeast rolls on a busy weeknight with a bit of prep ahead. On a day when you have more time, do the mixing and proofing, then portion your rolls, butter, and bake them at 275 F until the outside starts to set, or about 30 minutes. Then cool them to room temperature on a rack, and freeze them on a pan with enough space between them to keep them from sticking together.
Once they're firm, bag them, and stash them in the freezer. When you're ready to eat, thaw for an hour, toss them into the oven at 400 F, and bake them for 10-12 minutes to cook them through and let them brown.
7. The perfect pizza process
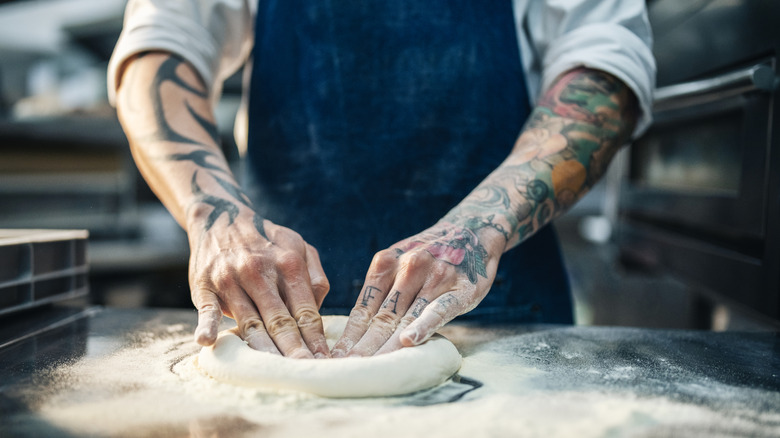
Pizza delivery may be quick and convenient, but it can't hold a candle to a homemade crust that's given plenty of time to develop deep, yeasty flavor and a crisp, chewy texture. After mixing the pizza dough, Alton Brown lets it rise in the fridge at least overnight or for 24 hours. At room temperature, the dough will over-rise — and eventually fall — before the flavor has time to develop, but refrigeration slows it down.
Once risen, knead it for 15 minutes in a machine — or 30 minutes by hand, not counting rest breaks — until you can pinch off a hunk of dough and stretch it thin enough to see daylight through it before it rips. Then shape and rest again at room temperature. Stretch it and bake it on a preheated pizza stone — or a much less expensive unglazed quarry tile from the hardware store — on the floor or bottom rack of the oven, where the stone can live full-time. You can also refrigerate it in a zip-top bag for up to 6 days before baking.
8. Achieving tender, flaky pie crust
Tenderness and flakiness — key performance indicators for any pie crust — are contradictory characteristics born from contradictory conditions. Tenderness comes from completely coating the flour particles with fat, while flakiness comes from layering them between striations of butter.
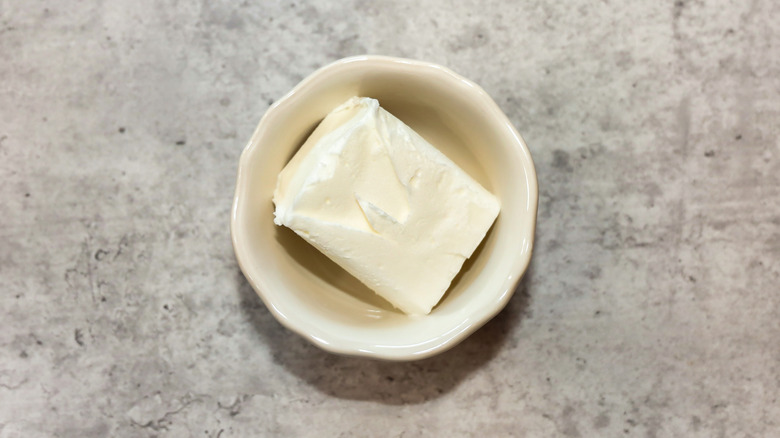
To achieve this, Alton Brown uses softened, room-temperature butter to coat the flour for tenderness and very cold butter to create layers for flakiness, working in installments. Start by mixing softened butter with the flour, pulsing until all visible fat disappears, indicating it has fully coated the flour. Then add half the cold butter, pulsing until the mixture resembles small English peas, and finally the rest of the cold butter, pulsing three or four times, leaving large chunks of butter.
Before rolling, you'll need to add a little bit of water to bring the dough together, but exactly how much you need depends on the weather. To avoid over-wetting the dough, and thereby producing gluten and making the crust more chewy than flaky, use a spray bottle to mist the surface, working it into the dough until you can squeeze it into a firm mass that breaks into pieces instead of crumbling.
9. Stash a sheet pan in the freezer
Doughs like pie crust and puff pastry rely on butter for their characteristic textures. But since butter softens at 65 degrees Fahrenheit, even laying on the counter can cause that essential structure to break down, and things get even dicier when you're working those doughs by hand. Fortunately, Alton Brown has a hack for that, too.
Stick a sheet pan in your freezer when you start mixing your dough or thawing your pastry, and it will be ice-cold by the time you start working with it. Then, when you can feel the dough starting to get soft and gooey, pull the sheet pan out and press it down on the dough to firm the butter back up. And if you're likely to forget this prep step, you can keep a small cookie sheet in the freezer full-time so it's ready when you need it.
10. No rolling pin, no problem
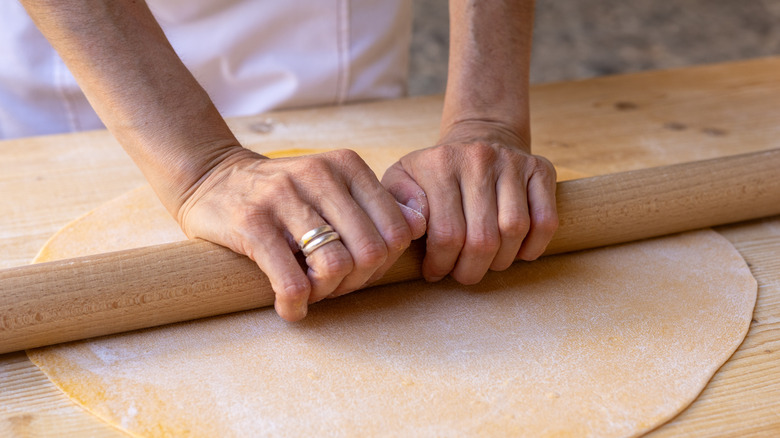
When it's time to roll out your dough, don't panic if you don't have a rolling pin handy. Most American home cooks are probably most familiar with the ultra-heavy, two-handled rolling pins, and if you don't have one on hand, you might feel a little stuck. But that's not the only style of rolling pin out there, or even necessarily the best one for the job. Unlike American rolling pins, French rolling pins are often just a straight or tapered dowel, which offers more precision and control over the pressure used to roll.
So, in a pinch, you can use anything round and sort of heavy, like an empty wine bottle. But when you get the chance, Alton Brown recommends — as he often does — a trip to your hardware store, not your local kitchen supply. There, you can find wooden dowels in whatever size you like, or even a section of PVC pipe, for much less dough than a fancy rolling pin. And while you're there, pick up some wide, flat rubber bands. You can wrap them around the ends of your new rolling device and stack them up to the desired thickness of your dough, so you'll have perfectly even pie crust and pastry in a snap.
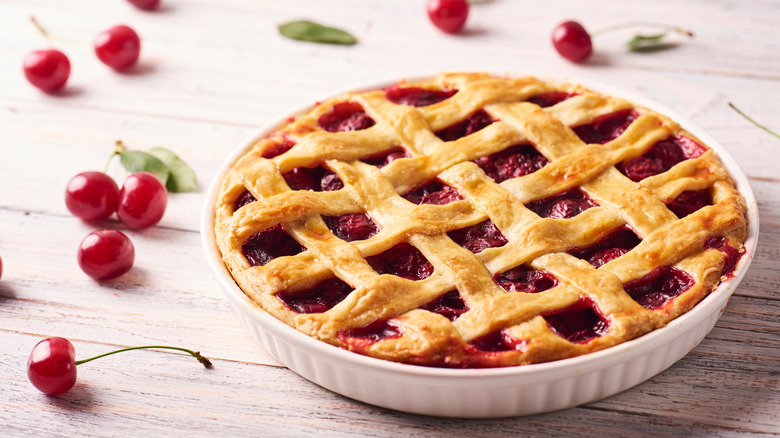
11. Use cake crumbs to prevent soggy bottoms
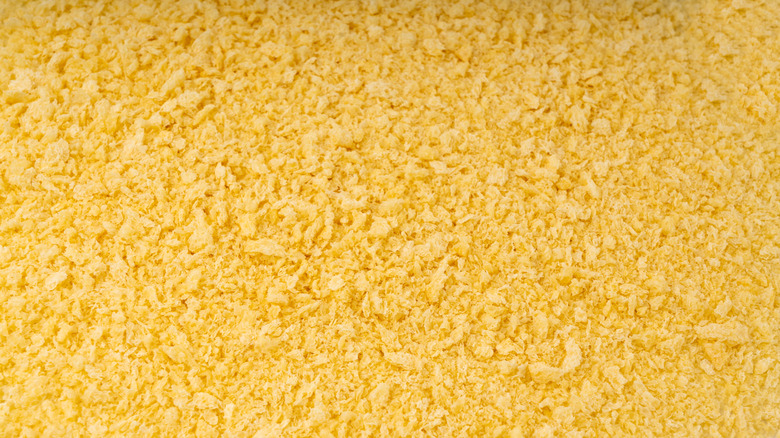
After putting in all that effort to achieve a perfectly tender, flaky pie crust or pastry, the last thing you want is for the fruit filling to turn it into a soggy mess. But when fruit is mixed with sugar, it releases water — that's just science. So, how do you keep your filling from wetting the bed?
Alton Brown recommends adding a base layer of cake crumbs (or breadcrumbs, if you're headed down a savory route) to your pie or puff pastry before adding your fruit filling. That way, they'll soak up all that fruity goodness, keeping it safely inside the pie crust where it belongs. Your crust stays crisp, and the crumbs add a lovely texture to the filling.
12. Customize your cookies
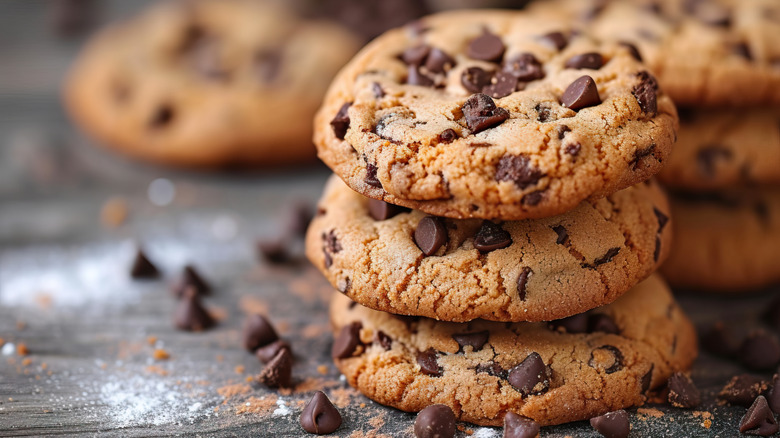
Nestlé Toll House chocolate chip cookies are nearly perfect as far as cookie recipes go — a little crispy, a little chewy, and if you pull them out at the right time, a little gooey. But if you like your cookies a little crispier, chewier, or fluffier, Alton Brown offers the perfect adjustments to get them the way you want them.
For thinner, crispier cookies, take the base recipe and add an extra pinch of baking soda, replace one egg with 2 ounces of milk, and substitute ¼ cup of the brown sugar for white sugar. The higher acidity in the baking soda gives the dough a higher setting temperature, which allows the cookies to spread more before setting, assisted by the pre-melted butter, and eggs puff, so less egg means less puffiness.
If you prefer the puff, then replace the butter with shortening, add ¼ cup of brown sugar, and substitute cake flour for all-purpose and baking powder for the baking soda. Finally, chill the dough before portioning. Shortening has a higher melting point, and chilled fat softens more slowly, so the cookies will spread less before setting. Plus the baking powder sets at a lower temperature than baking soda, leading to lovely dome-shaped cookies.
To get extra chewy cookies, use melted butter and bread flour instead of all-purpose flour. Then replace ¼ cup of the white sugar with brown sugar, which adds tenderness, and substitute one yolk and 1 ounces of milk for one of the eggs. Egg whites dry out, so less egg white means more moisture, which yields a chewier cookie.
13. Replace the butter in yellow cake with butter-flavored shortening
Some cake connoisseurs may find it sacrilegious, but for Alton Brown, the key ingredient in a yellow butter cake isn't butter — it's butter-flavored shortening. It has a higher melting point than butter, so it won't melt during mixing, which is important for a butter cake that gets its lift from the creaming method — mixing sugar with fat at high speeds so the sugar pokes tiny holes in the solid fat — forming the bubbles that later leavening will blow up. Plus, he claims, it tastes more like butter than actual butter.
When swapping butter-flavored shortening for butter, just be sure to account for butter's roughly 20 percent water — which requires a bit of math. Subtract 20 percent from the recipe's butter weight to find the shortening weight, then add the water weight back in as milk to maintain the hydration balance.
14. Keep egg whites safe from yolks and fats
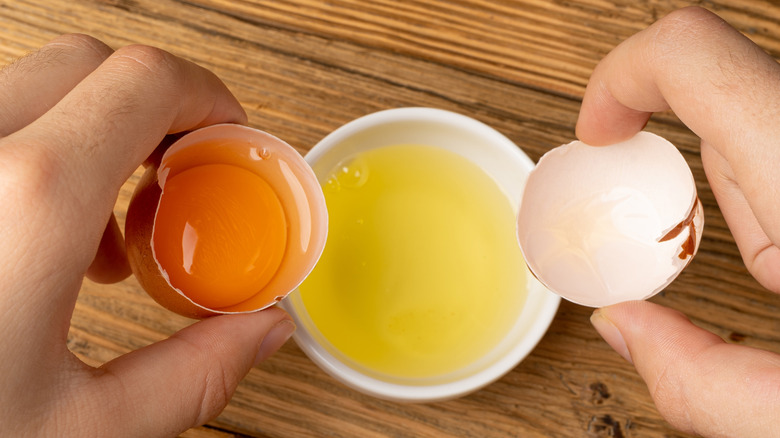
Egg foam dishes like angel food cake get their texture and structure from the proteins in egg whites that trap air bubbles when they cook, but a single speck of fat — like egg yolk — can coat the bonding points of the proteins, breaking the foam. Alton Brown recommends using a quarantine method while separating eggs, using three separate bowls — a yolk bowl, a white bowl, and a quarantine bowl. Crack the egg, pour the yolk into the yolk bowl and the white into the quarantine bowl, then check it for yolk before pouring it into the white bowl. If you do spot a bit of yellow in the quarantine bowl, you can dump it before it can contaminate the rest of your pristine yolks.
But the protection doesn't stop there — what you mix in matters, too. Plastic bowls can bond with fats, which cling to them even after several washes and can break your egg foam. Whip egg whites in a metal bowl — ideally a copper one, like this pure copper mixing bowl — for added insurance against contamination.
15. What you grease with matters
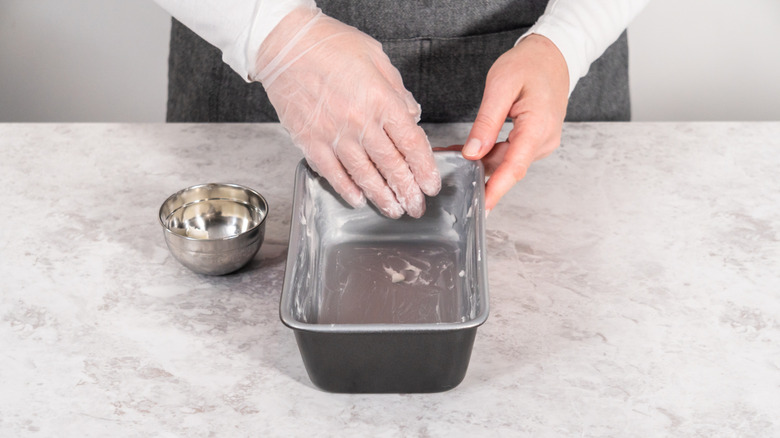
Though sticking is something most of us want to avoid when baking, Alton Brown says it's important to choose the right lubrication for the task. For example, when greasing cake pans, he recommends shortening instead of butter. That's because butter's water volume will pool in the bottom of the pan and create steam with nowhere to go, preventing browning.
On the other hand, for some dishes, sticking isn't just acceptable — it's essential. Egg foam dishes like cupcakes and angel food cake, for example, need something to climb in order to rise — like the side of a muffin tin, or the center post of a professional two-piece tube pan — or else they fall flat, so don't grease those pans at all.
16. Turn cut puff pastry bottom-up before baking

Though infinitely easier than folding and rolling your own laminated dough, store-bought puff pastry still has some quirks to be aware of when working with it. For example, it has to be thawed under a towel to avoid condensation ruining the dough, yet kept ice cold to prevent the butter oozing out before baking. But one surprising pro-tip most home bakers likely wouldn't think of involves the orientation of the pastry when baking.
According to Alton Brown, to get maximum lift out of your puff pastry, you've got to flip it over, bottoms-up, after cutting it. Pinching the seams, folding the dough, and cutting it compresses the upper layers of pastry more than the lower layers, which have many layers above them to distribute the pressure. This compression inhibits lift, so flipping them over allows them to puff sky-high. And if you're using egg wash, make sure to keep it away from the edges. The proteins in the egg act like glue, which will stick the layers together, preventing the edges from lifting.