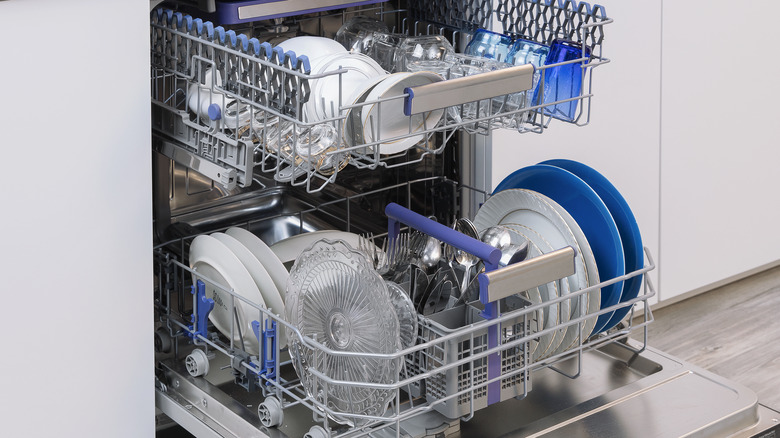
How To Install Your Own Garbage Disposal, Step By Step

We may receive a commission on purchases made from links.
Garbage disposals come with all kinds of devilry: weird smells, stringent rules on what you can put down them, erroneous urban myths like the fact that lemon peels sharpen the blades (they do the opposite, in fact). Then there's the constant terror of someone knocking the button when your hand is down it, although this is an extreme rarity. Much more of a concern? Doing a poor job installing your disposal yourself ... and suffering the consequences.
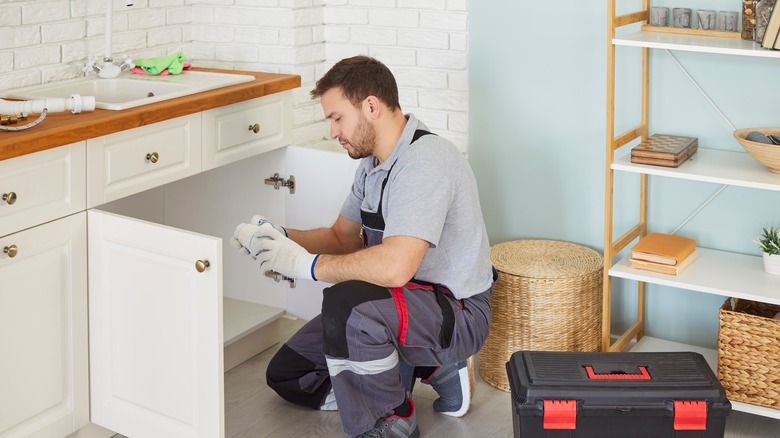
"The most common mistake is skipping the step of carefully reading the manufacturer's installation instructions before starting," says Dino Rachiele, owner of Rachiele Custom Sinks. "Every brand has small variations that can cause leaks or alignment problems if ignored," she added. It's not for the absolute beginner, either. "Installing a disposal is a solid intermediate DIY project involving plumbing, electrical work, and problem-solving skills," says Kevin Vander Hyde, vice president of Vander Hyde Services. "If you've never done electrical work, aren't comfortable in tight spaces under a sink, or encounter unexpected issues like corroded drain lines, don't hesitate to call a plumber."
The good news is, if you know what you're doing, the garbage disposal should last between 10 and 15 years, Vander Hyde says. It pays, then, to make sure you know what you're doing. Here's the step-by-step "how to" for which you've been waiting.
1. Choose the model
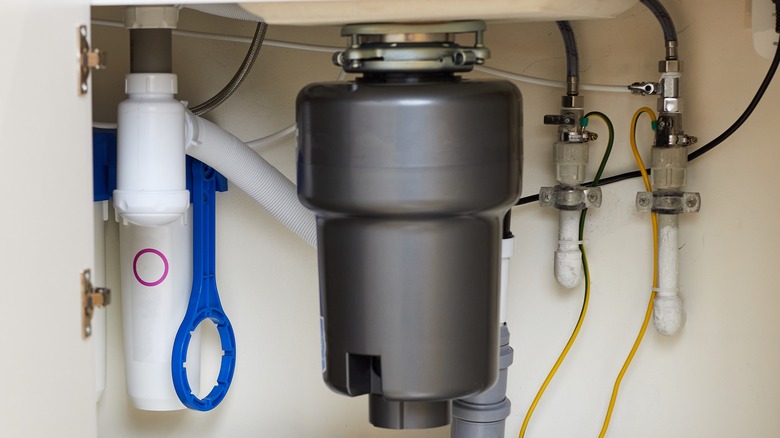
Unfortunately, when learning how to install a garbage disposal, many people forget the most basic step: making sure you've got the right one. "One of the most frequent errors of individuals is selecting a disposal unit without considering whether their sink and under-cabinet area will fit the disposal," says Alexzandra Aguirre, interior designer at Phoenix Interior Design LLC. "Some disposals are heavier or bulkier than others, and improper measurements may result in a poor fit or alignment."
You should take into account the size of the motor, draining wiring, and even acoustical insulation, she says. Megan Doser, owner and CEO of Doctor Fix It Plumbing, Heating, Cooling & Electric, agrees, adding a few other facets of consideration: the mounting system, drain outlet height, and power connection type. "If you already had a disposal installed, you need to buy something that aligns with those specs — or you'll have to redo plumbing and wiring to make it fit the new disposal."
Another common issue: Buying more garbage disposal than you really need. "1/2 hp disposal will work for most all residential applications," says Shaun Barr, owner of Barr Plumbing. "If you need more power than that you need to be using your trash can, not your disposal!"
2. Gather your tools
Next up in the Big Book of How to Garbage Disposal, it's time to gather your tools. "Having everything you need at your disposal prior to starting is the key to a hassle-free installation," says Yan Margulis, home renovation and remodeling expert at Capable Group Inc. Among the most important tools are a Channellock VJ-3 Tongue and Groove Plier Set, SK 6-Piece Slotted Screwdriver Set, and AstroAI Digital Multimeter Tester With DC AC Voltmeter. You should also keep on hand an adjustable wrench, plumber's putty knife, a bucket, and maybe a hacksaw for trimming in the drainpipe, he says.
If the disposal is heavy or unwieldy, you might want to gather up a helper or a jack as well. This helps you keep the unit safe and stable throughout the installation, and saves your shoulders as well.
3. Read the instructions in their entirety

Whether or not you think you know what you're doing, always start by reading the instructions. "This sounds like your mother nagging you, but manufacturer instructions vary more than you'd think," Kevin Vander Hyde says. "Some disposals have specific assembly sequences, torque requirements, or unique electrical connection methods." Believe him when he says that 10 minutes of reading could prevent an hour of rework if you just charge ahead. "Also, the instructions usually tell you the exact electrical requirements—some need 15-amp circuits, others need 20-amp circuits."
Note that the setup of your sink matters as well. If you have a double sink, you have to install the garbage disposal on the correct side. "If the disposal is too low, water and waste won't be able to reach the P-trap and drain properly down the line," Megan Doser explains. This can cause clogs, back-flow, and standing water. To make sure you've got it right, Yan Margulis adds, always dry-fit everything before you clamp or seal it in place.
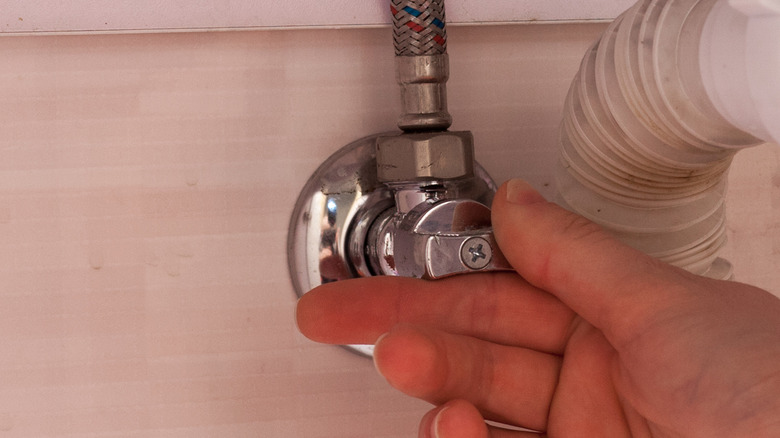
4. Turn off the power and water supplies
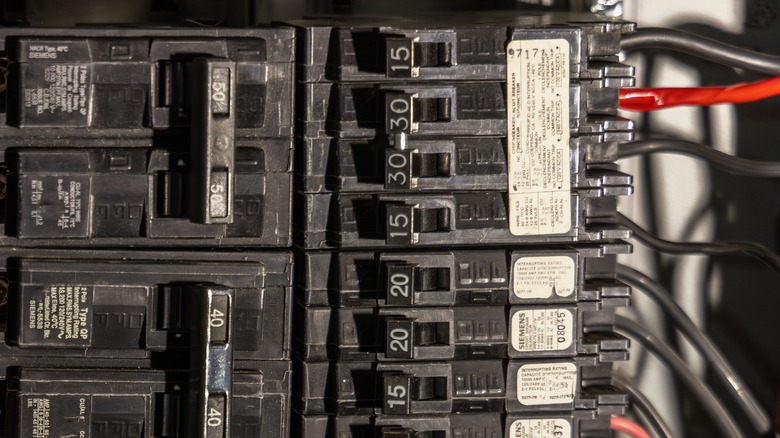
Especially if you're not a professional, it behooves you to turn off both the water and the power. While you might not need to shut off the water, Shaun Barr says, turning off the electricity at the breaker is a good idea. "Just flipping the wall switch isn't enough because the outlet where the sink is located remains energized," agrees Yan Margulis. "That will deliver potentially deadly shocks." It could also short out the unit, which is a bummer even if nobody dies in the process. He recommends you check the outlet with a voltage meter to ensure the area is actually safe to work on.
As for water, professionals don't necessarily need to worry about this, but if you're not a professional, shutting the water off can save you from unfortunate flooding under the sink. It's easy enough, so why not do it?
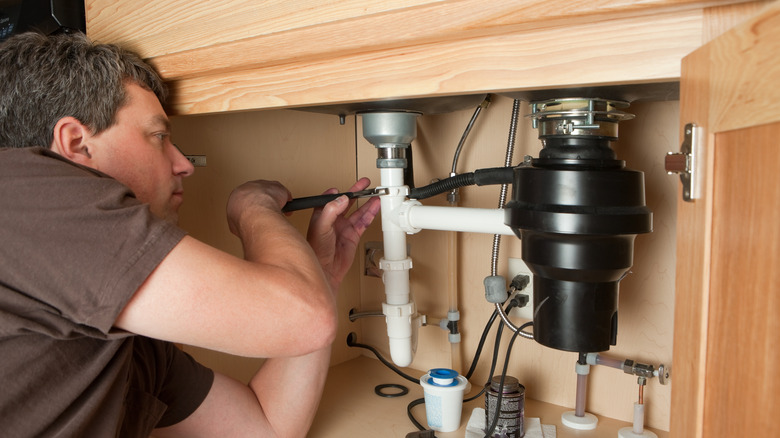
5. Disconnect connections and remove the old disposal

Once everything is shut off, it's time to disconnect the drain trap and dishwasher connection to the current garbage disposal. If you don't know how to do this yet, proceed slowly. You must also detach the electrical connections carefully, then remove the old mounting hardware and flange. "If you're replacing an old disposal, inspect the sink flange and support ring carefully for corrosion," Dino Rachiele instructs. "Even minor wear can lead to leaks after a few weeks."
It's a good idea, during this step, to place a bucket under the trap to contain any water that's lingering in there. "Loosen the connections of the P-trap slowly so as not to cause a mess," Yan Margulis says. "I also make sure to release the dishwasher hose and power cables slowly." In addition, he says, it's a good idea to mark or photograph the wires in case you're not quite sure how to reattach it later.
6. Scrape off old plumber's putty

Before you mount the new garbage disposal, it's important to fully remove all the old plumber's putty. "Old plumber's putty and gasket residue prevents the new flange from sealing tightly, and that leads to slow leaks," Megan Doser says. "If you install a new garbage disposal, you need to use a new sink flange, new gasket, and fresh plumber's putty — even if the old parts look fine." Moreover, she says, the surface must be completely flat and dry before you apply new putty. "Most sealants contain oils or solvents, so if you don't dry the surfaces you're sealing thoroughly, you won't get a 100% bond and the joint will start leaking soon."
If you're not sure how to remove the old putty, watch a video to help. A putty knife is necessary, Yan Margulis says. If you want to flesh out your tools, a 5-Piece Putty Knife Set can't hurt.
7. Apply new plumber's putty to the flange and secure it
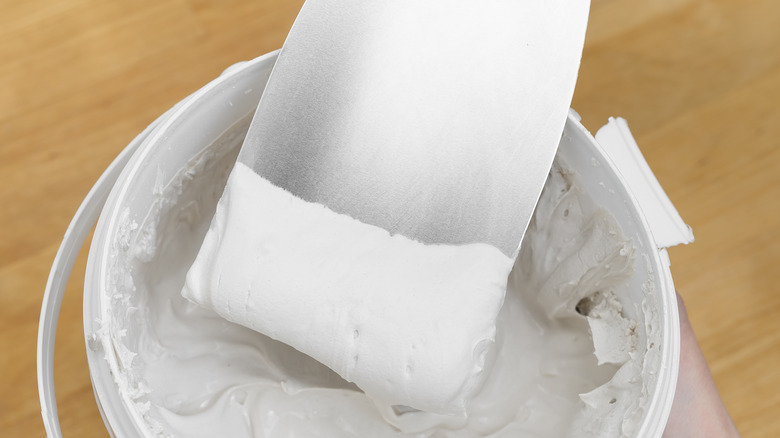
"The lack of proper sealing between the sink flange and disposal is one of the common causes of leakage," Alexzandra Aguirre says. That makes the correct application of putty (such as Harvey's WM Harvey Stainless Plumbers Putty) very important. To do so, Yan Margulis says, roll fresh plumber's putty between your hands until it's roughly the thickness of a pencil, then apply it evenly along the new flange. Clamp it down firmly but slowly.
Make sure to tighten it enough to prevent leaks. "You should see a small amount of putty ooze out from underneath the flange," Margulis says. "That's the sign of a watertight seal." However, you should also beware of overtightening, Dino Rachiele says. That can squeeze out too much putty and create gaps, which can also result in leaks. Once you've applied it, wipe away the extra for a smooth finish.
8. Remove the dishwasher knockout from the new unit
If you're new to installing garbage disposals, this is an easy step to miss, but it's critical. "The dishwasher drain connection has a little plastic piece called a knockout plug inside the inlet that should be removed before connecting the drain hose," Megan Doser says. "If you forget to knock it out, the dishwasher won't be able to drain — you'll understand it when you open the dishwasher after a cycle and find it full of dirty water."
In some cases, the plug may also find its way into the disposal itself. They can get ground up or even lodge in the blades, says Shaun Barr, who has had to remove them from brand-new disposals. If you forget, you will literally have to uninstall the disposal, remove it, and reinstall everything from scratch. Boo to that.
Luckily, removing the knockout plug is actually pretty easy. "Take a screwdriver, a punch, and a hammer and stick it inside the dishwasher inlet on the side of the disposal," Kevin Vander Hyde says. "Give it a few solid whacks to knock out the plastic plug." Once it's out, reach inside the disposal carefully — you can use needle-nose pliers if you want to make sure your fingers don't go near the blades — and remove the plug. Note: If you don't have a dishwasher, you can leave the knockout in place.
9. Connect the electrical components

This is the tricky part of the how-to, the one that requires a bit more technical knowledge. If you bought a plug-in disposal, then your job will be a lot easier. If it requires hardwiring and you're not sure what you're doing, it's best to get an electrician's help rather than winging it. Caveats over, if you're going to do it yourself, make sure you follow the wiring color codes precisely, Dino Rachiele says. "Make sure connections are fully enclosed in the junction box," he adds. "Loose connections can cause intermittent failures or even short circuits."
More specifically, says Kevin Vander Hyde, the process involves removing the electrical cover plate on the disposal, running the Romex cable through the cable connector, and stripping the wires. "Connect black to black, white to white, and ground to the green screw," he instructs. "Secure everything with wire nuts, tuck the wires neatly into the housing, and replace the cover plate." If you're just plugging it in, he adds, you still have to take care that there's a proper outlet under the sink. A "sketchy extension cord situation," as he puts it, is just asking for trouble. "Electricity and water are an unforgiving combination."
Now for some more caveats. You really can't mess around with where you wire the disposal, Megan Doser says. Disposals pull a lot of current. "That means it has to be on a dedicated, properly grounded 15- or 20-amp circuit, she says. If you connect it to a shared circuit, splice into another appliance's line, or skip grounding, you're setting yourself up for constant breaker trips and even fires.
10. Hang the disposal
Now it's time to hang the garbage disposal from the underside of the sink. First and foremost, Dino Rachiele says, it helps to use some leverage while attaching the disposal unit. "A major mistake is failing to properly support the disposal's weight while tightening the mounting ring," he says. "This often leads to misalignment and vibration." That's where the jack or second set of hands comes in. As with the flange, you don't want to overtighten or undertighten the mounting assembly. This can cause cracks, leaks, and vibrations, Kevin Vander Hyde says.
Also important is to account for acoustic comfort. "The tremor caused by disposals may spread to the sink and the cabinetry," Alexzandra Aguirre says. "Putting rubber gaskets or sound-damping pads under the sink would help in reducing this noise." If you run your disposal a lot and are sensitive to noise, then this could be a good move.
Lastly, don't rush through the mounting steps. It's a good way to end up with a misaligned disposal unit. "If the mounting ring isn't locked evenly or the disposal is hanging slightly off-center, you'll get noise, vibration, and even leaks where the drain lines meet," Yan Margulis explains. "Taking an extra minute or two to get perfectly aligned can mean hours of grief later."
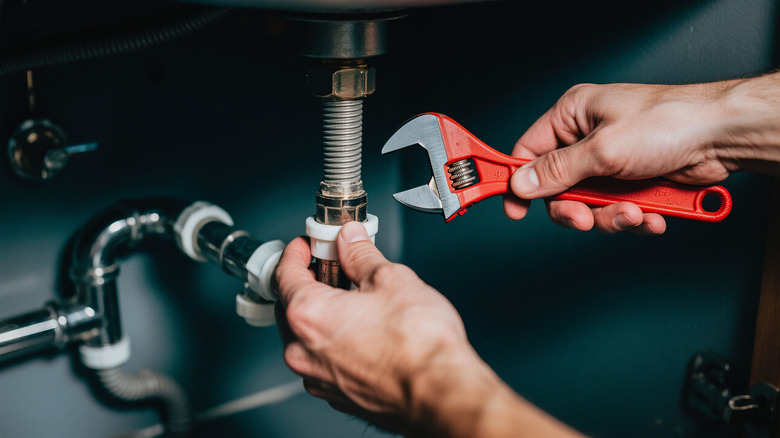
11. Connect the P-trap and seal the connections
Almost done: Now it's time to connect the garbage disposal to all the surrounding components, so that it can drain effectively. "Attach the P-trap and drain lines and make sure that all gaskets and washers are properly seated," Yan Margulis says. "I hand-tighten connections initially and then slightly tighten them again with pliers. High pressure can cause PVC fittings to crack."
Make sure to use new gaskets or compression washers, Dino Rachiele says, not upcycled ones. It's important to avoid cracks, bends, rust, or any other issues that might come from old hardware. (Save that for your craft projects.) It's important, he says, to use stainless steel hose clamps for any flexible drain connections: "They last much longer than the typical zinc clamps included in most kits." Lastly, make sure that the P-trap is aligned well. Misalignment or forcing can cause you to use too many couplings, compromising the drainage or causing leaks.
12. Turn the water back on and check for leaks
That's it ... it's in! Now all you have to do is turn the water back on and check for leaks. Wait on the electrical for now and just run water into the disposal. Use hot water for this process, Shaun Barr says, and look under the sink to make sure nothing is coming through. It's important to check every connection point, Kevin Vander Hyde says: the flange, the discharge elbow, and the P-trap.
After you confirm there aren't any leaks, fill the disposal side of the sink with hot water and then drain it several times in a row. "I like to do this a couple of times," he says. That way, there are no surprises later.
If you see any moisture at all, deal with it immediately. "Moisture on connections should also be dealt with at the earliest stage to prevent the development of chronic plumbing problems," Alexzandra Aguirre says. Flange leaking means you need more putty or to tighten the mounting assembly, Vander Hyde says. If connections are leaking, on the other hand, you need to tighten any loose nuts or reposition your washers.
13. Turn the breaker on and test the disposal
Last but not least, turn the breaker back on and test the garbage disposal. Run cold water while you're testing the disposal, and listen carefully. "If you hear vibration or grinding, it usually means the mounting isn't centered or the impellers are hitting debris left inside," Dino Rachiele says. Begin with soft materials to play it safe. "A steady hum normally indicates that the installation has been successful," Alexzandra Aguirre says.
Going forward, make sure you don't overload the drain. They're not meant for emptying the fridge, says Shaun Barr, who has unstopped countless drains from people overloading their disposals. There are some foods that you shouldn't put down your kitchen sink, even if you have a garbage disposal, such as flour. However, there are other, counterintuitive items that totally play nicely with the garbage disposal — such as ice, which sharpens and cleans the blades.
If you have a septic system, make sure to use your disposal with caution. Other preventive measures include labeling the circuit breaker so you know where to find it, storing the manual somewhere safe, and educating everyone in the home about how exactly to use the unit safely—for the sake of both fingers and the unit itself. Last but not least, Kevin Vander Hyde says, you should keep a dedicated kitchen sink plunger handy, because you just never know.