11 Easiest Vegetables To Grow Inside
We may receive a commission on purchases made from links.
A world of difference separates fresh-from-the-garden, just-picked produce from standard supermarket fruits and veggies. While the latter may be bigger, prettier, and more consistent in shape and size, there's no comparison between the flavor of a fresh-picked tomato or carrot and one that's been bred for durability and likely endured a week or more in transit before reaching your plate.
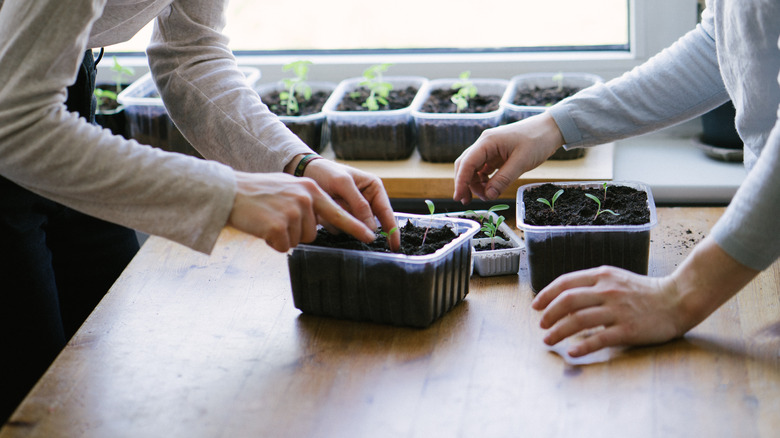
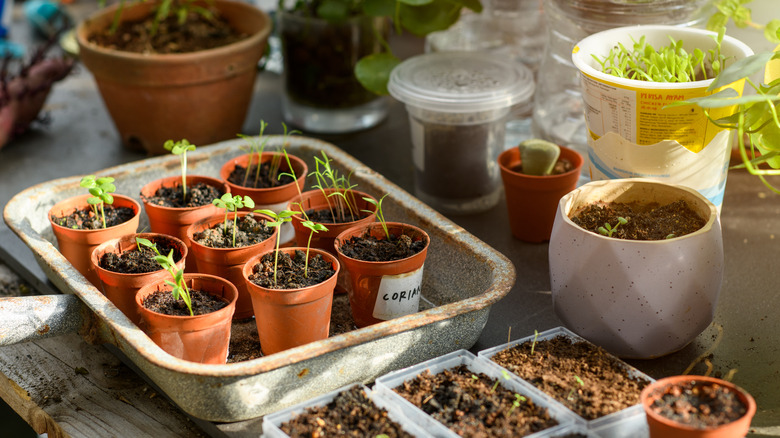
But even more satisfying than a good farmers' market haul is a harvest of veggies you've grown yourself. A feast from a home-grown harvest is not only as fresh as food can get, but it's also something you can serve and share with pride — a flavorful and nourishing reward for all your hard work and patience. And the process of vegetable-growing itself, including planting seeds, nurturing the plants, and coaxing them to maturity, is its own reward. But even if you're an apartment dweller or have limited yard space, you can still enjoy the rewards of homegrown veggies. All you have to do is grow them indoors. To help you choose the best veggies for your indoor harvest, we enlisted the advice of Ward Dilmore, the founder and head landscape designer at Petrus Luxury Estate Landscaping Company, and Joe Durando, an owner of Possum Hollow Farm in north-central Florida.
Tomatoes
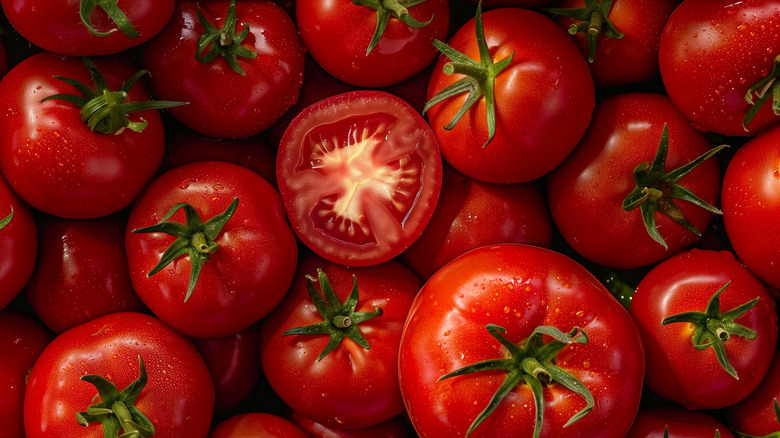
Home-grown tomatoes are a point of pride for many gardeners, and at the height of summer, eager cooks and eaters await gifts of freshly-picked tomatoes from their gardener friends. Once you've tasted one, you'll understand why Southerners eagerly scarf down simple but spectacular tomato sandwiches consisting of nothing more than slices of the fresh veggie, mayo, and white bread. And while gardeners associate tomatoes with warm, sunny days and afternoon showers, ambitious gardeners can also grow them indoors, which is a useful strategy if you want to enjoy the flavor of just-picked tomatoes year-round.
It's worth noting, however, that indoor tomatoes require a bit of planning and commitment. While tomatoes grown outdoors get all the light they need to thrive without your help and enjoy the pollination services of your local insects, indoor tomatoes require you to provide these essentials. This means you need to have a sunny, warm spot in which to grow your tomatoes; they need at least 8 hours of sunlight a day. And you won't get any tomatoes from your indoor plants unless you hand-pollinate them: Use a cotton swab to spread pollen between the flowers to promote fruit development.
Lettuce
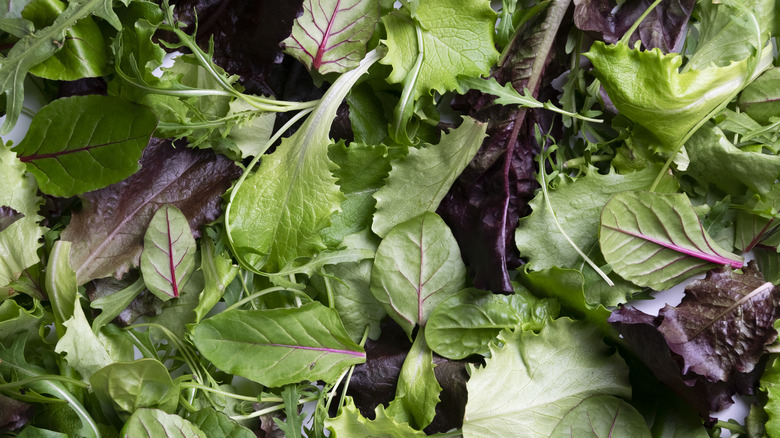
If you're looking for an easy vegetable to grow indoors that also looks pretty next to your other houseplants, look no further than the humble head of lettuce. Indeed, lettuce takes so well to indoor growing conditions that most commercial lettuce is now grown indoors. "Leafy greens are a very good beginner's choice," Ward Dilmore said, adding that lettuce and similar greens are "relatively low maintenance beyond light and water." Even better, unlike lettuce grown outdoors, you won't have to worry about caterpillars or other critters gobbling up your harvest before you do.
To grow lettuce indoors, you'll need a planter and amply fertilized, moist soil. A convenient option for growing lettuce is a self-watering planter: Just fill the planter's reservoir with water once a week, and the planter releases the water into the soil as needed. If you want to grow a lot of lettuce in a hurry, you might want to consider a hydroponic system, which allows you to grow lettuce with just water and nutrients. It's pricier than a planter filled with soil, but it allows lettuce to grow twice as fast. For this reason and others, many gardeners feel hydroponic systems are well worth the investment.
Microgreens
Microgreens are a great option if you're a nervous novice gardener or indoor space is at a premium in your home. As their name implies, they don't need very much room and, like their bigger relatives, can thrive even in shallow containers. "Leafy greens do not need much root area to grow," Ward Dilmore said. "Using mudflats is usually fine for leafy greens. One could also grow the leafy greens as microgreens using this same method." Joe Durando agrees, saying microgreens are "easy with a quick turnaround and don't take too much space."
This is a big reason to start your indoor gardening journey with microgreens: They grow quickly, so you'll reap the rewards of your efforts in just a few days. Some greens, such as arugula, take longer to germinate and sprout. But you'll see sprouts from radish and broccoli seeds in just a day or two, and you'll know the resulting crunchy, spicy microgreens will soon be ready to harvest. After only 3 or 4 days, broccoli and radish greens will have grown to between 2 and 4 inches, which means it's time to enjoy them. Snip them at the base with scissors, rinse, and eat. (The sky's the limit, but if you need inspiration, a handful of arugula is one of many great toppings that belong on your chicken sandwich or in a grilled Italian picnic sandwich.) The bases of the greens won't regrow, so if you want more, you'll have to start with a fresh batch of seeds.
Chives
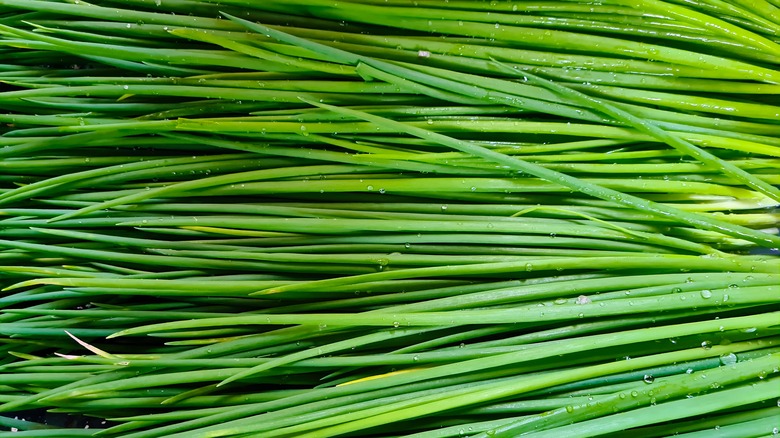
Fresh chives are a joy to have on hand. They not only add a pretty splash of color to everything from basic but beloved baked potatoes to salads and dips, but their delicate, savory flavor enlivens dishes without overpowering them the way raw scallions and onions can. The challenge is they're tough to keep around; if you buy one of those little plastic containers of chives, you'd better use them up in less than a week and a half to two weeks, or it will devolve into a slimy mess. It's no wonder few of us regularly keep chives in our kitchens.
If you love chives but don't want to feel obliged to binge on them every time you buy them, you have an easy alternative: Grow them yourself. And the good news is they're among the easiest herbs to grow. Plant the seeds ¼ inch deep and keep the soil moist, as chives like lots of water. Keep the planter in a dark area until the seed sprouts, then move it to a sunny spot by a window. Thin the seedlings to allow 4 inches between the plants. And to encourage your plants to keep growing, pinch off any flowers that start to form. But don't throw your thinned greens or flowers out — all parts of the plant are edible, so use these as pretty additions in something like a BLT pasta salad recipe.
Spinach
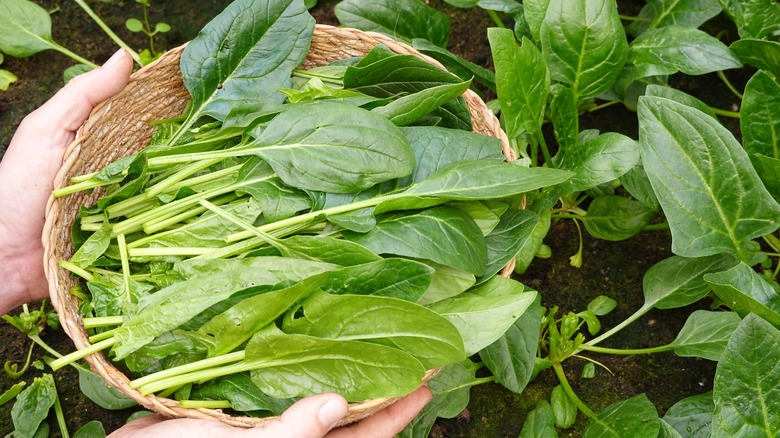
Spinach is a kitchen staple for many cooks because of its vibrant color and versatility. Cooked, it's smooth and silky and shows its best self in everything from classic creamed spinach to spicy curries and casseroles. Raw, it's a hearty, flavorful alternative to lettuce in salads and wraps. And while frozen and store-bought spinach are great to have around, just-picked spinach is even better. And with a bit of patience, you can grow it yourself indoors.
Like other greens, spinach doesn't require much in the way of special equipment for indoor growth — just a container and potting soil or a hydroponic system. It needs more light to thrive than lettuce, so be sure to position your growing system near a sunny window. And be aware that while the temperature of your indoor space may stay consistent year-round, your natural light coverage won't. "In the winter, your large, bright windows may not get as much sunlight as in summer, and that should be taken into consideration," Ward Dilmore said. "You may need to compensate with extra grow lamps."
Kale
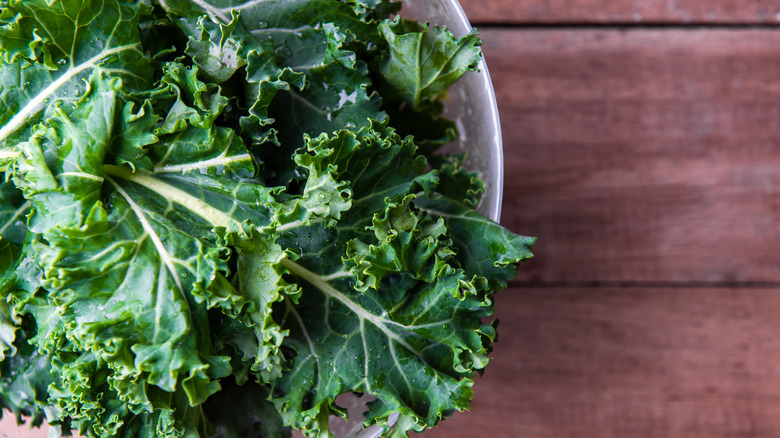
Kale may not be as wildly trendy as it was a few years back, but we still love a well-made kale salad, and hearty braised kale will continue to be part of our regular menu rotation. Forget that it's a nutritional powerhouse — its distinctive, earthy flavor and toothsome texture will always keep us coming back for more. Even kale stems can be transformed into punchy snacks if you pickle them. And like other leafy greens, it takes well to being grown indoors. As an added bonus, its deep green, curly leaves also make it a pretty addition to your indoor décor.
To grow kale from seeds, plant the seeds in potting mix (be sure your planter has a drainage hole) and keep the soil moist while waiting for seeds to germinate. When the plants have grown to about 8 inches, they're ready to be moved to bigger pots of their own. Fertilize the plants once a month with a nitrogen-rich fertilizer, and water regularly. You can harvest the leaves (use scissors) whenever you think they're ready, but to keep your plants growing, harvest the outer leaves first since new growth starts from the middle of the plant.
Carrots
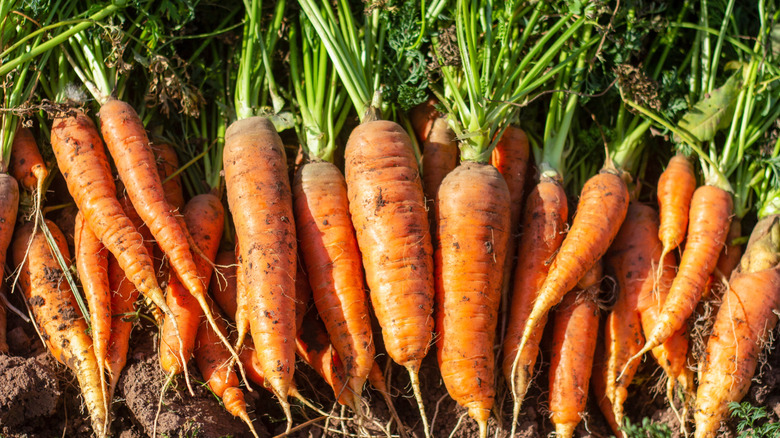
Yes, you can grow root vegetables such as carrots indoors, and no, this won't require you to dig trenches in your living room floor. And if you prefer the sweeter flavor and more delicate crunch of smaller carrots, growing them indoors can be a fun project. It requires some work and attention, but the main thing you'll need is patience since carrots grow slowly outdoors and even more slowly indoors. For example, if a carrot variety normally matures in two months, expect your indoor carrots to mature in three months.
To start your carrot crop, plant your seeds (they'll be tiny and hard to see) under a thin layer of moist potting soil, and keep the soil moist with a plant mister. They'll start to sprout in about three weeks. Move the pot to a sunny window or under a grow lamp. Thin the sprouts to give the carrots room to grow, allowing about 2 inches around each remaining sprout. You can eat the carrots and their tops whenever you want, but the longer you wait, the bigger the carrots you'll harvest. But be aware that carrots grown in pots will be smaller than their supermarket counterparts. "I would not encourage folks to grow full-sized vegetables unless they are really serious, willing to do some research, and willing to spend money on a sophisticated setup," Joe Durando said. "Frankly, the best source of info and supplies are companies that cater to indoor reefer cultivation."
Fresh herbs
While we appreciate the convenience and flavor of our trusty bottles of dried herbs, something about their fresh counterparts — everything from rosemary and basil to oregano and mint — transform everyday dishes from solid to spectacular. And for some recipes, fresh herbs aren't just nice to have, but essential: You can't make an authentic batch of pesto without several handfuls of fresh basil. So if you love to cook with fresh herbs, the easiest way to ensure a steady supply is to grow them yourself.
And even if you have a brown thumb or little interest in or time for gardening, herbs are delightfully low maintenance and require no horticulture experience or guesswork. They require little more than good-quality soil, water, and light, and they won't take up much tabletop or counter space. On top of that, the compact, little plants are pretty as well as fragrant, all of which make herbs an ideal project if your only available space is your kitchen windowsill. To ensure success, use a planter with a drainage hole and soil that offers both nutrients and good drainage — Ward Dilmore recommends organic potting mix. And if you're growing multiple plants in the same container, space them apart so they all have room to grow.
Radishes
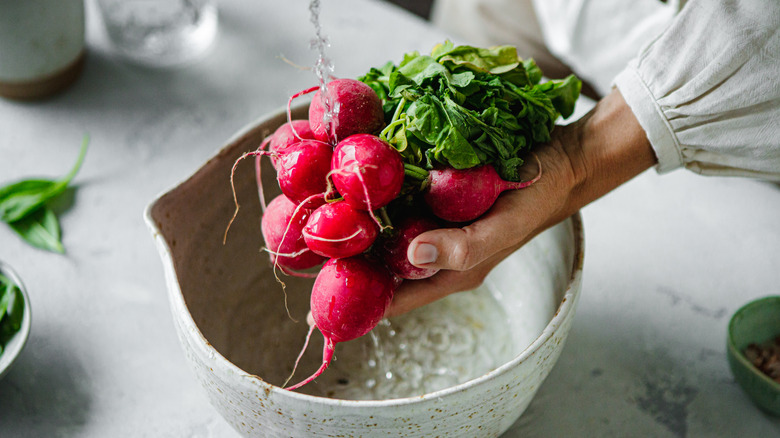
Radishes don't get nearly the love they deserve from U.S. cooks and eaters. The pretty little red-and-white orbs make regular appearances on vegetable trays and occasionally as garnishes at fancy buffets, but that's about it. And that's too bad because colorful, peppery radishes add crunch and a touch of heat to salads, as well as to Mexican dishes like tacos and stews. If you dislike them raw, you can also try cooking radishes. These roasted or glazed veggies make a flavorful and refreshingly different side dish to hearty meat dishes.
So if you've been curious to try indoor vegetable gardening, radishes are a great choice. To make it easy for yourself, grow them from seed in a self-watering planter in an area that gets at least six hours of sunlight a day. Radish plants like cool weather (70 degrees Fahrenheit or below), so they would do well in a covered patio or carport during the winter months. Keep an eye on them to make sure the soil stays moist, but not saturated with water, as too much water can cause the radishes to rot. They mature within a month or two, but keep in mind that older radishes are hotter, so use your personal taste as a guide when harvesting.
Chiles
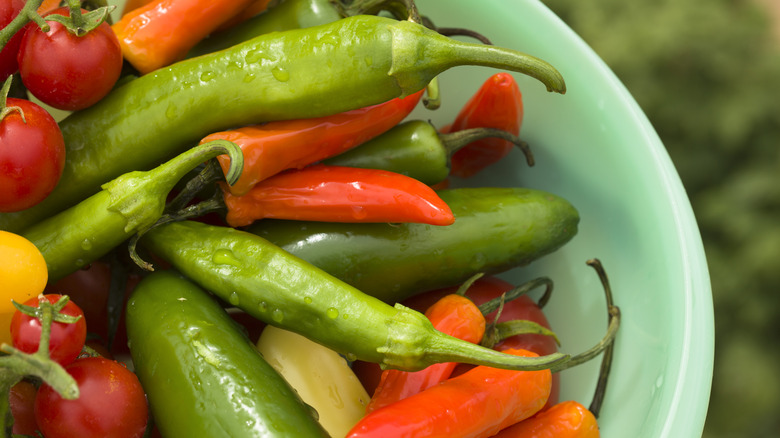
If hot sauce is the first condiment you reach for when dining out and you have a warm, sunny spot in your home, you might want to try your hand at growing your own chiles indoors. Like many other vegetables, they won't grow as big as they would outdoors, but you can still cultivate healthy plants and get plenty of chiles — just expect them to be on the small side.
And not all types of chiles do well indoors. Your best bets are smaller, hotter ones such as Thai chiles, habaneros, and chiltepins, all of which have long growing seasons. Because chiles are native to hot, sunny areas, you'll have to find a spot for them that gets at least six hours of direct sunlight a day (or invest in a grow light). They also like warm weather — outdoors, they grow best in daytime temperatures above 80 degrees Fahrenheit — so position your planter in a toasty part of your home or use a heating device, such as the Vivohome Seedling Heat Mat or a fluorescent bulb positioned a few inches above the plants, to keep them warm.
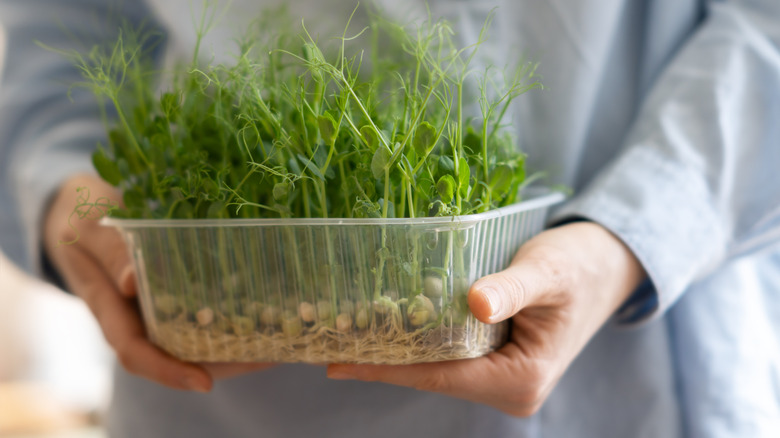
Pea shoots
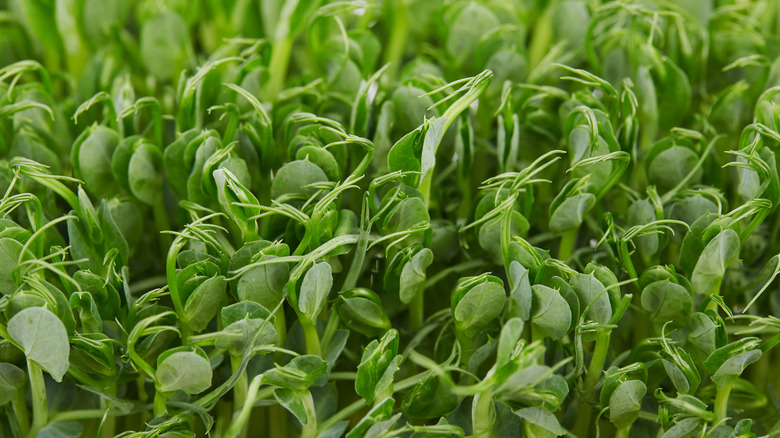
One of the pleasures of growing your own veggies is being able to enjoy them at your own preferred degree of ripeness or maturity. Because home gardeners don't have to wait for produce to reach marketable size, they can treat themselves to tiny baby carrots and tender little greens whenever the opportunity presents itself.
If you love delicate little greens and would like to try your hand at growing them indoors, pea shoots are a great choice. They're exactly what they sound like: the immature shoots of regular pea plants. And they're delicious; go to a Chinese restaurant with a Chinese customer base, and you'll likely find pea shoots on the menu (in season) as a simple stir-fry. They're easy and fast to grow, too. Just press a layer of dried peas into moist, drained potting soil, and place the planter in a warm, sunny spot, such as a windowsill. Keep the soil moist as the shoots grow. After about two weeks, you should have a mini-forest of 4-inch sprouts, ready to snip off and enjoy raw or quickly sautéed. To harvest, cut the shoots with scissors about an inch from the soil. The sprouts will regrow, allowing two harvests (or, if you're lucky, three) from a single planting.