10 Pastry Chef-Approved Tips For Making Classic Peanut Brittle
We may receive a commission on purchases made from links.
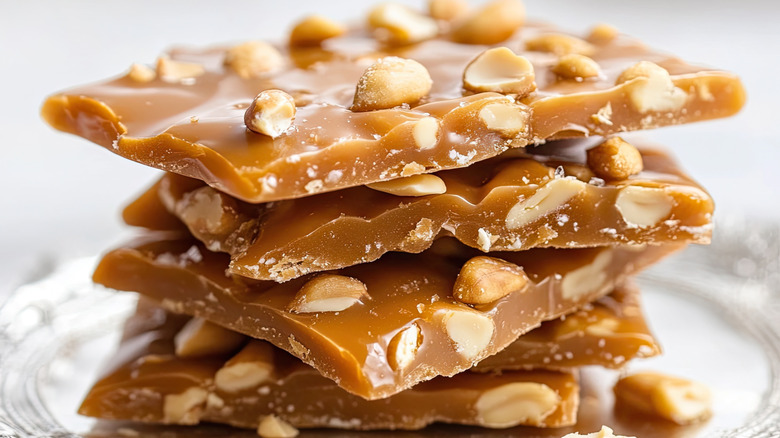
Candymaking may seem like a task better left to the professionals. However, if you're a novice candymaker looking to get some experience with sugar work under your belt, there are some sweets that are relatively easy to make on your own — chief among them is peanut brittle. This confection has a relatively short ingredient list — sugar, corn syrup, butter, water, peanuts, baking soda, and flavoring — which has been cooked on a stove before being transferred to a sheet pan and allowed to cool. The result is a buttery, snappy, and toffee-like candy with the perfect contrast of sweet and savory. It's an old-school candy for sure, but that doesn't make it any less delicious.
Just because peanut brittle seems simple, both in terms of its ingredient list and methodology, there are numerous mistakes that novice candy-makers can make with it that can ruin its texture, consistency, and flavor. In order to sidestep these pitfalls and ensure delicious, sweet, and flaw-free peanut brittle, we got some insights from an expert: pastry chef and "Chopped Sweets" winner Katherine Sprung. Her tips will get you on the path to peanut brittle perfection in no time at all.
1. Get a candy thermometer
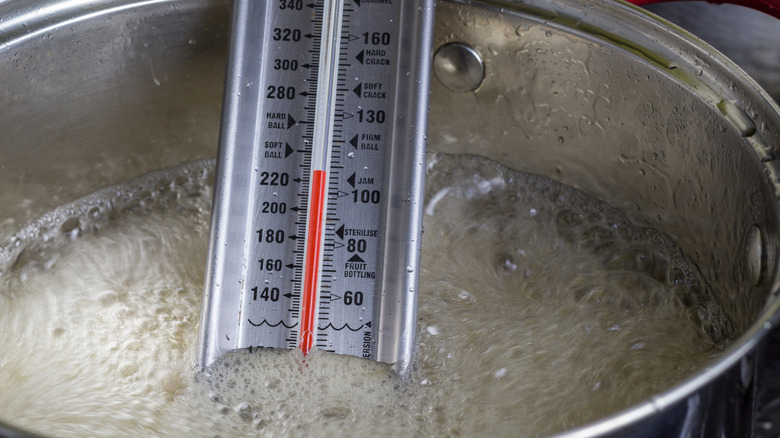
The first step to making any recipe successfully is to stock up on the right tools. One of the most important for making peanut brittle, per pastry chef Katherine Sprung, is a candy thermometer.
Like all types of candy, peanut brittle has to be heated to a specific temperature in order for it to harden and crack once it's finished setting. If you don't cook the caramel enough, you could be left with brittle that's bendy or that doesn't quite set right. On the other hand, if you overcook your sugar, you could be left with a burnt-tasting substance that doesn't remotely resemble the golden-colored, sweet toffee associated with peanut brittle. "Once sugar is overcooked, it can't be reversed," Sprung says. "This is another reason I recommend using a clip-on candy thermometer, even for the most skilled cook. It just helps keep you on track, and acts as insurance!"
Katherine Sprung recommends heating your sugar until it reaches the hard-crack stage, which is around 300 F. She explains that some thermometers will have a mark for this temperature, which makes it easy to tell when your brittle is done cooking. Candy thermometers are relatively inexpensive, too; this Taylor 12-inch stainless steel one is priced at just under $12 and will easily sit in your pot.
2. Invest in the right pot
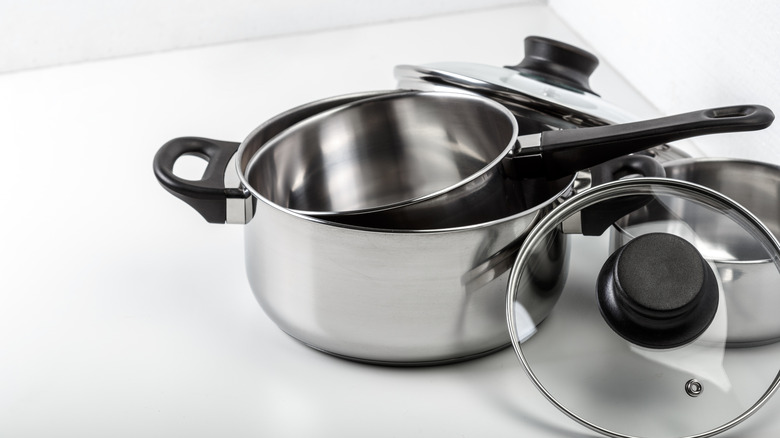
A candy thermometer is not the only important tool you should invest in when making homemade peanut brittle. You'll also want to cook it in a sturdy pot. "I always use stainless steel for making candy and boiling sugar," says Katherine Sprung. "You get good and even heat distribution, and you can see the color changes whether you're working with sugar or browning butter." She cautions against using a dark-colored pot, which can make it more difficult to see the color of whatever's cooking.
Flimsy and cheap pans are a definite no-no for cooking brittle, as they may have hot spots and cause parts of the brittle to burn. If you don't have a heavy-bottom stainless steel pot, you could also try cooking your brittle in a Dutch oven. Alternatively, some folks have tried cooking peanut brittle in a microwave, but since the appliance heats up so fast (and usually not evenly), you'll want to keep a careful eye on the sugar mixture to ensure it doesn't burn.
3. Look for visual indicators that your brittle is done cooking
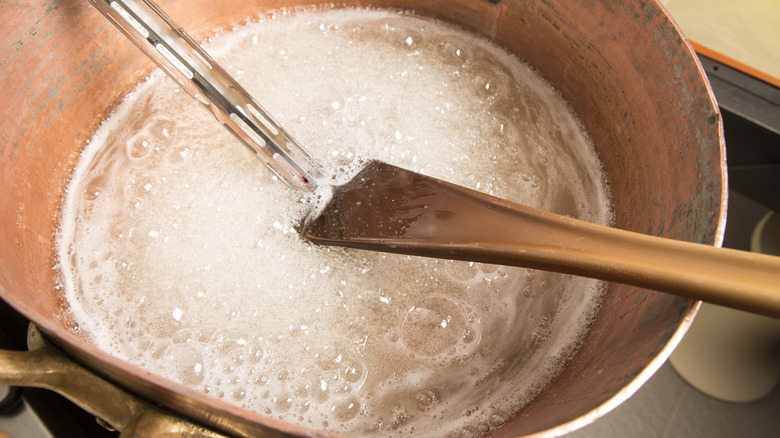
A big part of making peanut brittle is, of course, monitoring the temperature to ensure the sugar reaches the hard crack stage. But this is not a mixture that you can walk away from as its cooking as you need to pay attention to visual indicators, as well as temperature, to ensure that it cooks correctly. Color and bubble size are two of the signs that Katherine Sprung recommends watching out for. She explains that a correctly cooked peanut brittle should be dark amber in color, meaning it's not pale or burned (hence where the light-colored pot comes in handy). She also says that when the sugar is cooked too much, you'll start to notice a burning smell coming from the pot. Since you can't reverse a brittle that has been overcooked, it's best to keep an eye on the mixture to prevent it from getting to that point in the first place.
Bubble size can also tell you a lot about the brittle. "You'll notice when you're in the earlier stages, the bubbles will be bigger and almost foamy looking, but as the temperature rises, they'll become tighter and more rapid," Sprung says.
4. Don't forget the baking soda
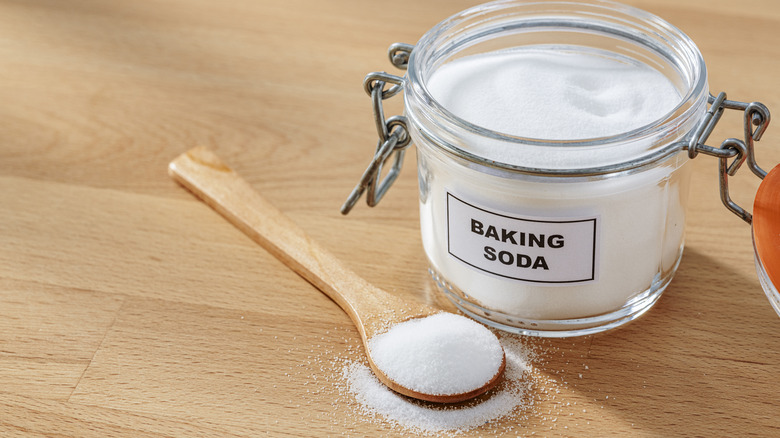
One of the pivotal ingredients in peanut brittle is baking soda. Without it, you won't have the right consistency. "Adding baking soda [creates] a chemical reaction, leading to tiny air bubbles which give the brittle its snap. If you've ever made or seen honeycomb [toffee] being made, it's the same process," Katherine Sprung says. The science behind it is simple. As the sugar cooks, it accumulates trace amounts of acid, which interact with the alkaline baking soda and release carbon dioxide bubbles. These bubbles are what make the peanut brittle fragile and able to be broken. The alkaline addition also increases the pH of the brittle, which contributes to the brittle's flavor, courtesy of the Maillard reaction.
"You want to add it at the end, once your sugar has reached its goal temperature, and you work quickly to incorporate it before pouring it out from the pot," says Sprung. If you add your baking soda in too early, there won't be enough acid to interact with the baking soda and cause a reaction.
5. Check the weather before making peanut brittle
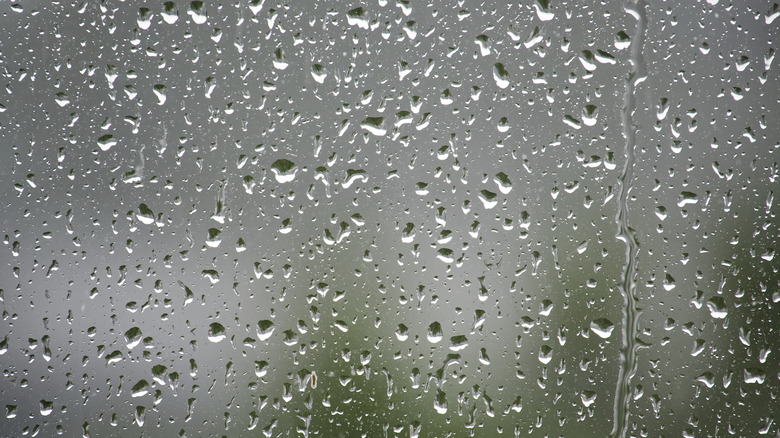
Making a sweet pick-me-up seems like the ideal activity for a gross, rainy day. However, if you want to make a successful and tasty batch of brittle, you might want to check the weather forecast before you haul out that heavy-bottom pot and candy thermometer.
"Humidity is one of the biggest enemies against sugar creations," Katherine Sprung says. "It might not always be possible, but try to make any of these types of items on a less or non-humid day (definitely don't keep your windows open)." Increased moisture in the atmosphere causes the rate of evaporation to slow, which can cause the cooking brittle to stay stickier and not dry out as quickly. If the relative humidity is below 35%, you should be good to go, but if it goes above 50%, you may want to give this recipe a raincheck. "The humidity can turn your crisp and snap-like brittle into soft and chewy," says Sprung.
Of course, you can't control the weather, but there are some things you can try if you're finding that your peanut brittle is a little too wet for comfort. "If you can't escape the humidity, make sure to at least put your brittle in an air-tight container as soon as it's cooled and ready, and if you have access to food-safe silica packets, that can help too," Sprung says. Alternatively, you can also run a dehumidifier in your kitchen, or cook your candy a couple of degrees higher to compensate.
6. Line your tray with the right materials
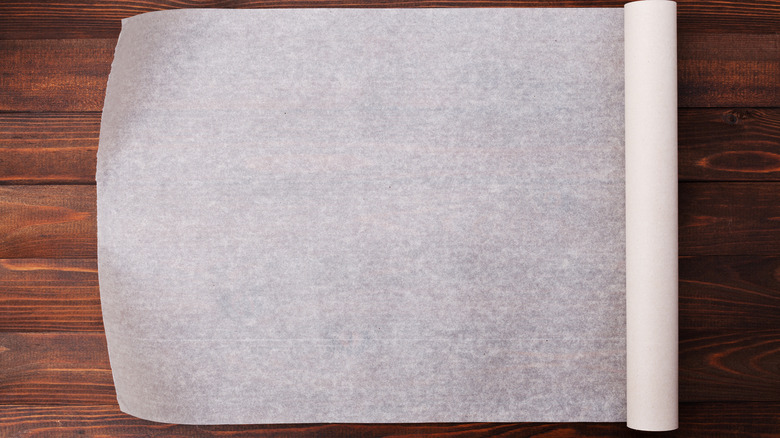
Peanut brittle can result in a sticky situation. To minimize the amount of cleanup that you have, you'll want to lay down a protective layer on your sheet pan before pouring on your brittle. Katherine Sprung recommends opting for a silicone liner, which is both heat-resistant and reusable. They make these liners in multiple sizes, so you can find the perfect one for your needs. If you don't want to invest in a silicone liner, you can also go for parchment, which can be thrown in the trash after you're done using it. The one type of liner you can't use? Wax paper. As Sprung explains, the wax layer will melt, resulting in candy that you can't eat.
One of the handiest hacks? If you're using parchment paper, grab some binder clips. They're the secret to accident-free bakes (and candymaking); secure the paper on the sheet with the clips, that way, when you pour the candy, you won't have to worry about it falling down the edges. For added protection, you should also cover your arms to prevent getting any splatter on your skin.
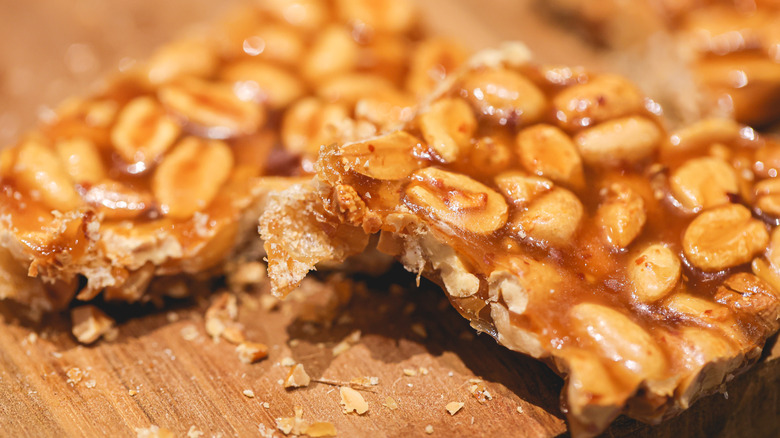
7. Use roasted peanuts
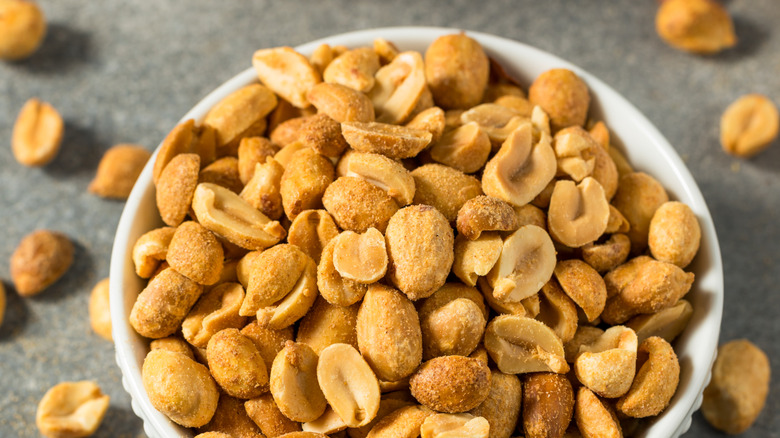
One of the most important parts of peanut brittle, aside from the toffee-like flavor, is the whole pieces of peanuts inside of it. Katherine Sprung recommends adding roasted, unsalted peanuts to your brittle. "The roasted will give you a better depth of flavor, and keeping them unsalted allows you to take control of the flavor and seasoning," she says. She recommends adding a sprinkle of flaky sea salt after pouring the brittle into the tray.
You'll want to avoid using raw peanuts for peanut brittle. Raw peanuts don't have the same crunch as roasted ones, meaning that you could end up with squeaky or soft peanut pieces inside of your brittle. However, you can switch up your recipe by using different types of peanuts. Spanish peanuts are a favorite; these little red peanuts, which are often used as a topping on Tin Roof sundaes, have a very strong flavor compared to running peanuts, one of the most common varieties.
8. Store your leftovers correctly
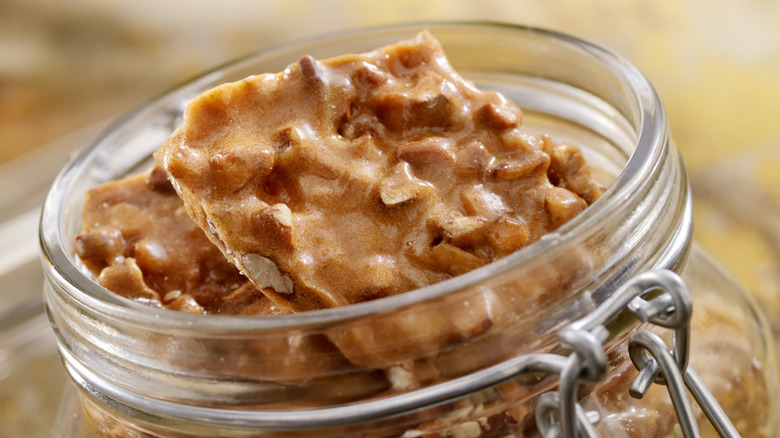
Peanut brittle is not something that you make in small batches. As such, you'll want to store it correctly so that you can enjoy the leftovers for a long time. Katherine Sprung shares that the best method for storing peanut brittle is to make sure it's entirely cooled, then transfer it to an air-tight container. Layering them in a single sheet is ideal, but as she explains, you can also use parchment or wax paper to separate layers of peanut brittle and prevent them from sticking together.
One of the secrets to storing peanut brittle is to keep it from getting moist. Sprung suggests adding food-safe silica packs to the storage vessel. "Just keeping it at room temperature, [away] from direct sunlight is going to be the best," she says, noting that you should avoid storing the brittle in the fridge to stave off condensation.
9. Don't dillydally
Time is of the essence when making any recipe, though it's especially relevant when making candy. Once the brittle has reached the right temperature, it's time to transfer it to your lined tray so that it can cool. Otherwise, you may risk overcooking. "Keeping it any longer in a hot pot can continue to cook and heat the sugar, which you don't want, once it's already at [its] final temperature," Katherine Sprung says. Once the hot brittle leaves the tray, it will start to set, which is why it's critical to spread it on your pan as soon as possible. "Spreading it out quickly also allows even distribution of the baking soda, creating the [aeration and brittle] effect you're looking for," she says.
You'll want to use a wooden spoon, silicone spatula, or pan scraper to remove the remainder of the hot, sticky syrup from the cooking vessel. Time is of the essence here, too, as you want to reduce the amount of sticky cleanup you need to worry about later. If you don't get to cleaning the pot fast enough, try boiling water in it to release the syrup from the walls.
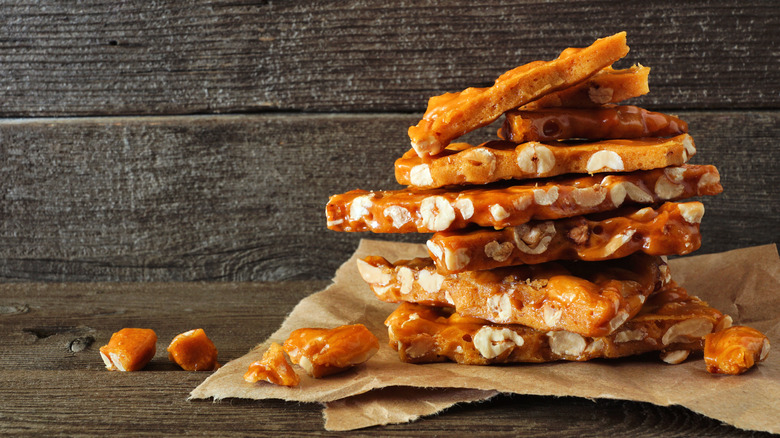
10. Don't spread it too thick or too thin
One of the best things about peanut brittle is that it's thin and snappy, which is why getting the right thickness is so important. Peanut brittle sets very fast, so ensuring that it reaches the right thickness is key. Katherine Sprung recommends shooting for around ⅛-inch thick; it'll result in a brittle that's easy to bite into and is snappy, rather than one that you really have to work your molars on to bite into pieces.
Once your brittle is spread on the pan, you should let it sit for a while until it's fully cooled; Sprung says it'll take about 15 minutes. If you break it prematurely, it may not snap, and potentially leave unsightly fingerprints in your brittle. "Just give it a feel with the back of your hand around the [15-minute] mark, to make sure [its] cooled completely, and once it is you can start to break it up into pieces," she says.