10 Expert Tips Every Baker Needs For Perfect Pie Dough
Few foods can sense fear. Macarons are one of them — if the weather is sticky, say sayonara to your French patisserie dreams. Pie crust, believe it or not, is another. If you find a recipe for a quality apple pie or strawberry rhubarb pie in a cookbook, you might think it's relatively easy to whip up a homemade pie crust rather than buy one from a grocery store. However, if you are at all nervous about it, or second-guess your ratios of fat to flour, you could be left with a rubbery, sad mess that will send you looking for a pre-made crust at the store like a dog with its tail between its legs.
Pie crust is a recipe that's difficult to do well, especially if you aren't familiar with all of its peculiarities and potential tricky bends. I've had to learn these the hard way, both as a home baker and a cooking class instructor. But with a little guidance and a whole lot of confidence, you can churn out flavorful and elaborate crusts that look like they just walked out of "The Great British Baking Show" tent. And the best part is that once you master a basic crust, you can experiment and put your own creative spin on it. Here are some of my top tips for making great pie crusts and mastering this tricky yet fundamental baking staple.
1. Avoid using your hands
Take it from me: Pie crust is one of the most finicky foods you can make. If the temperature is too warm, the butter melts. If you don't use enough water, it crumbles. And if you handle it too much, well, then it gets really, really offended.
One of the highest-level tips that I can give for working with pie crust is to always try to handle it as little as possible. There are several reasons why this is the case. The first is that the heat from your hands can cause the butter to warm, which causes the moisture in it to leak into the flour. Not only will this result in a pie crust that doesn't have defined layers or a good puff, but the release of water can kick off the development of gluten in the flour, which will cause the crust to come out more like a rubber tire than a proper pie dough. If you think you're touching or handling it too much, then you probably are.
Luckily, there are many ways that you can avoid over-handling your crust. If you find that it's starting to fight back when you roll it out, try resting it in the fridge for a little bit to allow the gluten to slack before working with it again. You should also roll it gently, and avoid poking and prodding it. TLDR: Less is more.
2. Experiment with different fats
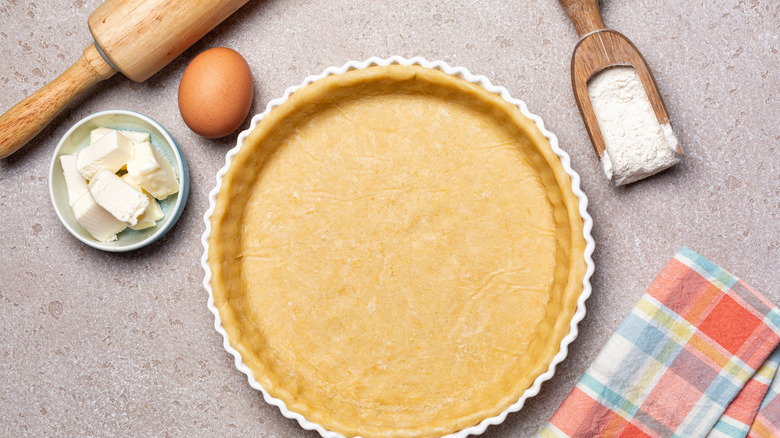
Your pie crust recipe may call for any number of fats. The most common one is butter, and I find it to be especially common when it comes to baking an apple pie. Don't get me wrong, it is a great addition to a pie crust and has an excellent flavor that can't be replicated by a butter-flavored margarine or plant-based butter. However, the drawback with butter is that it melts more easily than other fats. On the other hand, if you're after structure in your pie crust (or are looking for a fat that's a little more forgiving), you may want to try vegetable shortening (like Crisco). It doesn't melt nearly as easily as butter, though some think that it imparts a greasy mouthfeel on the pie if used in excess. If you don't mind a porky pie, you can also try lard — though it's harder to find than butter or shortening and means that folks who keep kosher or are plant-based can't have a slice of your delicious creation.
Since there are so many benefits and drawbacks at play, I don't think there's one right answer for "what fat is best?" I personally prefer a 50/50 mixture of cold butter and shortening. It gives the pie just enough buttery flavor, but I also don't have to worry about chilling it every five minutes. Vegan or plant-based butter can also be a good substitute; though I've found the water content just might not lead to as pronounced a puff.
3. Don't break down your fat too much
I covered the "what" when it comes to fat, but it's also important to address the "why" of using fats in your recipe. When your pie is baking, the water in the butter will evaporate, leaving behind distinct layers and a slight puff. The flour will also wrap around the fat particles; it's the fat that prevents the gluten from becoming overworked, in turn keeping your crust tender.
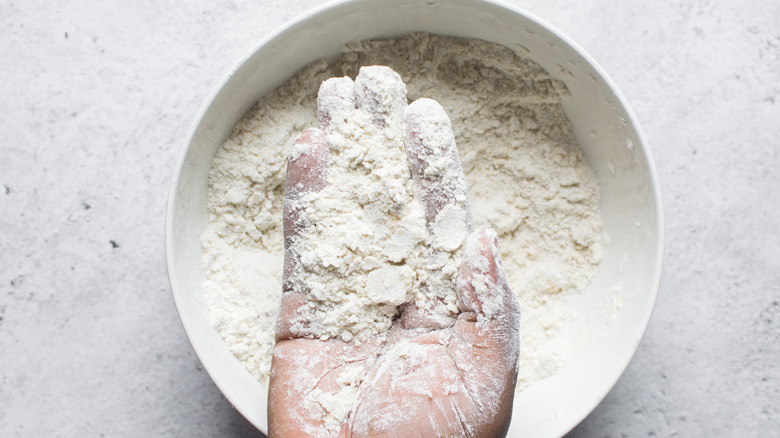
As such, you'll want to make sure that your fat is well-distributed throughout the pie dough. You should leave behind some distinguishable pieces of fat in your flour mixture. Though, if you keep massive chunks of butter or shortening in the dough, you'll have a heck of a time trying to roll the crust out. But if you blend down your fat to the point where it's hard to distinguish it from the surrounding flour, you may have some issues with its consistency and getting those signature layers.
When I'm cutting butter into flour, I like to get the butter to somewhere between pea-sized and a coarse sand consistency. In other words, it's okay if there are some pieces of butter that are more pulverized than others. This is easy to account for if you're cutting your fat by hand (and by hand I mean with a pastry blender or fork). You can also use a food processor; just lift the lid up occasionally to check on the texture of your pie dough.
4. Use cold, but not frozen, butter
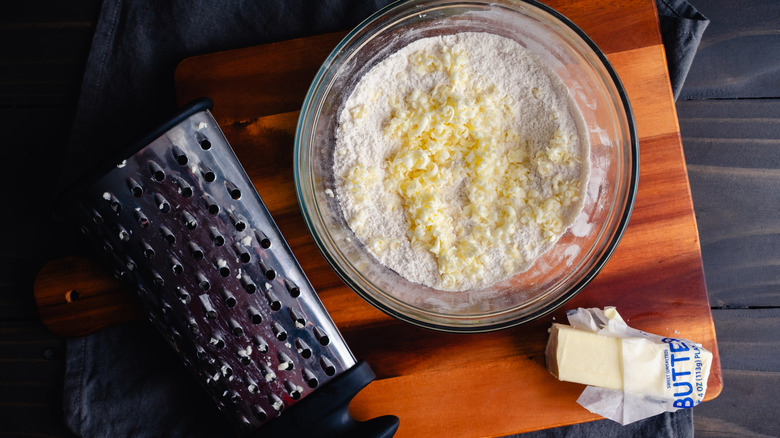
You may have heard through the grapevine about the little handy trick for getting the right size butter in your pie crust: grating frozen butter into your flour. However, this method has its drawbacks — more than just leaving you with a dirty box grater to clean. While some people tout it as a miracle cure for staving off melting, I have found very little success with this trick. Frozen butter isn't easy to work with because of how hard it is. The butter pieces tend to stick together and form lumps in your pie crust, which is not what you want when you're trying to coat it in flour and evenly distribute it. It's a method that sounds too good to be true.
Chilled — but not frozen — butter is a much better addition to your pie crust. I like to leave the butter in the fridge for as long as possible before I'm ready to prepare my crust (that means weighing out my flour and setting up my mise en place ahead of time). You can also help prevent your butter from melting by freezing your mixing bowl beforehand and using a cold rolling pin.
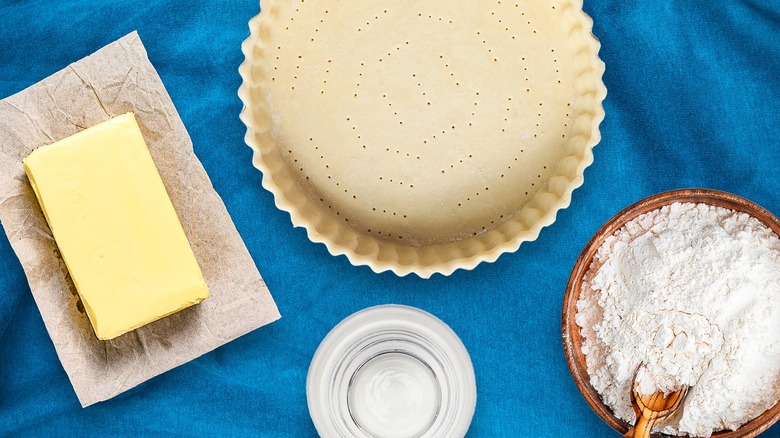
5. Be stingy with the water
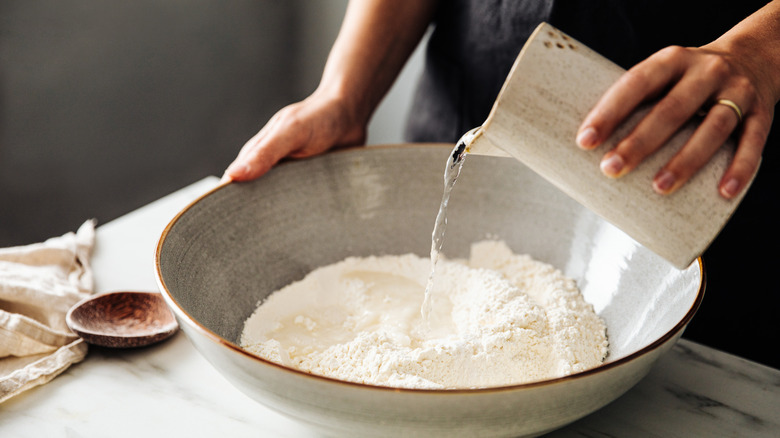
There are only four ingredients that you need for a good pie crust: flour, fat, salt, and water. It's the ratio of these four ingredients that's tricky to master and key to ensuring a great pie crust. Your recipe may call for just a few tablespoons of water — and potentially even less than that. The purpose of this liquid in a pie crust is merely to bind the other ingredients together. If you don't add enough, the dough will be dry and break easily; but if you add too much, you may be dealing with a soupy dough that sticks to everything. I've found its easier to add too much water than to add too little.
Since the amount of water that your pie crust needs is often determined by how coarse your butter is, you only need to add enough so that your pie comes together in a ball and has no dry pockets of flour remaining. It's important to note that the water also kick-starts the development of gluten, so if you add too much and overwork it, you could risk making your pie crust too tough. If you're using a food processor, add a scant amount of the cold water, pulse, take a peek, and decide if you need to add more.
Moreover, when I first learned how to make pie crust with my mom, she made a clear point that the water should always be ice cold before adding it to the flour. This will prevent the fat from melting.
6. Add a dash of vodka

The secret to a great pie crust may be lurking in your spirits cabinet (or potentially your freezer, depending on where you keep it). A shot of vodka can ensure an extra flaky pie crust, and you can rest assured that some of the alcohol will cook off as the crust bakes. It can be used as a substitute for water, which can cause the gluten in the crust to stodge up, leading to a hard or elastic consistency. Vodka circumvents that. The liquor is composed of about 40% alcohol, and adds just enough moisture to your pie crust without contributing to gluten development.
The amount of vodka you add to your crust is really dependent on your other ratios. Some recipes will call for around ¼ cup, and others include vodka in addition to the water. You can also substitute other spirits with a similar alcohol content if your spirits cabinet is looking a little sparse.
Regardless, a spirit-based crust should be easier to work with than one made with just water. You can even use a chilled vodka bottle to roll out your pie crust — it's the perfect shape and it will keep your crust chilled.
7. Always double chill your pie crust
Can you chill your pie crust too much? Next question, please. The short answer is probably not. Chilling does so much for baked goods, and it can make a big difference between a pie that's as thin as a cracker and one with clearly defined layers. Not only does it give the butter a chance to firm up, but it can also help the gluten to slacken.
When I make pie crust, I like to double chill it. The first time is right after I bring it together in a ball and the second is after it's been placed in a pie plate or tin. This gives the butter a chance to firm up after the time spent on your countertop, in your food processor, and the like. If you're making a double crust, it helps to portion out your dough into two separate balls so that the top crust ball can chill as you're shaping the bottom one. Then, once it's time to roll out your top crust, return your pie pan to the fridge so that your bottom crust can firm up. If you have scraps, you should also keep them in the fridge until you decide what to do with them — may I suggest pie crust cookies?
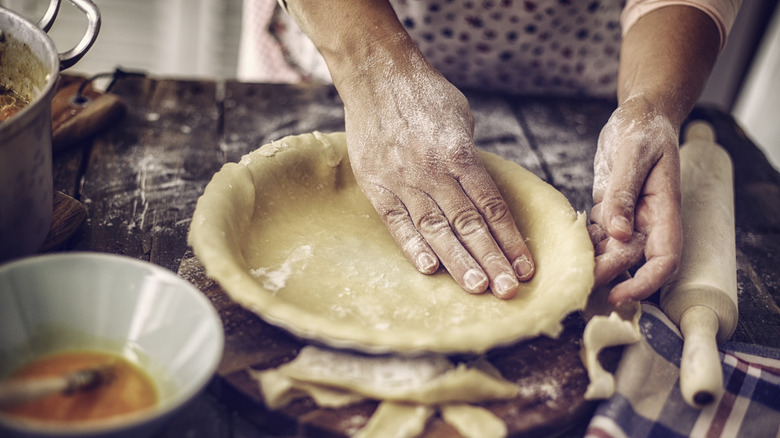
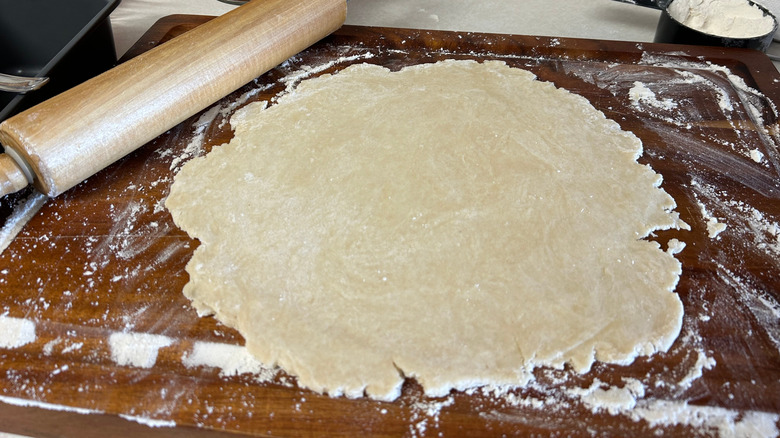
8. Roll your dough with intent
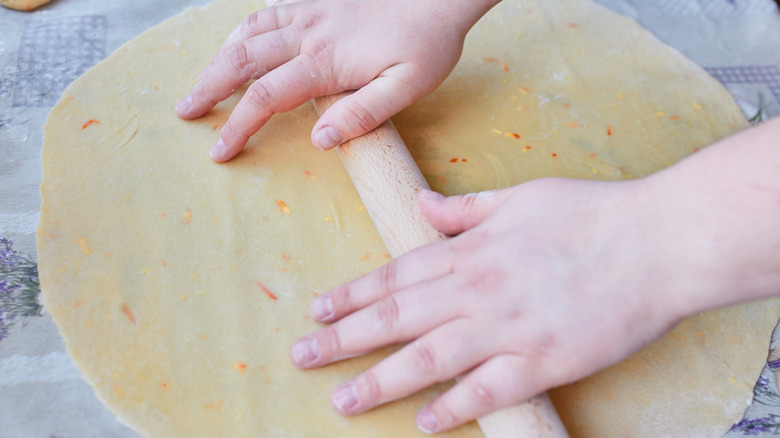
Rolling out pie dough can seem like a very arduous process until you get the hang of it. One of the tips that I recommend is to always layer your dough between two pieces of cling film (potentially more, depending on the size of your roll). Apply flour to the dough (on both sides), then sandwich it between the pieces so that no raw dough is exposed. That way, when you need to flip your dough, you don't have to worry about unsticking it from the countertop.
The key to rolling pie dough is to never roll in one place for too long. You want to stretch from the center of the dough outwards. I find that planting your rolling pin in the center of the dough, then pushing outwards until you reach the edge is helpful. Then, once that roll is complete, rotate the slab 90 degrees and do it again. Do it twice on that side before flipping the dough over and trying it on the other side. I prefer to always roll away from me rather than roll toward my chest, mainly because I get better leverage on the dough that way. You can also push the dough outwards with the same force on each rotation, which will give you a more circular dough rather than an amoeba-shaped one.
The sweet spot for dough thickness is ⅛ inch. You should also make it slightly larger than your tin (you can always flip the tin over and check), as you'll need to crimp it and account for any slouching on the sides.
9. Only use enough flour on your surface to prevent sticking
Flour is very helpful when it comes to making pie crust. It can prevent your dough from sticking to your rolling pin, counter, and every surface it comes into contact with. However, there is also a drawback to using too much on your work surface. If your dough is not perfectly chilled, it can absorb the flour particles and become stodgy and hard to work with. The key is to only use enough flour to prevent sticking. I like to have a shaker can of flour at the ready, that way, I can add a sprinkle to my rolling pin — making sure to get all the edges — and to both sides of the pie crust. If your flour situation looks like a January nor'easter in New England, you've probably added too much.
If you notice that there is a floury residue left on your pie crust, the easiest thing to do is to take a pastry brush to it. You can also cover the top crust with a wash to hide it (and also give it a better color and gloss).
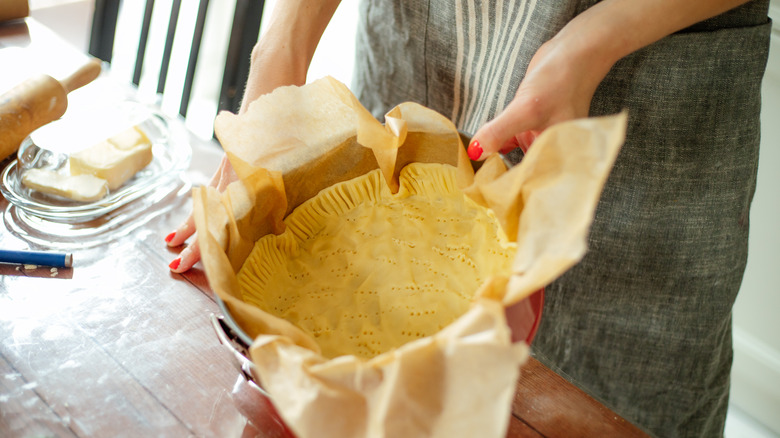
10. Don't skip the blind bake if your recipe calls for it
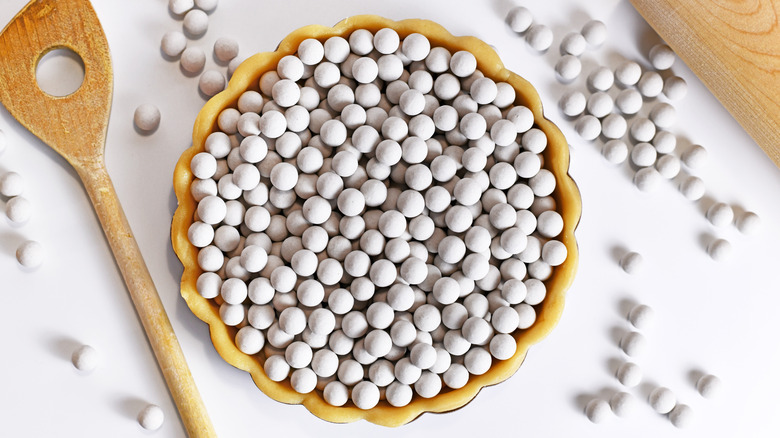
Ensuring a great pie crust involves more than just mixing it, rolling it, and carefully placing it into your pie pan. It also means paying attention to your recipe instructions when it comes to baking. One of the most common mistakes I see amateur bakers make with pie crust is not blind baking it, if the recipe call for it. Blind baking means giving your bottom crust a head-start in the oven before any filling is added. It's a must for pies like pumpkin or pecan because the filling and the crust bake at different rates. For these instances, the pie crust will only be par-baked; once the time has elapsed, the filling is added and the pie is finished off in the oven. A no-bake pie will require you to bake the crust entirely beforehand.
There are two big recommendations I have for blind baking. The first is to always weigh down your crust before baking it. A pie crust without filling will puff up, leading to an ugly slice and an uneven filling. You can use pie weights (which I find to be unreasonably expensive), or, if you don't blind bake pies often, dried beans. I also like to prick the bottom crust to prevent steam from accumulating. You won't have to worry too much about the filling seeping out into the dish, as the fork prongs are relatively small.