13 Steps To Take To Prevent Mint From Taking Over Your Garden

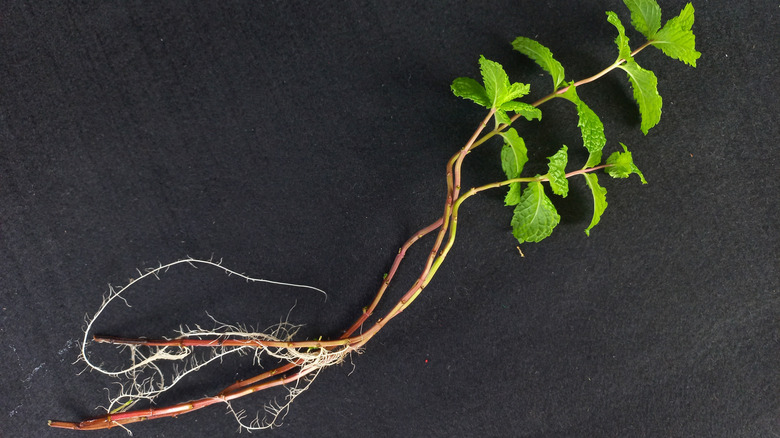
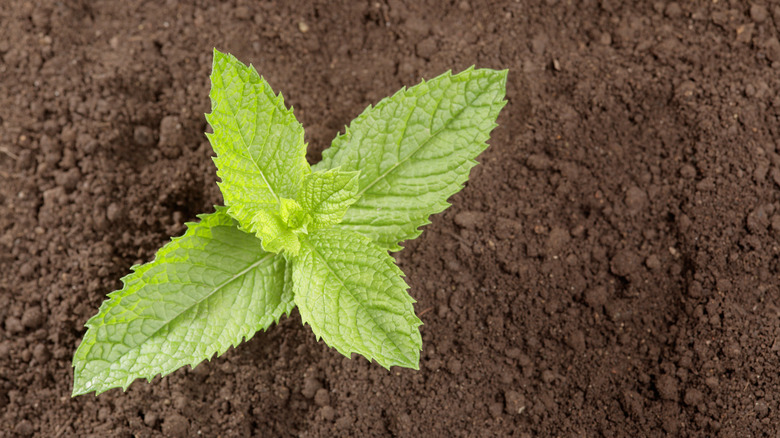
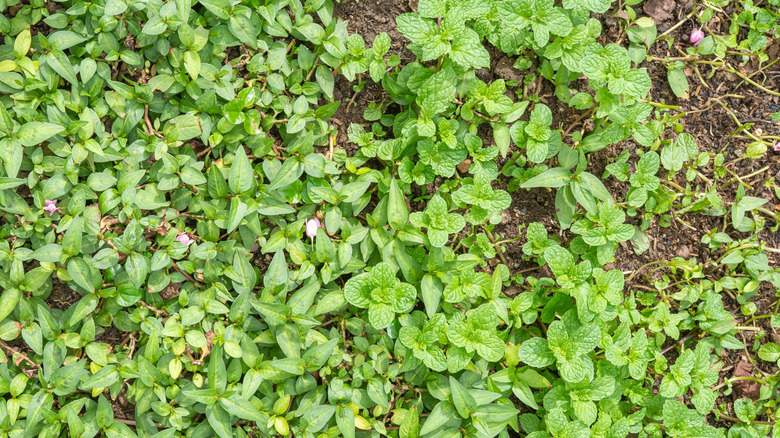
Mint is a beloved flavor and fragrance, and it's also one of the easiest herbs to grow in your garden. Unfortunately, that easy-growing nature also helps mint take over just about any space it's planted in. Mint, which comes in many varieties in many genera and species, is highly aggressive and can quickly spread all over the place if not controlled early and well. It spreads through underground rhizomes, sending out horizontal shoots through the soil that enable it to expand its territory rapidly, and its stems have the ability to develop roots on the spot, too.
However, many people are able to grow mint without destroying their garden. That's because they take steps from the start to contain the aggressive growth with a number of strategies. If you're careful, you can have a productive and cooperative mint patch that leaves the rest of your garden alone. If it's too late for that and your mint plant has gotten out of hand, there are remedies for that as well. One or more of these 13 steps to take to prevent mint from taking over your garden will help.
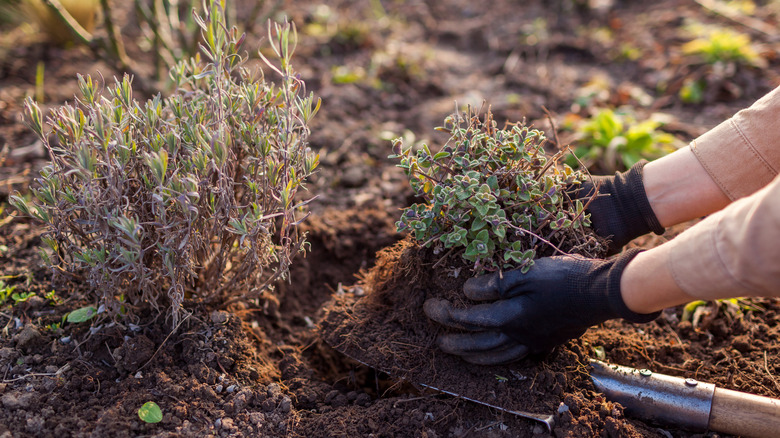
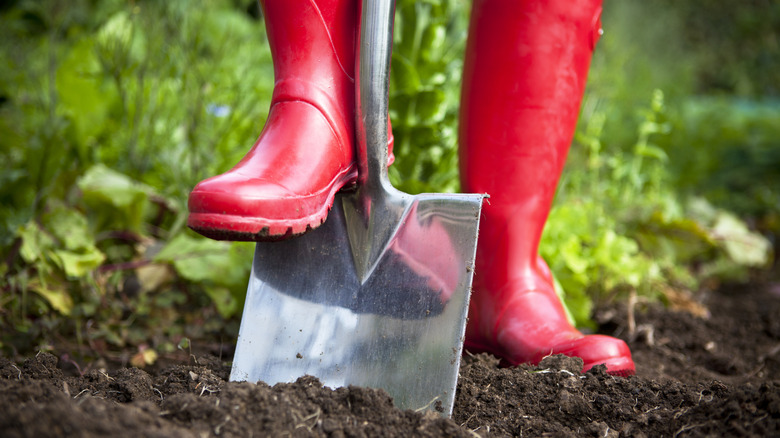
1. Plant it in a container, not the ground

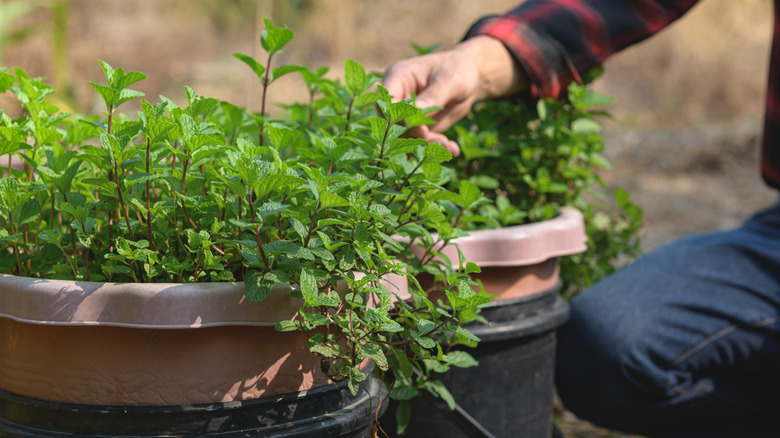
The easiest way to stop mint from overwhelming every other plant in your garden is to grow it in a container. Mint's stems and rhizomes look for any opportunity to spread out and create new mint plants, even sneaking through drainage holes at the bottom of the container. The pot you use should be deep and rest on a paver, plate, or some other hard surface that will block the rhizomes.
Dr. Gary R. Bachman of the Mississippi State University Extension Service has a nifty idea for growing mint: old coolers. The built-in drainage plugs allow excess water to drain out. Bachman writes that you can drill drainage holes in coolers that don't have drain plugs. Just remember to either place the cooler on a paved surface or place barrier fabric (that allows drainage) at the bottom of the container.
You may see advice to plant the mint in a container and then plant the container in the ground so that it looks like the mint is part of a garden bed. If you do this, ensure the container has a barrier to prevent rhizomes from escaping through the drainage holes. Leave at least 3 inches of the container sticking up above the ground to help keep mint stems from touching the soil. Make sure the container is made from a material that won't deteriorate.
2. Grow a less-aggressive variety
One method for preventing aggressive mint spread that may help is to plant a less-aggressive variety. However, there's some disagreement over how aggressive some of these varieties can be. It's a good idea to treat this one as an additional tactic and not your main strategy for controlling mint growth. Planting these in containers is still a good idea.
Suggested varieties include banana mint (Mentha arvensis 'Banana'), pineapple mint (M. suaveolens 'Variegata'), and apple mint (M. suaveolens); be aware that all of these varieties still have the ability to go wild in your garden. All three are edible and have different uses, from tea to salad to desserts. Another variety that looks lovely in pollinator gardens is Pycnanthemum muticum, or big leaf mountain mint. It smells like spearmint, it can be fast-growing, and it has very pretty blossoms that work well in ornamental gardens.
Other options include several catmint species in the Nepeta genus. Note that catmint is related to catnip, and while cats won't go quite as bonkers over catmint, the plant can attract cats. Ensure the species you choose is catmint because catnip can be much more invasive. Anise hyssop (Agastache foeniculum) is one more option that may be less aggressive. This is a wonderful option for attracting pollinators.
3. Use a bottomless container
So far, we've mentioned using a container with some sort of fabric or hard surface to block the exit of any rhizomes through the container's drainage holes. There's another type of container you can try, although this one is riskier — it's called a bottomless container, and it's literally a planting container with no bottom. The container is tall, with heights ranging from 10 inches to 18 inches and beyond. You plant the container in the ground with at least 3 inches sticking up over the surface of the soil.
That lip that sticks up above the soil helps stop mint stems from resting on the ground, where they can take root. However, you'll still need to monitor the plant and cut stems that look like they're getting close (You don't want to risk the stems resting on the ground). The long length of the container is supposed to contain the spread of the rhizomes, which normally grow horizontally. However, some growers are not that confident about the containers' ability to prevent the rhizomes from eventually sneaking down and around the container.
4. Monitor the stems and top edges of planters
We've talked a little bit about this already, but it's worth spotlighting on its own. Mint stems can take root themselves through a process called layering. While mint plants spread mostly by rhizomes underground, the long stems can send out roots when the stems sag and rest on the surface of the soil. Mint plants are simply determined to grow. This is an advantage if you want to propagate more mint plants because all you have to do is snip off a stem and place it in some water. However, it's a distinct disadvantage if you want to stop the mint from spreading into other parts of your garden.
You don't have to check mint plants daily, but do check them at least a couple of times per week. Look for any stems that seem to be headed downward, and clip those off. How quickly roots form once a stem touches the ground can vary, but roots from stem cuttings can form in as little as a week. Given how tricky it can be to corral mint once it goes out of control, you don't want to see even a hint of layering take place.
5. Plant it in a separate bed
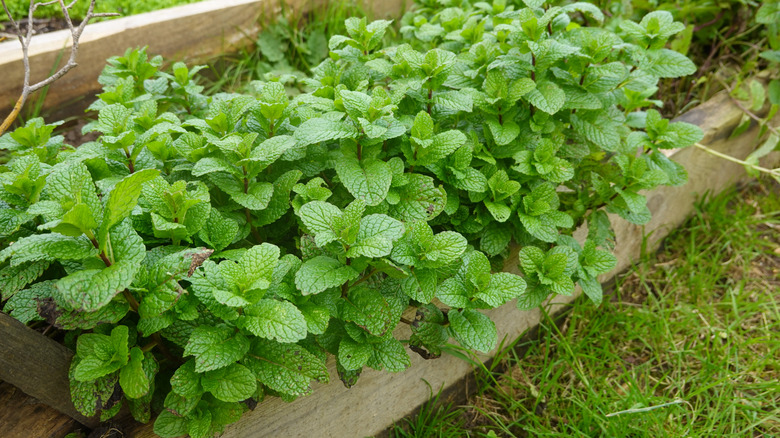
If you simply prefer the look of mint in a garden bed but don't want to have a container sticking up visibly over the surface of the soil, give the mint its own little bed. Set the mint garden bed away from your main garden beds, and create underground barriers around the bed with landscaping fabric or a similar root barrier. This can be an in-ground or raised bed, although it may be easier to install the root barrier if you create a raised bed because that doesn't require digging a hole in the ground.
Be vigilant about trimming mint stems that start to sag toward the ground that's outside the bed. Other than that, you can let the mint go wild within those boundaries. You'll have no other plants in that bed, so there's no worry about the mint eventually obscuring the other plant as it (the mint) grows and expands.
6. Continuously control the edges of a planting
If you're not able to find a root barrier for whatever reason, you can also work on controlling the edges of a planting through a couple of methods. One involves digging deep edges to create a moat of empty space around the plant. With a wide-enough border, mint rhizomes won't be able to spread to neighboring plantings because the rhizomes won't have anything to grow in once they poke through the soil. Dig the edge deep enough, too, that rhizomes won't be able to simply grow down a little and then under the edging.
The other involves using chemical edging, which means spraying herbicides around the planting. You'll have to be very careful about not planting the mint too close to other plants because you don't want the herbicides to affect other beds. If you're growing the mint to harvest for food and tea, any chemical you use on or near the mint needs to be something that's safe to ingest.
7. Physical removal, which can take at least a couple of seasons
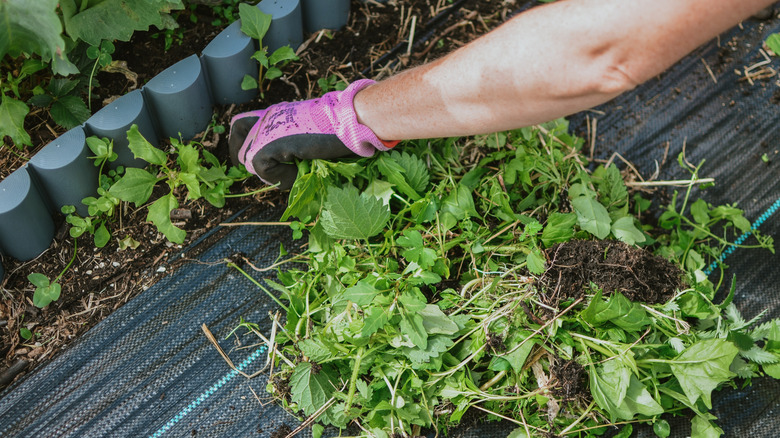
All of the previous suggestions were aimed at controlling mint that you're about to plant so that it doesn't start growing like wild. What do you do if you already have mint in the garden that's started growing outside its initial bed? You do have options, but be prepared to do some work. Mint is tenacious, and it could take you a while to get it under control. Keep trying, though, because if you can mirror mint's tenacity and stick with these strategies, you have a good chance of winning.
The method that's most likely going to work is physical removal. Actually pulling or digging up the mint plants gets them out of the soil. The risk here is that a small portion of plant will be left behind, which will regrow almost immediately. You could find more mint growing over the next few months. If you choose to physically remove the mint, water the soil first. That makes it a little easier to move as you pull up plants or dig down. Then, and this will sound counterintuitive, keep the area watered. That makes any remaining bits grow, which means you can see them and remove them. Check the area constantly and remove any mint you see immediately. You may have to monitor the area for a couple of months or more, but keep at it.
8. Smother overgrown mint
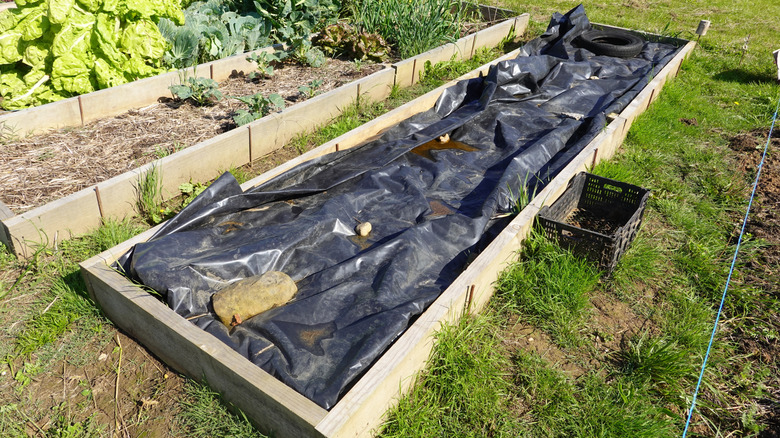
Sometimes, treating mint like a weed is the best way to go. Physical removal is still best for visible plants, but an additional method involves covering the soil where the mint was to block sunlight from the area. That deprives leftover bits of light that could allow for photosynthesis. You'd need to keep the area covered for anywhere from six weeks to a year, however. Options for materials include plastic sheeting that doesn't allow any light through whatsoever. You can also use cardboard. However, you'll need to check the cardboard regularly to ensure that wind and rain haven't moved parts of it or caused parts to disintegrate. Any light making it through to the soil could render your effort null and void and promote mint growth.
One more option is to use several newspapers and a layer of mulch, although those too can deteriorate over time. No matter what you use, if you see any mint plants peeking through, pull those out immediately.
Note that if the mint has invaded part of the garden with other plants that you want to keep, you can still cover soil around the wanted plants. You'll also need to change your irrigation system to drip irrigation. That will deliver water to the plants you want while letting the rest of the soil dry out, helping to kill off the remainder of the mint.
9. Try a few natural methods

There are a lot of garden remedies out there that use things like vinegar, boiling water, and salt to kill off unwanted plants. The rationale is that these are safer for you and the environment while also being easier to apply than a dangerous chemical. Some of these are supposed to work to control mint, too, but reports are mixed. Some people report great results, albeit after several applications, while others say these just don't work.
One method simply has you pour boiling water over the mint. This is a classic weed-killing method, and anecdotally, some have claimed this works well. You could also try placing salt over the area, pouring vinegar on the plants, or mixing the salt and vinegar along with dish soap. One person who posted online mentioned that she had to engage in an epic six-month battle in which she covered the mint with salt for a few days, poured boiling water over it every day for the next week, and repeated the cycle every time she saw more mint. She also said she buried trinkets in the ground where the mint was and challenged much younger relatives to dig up anything they could find for a reward, which is one of the more creative ways to get rid of errant rhizomes.
10. You may have to resort to herbicides

As nice as it would be to use something "natural" to control mint, the plant is so good at growing and spreading that sometimes even the most diligent efforts seem to fail. Don't despair if you have to resort to herbicides to get rid of the mint once and for all. It's a lovely plant with many good uses, but it can get out of control. One of the more common herbicides that will kill off mint is glyphosate, which you can apply to the leaves on the plants. Do this a couple of months before you attempt to pull out the mint plants. That gives the herbicide time to travel from the leaves to the roots.
Remember that there may be more rhizomes for separate mint plants sprouting in the soil that just haven't poked through the surface yet. That means that you may have to apply herbicide again and again as more plants work their way up, so don't despair if it seems like you have to keep re-applying the herbicide for a few weeks. Just re-apply as soon as you see the plants appear — don't wait for the plants to grow bigger.
11. Whatever you do, don't just mow and till
Two things you should not do if you need to control mint are mowing and tilling. It may be tempting to mow the mint to the ground and till the soil in hopes that this will bury and block plant material from sunlight. Remember, though, that mint thrives mostly through rhizome spread, which happens underground — even when most of the plant has been pulled up.
If you just mow the mint, it will get rid of only the visible mint and not the rhizomes — the stems will grow back. If you're OK with just mowing the mint every week, that's one thing. If you want to use the soil to grow something else, though, and you want to stop the mint from spreading to other parts of the garden, you've got to do more than just mow. If you till the soil where the mint is, then you've just spread pieces of rhizome and those self-rooting stems all over the garden bed. The result will be a new bed of mint, rather than clear soil. Mint is so good at surviving that it can be beneath several inches of soil and still grow back.
12. Don't compost seemingly dead mint plants

If it seems like we keep mentioning mint's ability to grow back from almost nothing, that's because it's one of the most important pieces of information that you have to remember as you battle to control mint. This is a tough plant, and spending hours removing it only to find that you have to repeat the process again — and again, and again, and again — can wear you down if you aren't prepared.
The last thing you want to do is take a dead mint plant and throw it on the compost pile or bury it in the soil, thinking that at least the plant matter will turn into compost or mulch. A lot of the time, those seemingly dead mint plants aren't really, truly dead, and they will grow. There can be viable seeds in mint that flowered before dying, for example. Compost piles at home don't always become hot enough to kill off seeds. Mint can also go dormant and appear to be dead, especially after not getting any water for weeks.
13. Be cautious about planting mint as a mulch/groundcover for fruit trees
Finally, one uncommon but apparently real home remedy for controlling mint growth is to plant it as a mulch or groundcover around fruit trees. The mint helps ward off pests, and the roots tend to be shallower than most tree roots. That restricts competition for nutrition and water. There are anecdotes claiming the mint doesn't spread that badly and that it hasn't become a problem. However, others have noted that it can still spread and that they still have to pull out mint roots (although they said they prefer doing that to dealing with pests).
A couple of warnings, however, if you think this is a good idea. One is that mint can still grow everywhere and spread past those fruit trees — that's always a risk. The other is that the mint's rhizomes may be shallow, but they could compete for resources with feeder roots from the trees that are closer to the surface (and thus closer to the mint).