10 Of The Most Common Baking Measuring Mistakes, According To A Professional Chef

You've probably heard of the old adage that baking is a science and cooking is an art. Though in many ways both require technical precision and creative flair, ultimately for a cake or pastry to turn out properly, accuracy and attention to detail are integral. This is something that comes more naturally to some of us than others.
Perhaps one of the greatest secrets to better baking is precisely measuring ingredients when preparing a recipe. This not only requires specific tools, it can be more challenging than it may seem. There are a number of pitfalls you may encounter when scooping out a tablespoon of flour or pouring a cup of milk into a measuring cup that you may not even realize you are making that can completely derail an otherwise perfect recipe.
As a professional chef who operated a bed and breakfast for nearly 18 years, I have a bit of expertise on the matter. I was in charge of baking all of the breads, pastries, and desserts served at the inn and it is a skill that I wasn't born with. Through experience and lots of trial and error, I mastered this craft and learned some valuable tips along the way that I'm prepared to share with you. Read on to discover some of the most common baking measuring mistakes you might encounter in the kitchen and how to fix them.
1. Reading the instructions incorrectly
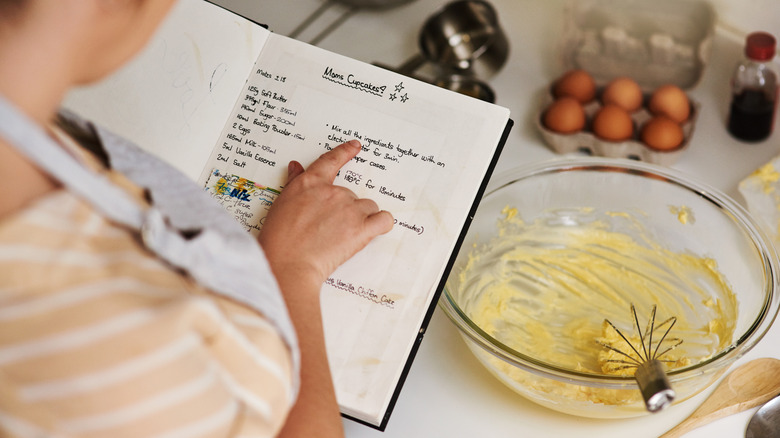
Perhaps the first thing any professional chef worth their salt will tell you about success in the kitchen is that you should read the instructions of a recipe thoroughly and multiple times before you start cooking or baking. This is especially important for baking where the specific ingredients and quantities used must be followed to the letter for the recipe to turn out.
Once you have read the recipe, the next step is to gather the appropriate ingredients and equipment needed and to lay these out on the countertop. This process is called mise en place, or "set up." By pre-setting all of the things you will need in advance, in order of use, you can guarantee that nothing gets missed.
In conjunction with this, another easy way to avoid losing track of measurements while baking is to actually pre-measure every ingredient and place these into individual bowls in order of use. While this creates a lot of extra dishes, it does prevent the possibility of missing something, adding it in the wrong order, or inadvertently using the wrong amount of something when you start baking.
2. Not using a digital scale to measure dry ingredients
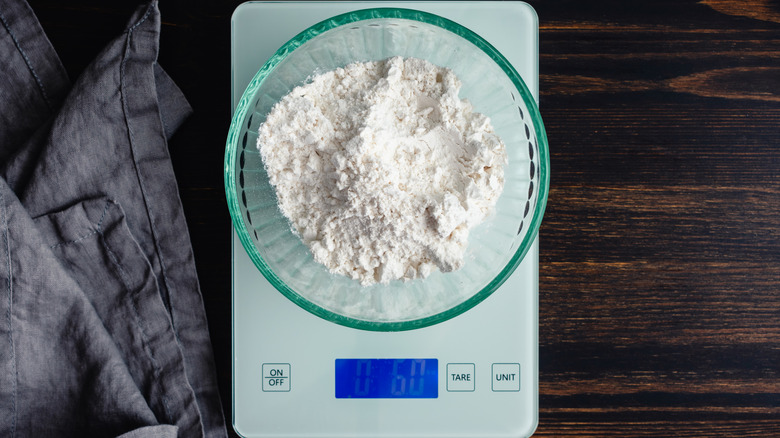
Generally speaking, the single most accurate way to measure ingredients when baking is to use a scale. Measuring by weight versus volume eliminates any inconsistencies in measuring devices or user error in how ingredients are measured. Scales are also capable of converting measurements from the imperial to metric system without the need for doing complicated math equations.
That said, not all recipes are designed and tested using a scale. In these cases, it may be best to stick with standard volume measurements, as long as these are executed properly (more on that later). While you can use either an analog balance or digital scale to measure ingredients by weight when baking, the latter is far more reliable for your baking projects.
When selecting a digital scale for your baking needs, opt for one that is designed to handle larger capacities, especially if you enjoy baking in bulk. You should also look for one that is simple to clean, lightweight, and has a clear display that is easy to read. Lastly, make sure the digital scale is calibrated properly before use and press the "tare" button before measuring each ingredient to further guarantee accuracy.
3. Swapping dry measuring cups with liquid ones
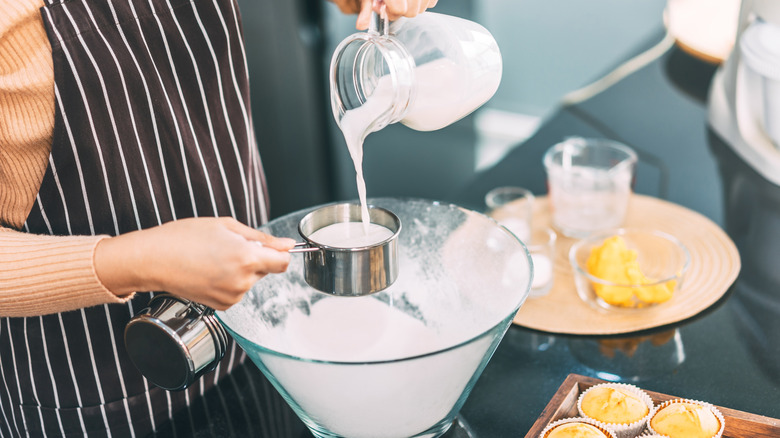
If you do decide to stick with volume versus weight measurements, for convenience or because a recipe is designed that way, you'll need to stock up on some essential baking tools, namely a reliable set of dry and liquid measuring cups. While it may seem like a cup is a cup regardless of how you measure it, nothing could be further from the truth, especially when it comes to doling out dry versus liquid ingredients for a recipe.
Liquid ingredients are self-leveling, meaning when you pour them into a measuring cup with clearly defined units of measurement, imperial or metric, they are easier to assess. Dry ingredients, by contrast, are not self-leveling, so they require more specific scooping and measuring to use the correct amount. This cannot easily be done with a liquid measuring cup, but rather requires the specific design of a dry measuring cup to be meted out correctly.
To determine which type of measuring cup to use for a specific ingredient, dry or liquid, it is important to evaluate whether or not the item is self-leveling. Some liquids, for example, may not easily self-level. These can include sour cream, yogurt, applesauce, or peanut butter. For this reason, they are easier to measure using a dry measuring cup. If you cannot tell, default to the dry measuring cup.
4. Using imprecise measuring devices
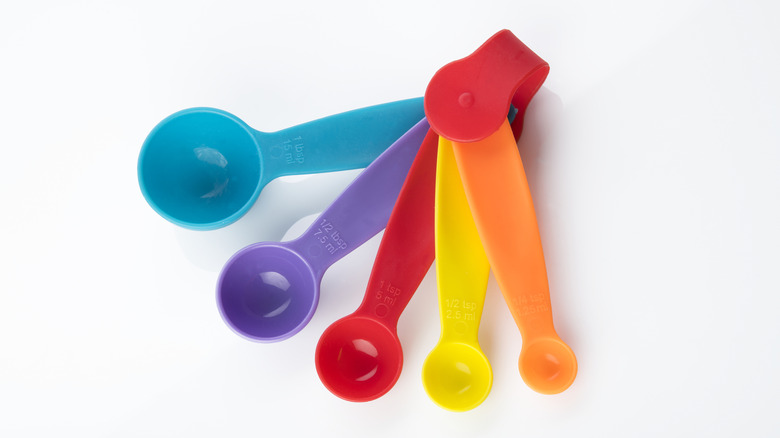
There are countless variations of measuring spoons on the market that come in every kitschy permutation you can imagine, from heart shapes to your favorite cartoon character. These may be adorable to look at, but they aren't especially practical for use when you want to actually bake. A somewhat infuriating, and perhaps not surprising, fact to be aware of is that measuring spoons are not regulated in the United States.
Though the U.S. government defines a teaspoon as 0.17 fluid ounce or 5 milliliters and a tablespoon as ½ fluid ounce or 15 milliliters, when it comes to how accurately measuring spoons are manufactured, companies are allowed to self-police, meaning they have nobody watching to ensure the measurements are precise. This may cause you to end up with completely erratic results using the same recipe, just because you employed a different set of measuring spoons each time you prepared it.
To ensure your measuring spoons are accurate before use, test them using a small liquid measuring cup or a digital scale. If the teaspoon and tablespoon measurements equal the defined equivalencies, they are safe to use for baking. If not, toss them. It is also a good rule of thumb to purchase measuring devices that come from a reputable retailer, even if these are slightly more expensive.
5. Not using the spoon and level method
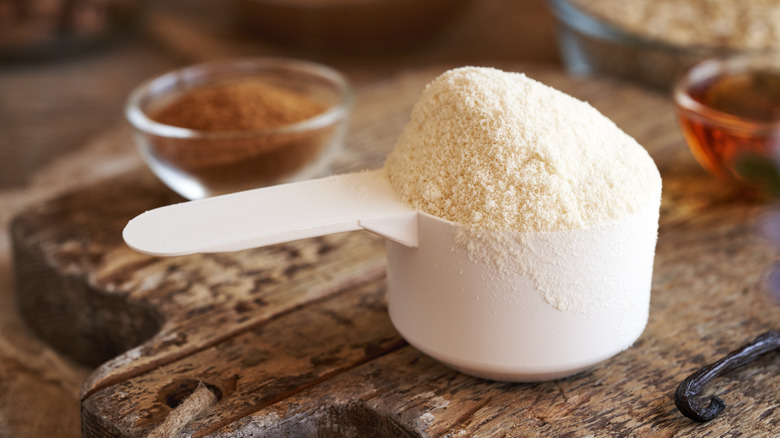
Now that we have established that there is a right and wrong type of measuring cup or spoon to use for dry ingredients, it is important to understand the appropriate way to use these to get the most accurate results. Many of us simply dive into a bag of flour, scoop the ingredient into the measuring cup or spoon, pat it down, and dump it into the mixing bowl. This can lead to inconsistent results and may cause your baked goods to become dense and tough.
Regardless of which dry measuring device you are using, the "spoon and level" method is the only way to guarantee precision short of using a digital scale and measuring ingredients by weight versus volume. The "spoon and level" method requires a few simple steps. Begin by fluffing up the dry ingredient you are measuring to eliminate any clumps. Next, scoop the ingredient into the measuring cup or spoon using another spoon until it is full. Do not press the ingredient down into the cup or spoon. Instead, allow it to remain loose. Before adding the ingredient to the recipe, use the back of a knife to level off the measuring cup or spoon, then toss it into the mixing bowl. Repeat as needed for each dry ingredient.
6. Measuring liquids on an uneven surface
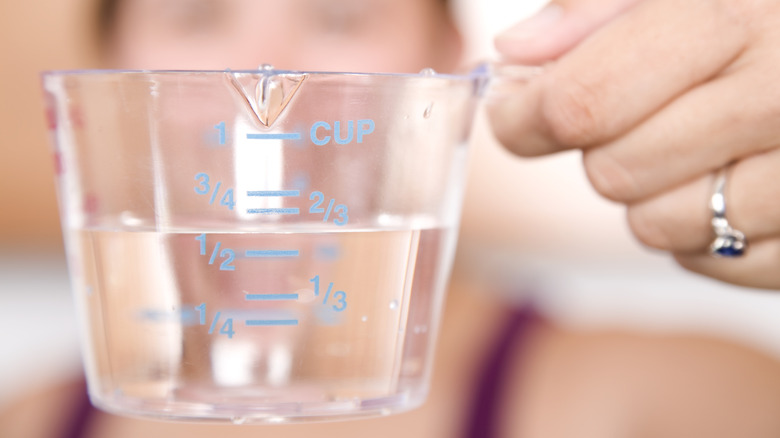
Since we know that liquid measuring cups are designed for use with self-leveling, wet ingredients, it goes without saying that a key to accurately using these is to guarantee that the liquid is actually level. Believe it or not, this may be more challenging than you would think.
First, always make sure you select a measuring cup that is large enough to accommodate what you are estimating. This isn't the time to make educated guesses. Before using liquid measuring cups, make sure they are clean and dry. It is also important that the units of measurement are still clearly visible on the cup. If they are beginning to fade, it's time to invest in new measuring cups.
The most critical step when pouring any liquid into a measuring cup is to make sure you do so on a level surface. Don't hold it in mid air and expect to be able to see the measurement accurately. If the surface is crooked, move it to a different one. And, be sure to clean and dry the measuring cup between each ingredient, or use multiple measuring cups, to further guarantee precision. Lastly, use a spatula to scoop the ingredient out to the very last drop.
7. Not using cooking spray to coat measuring devices with sticky ingredients
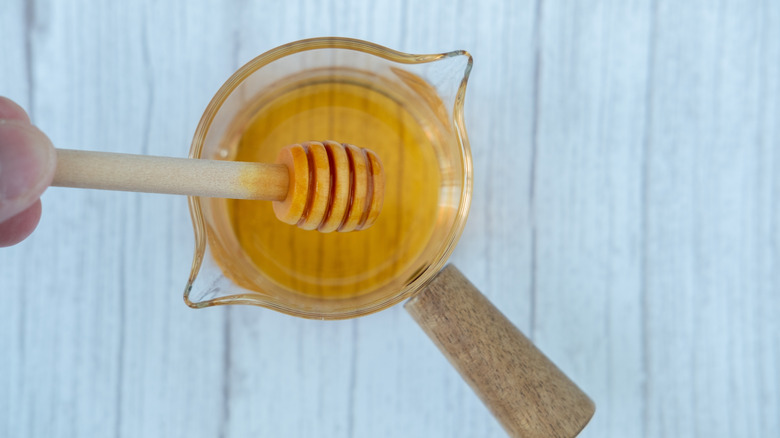
If you have ever tried to measure honey, maple syrup, molasses, or any other sticky substance, you know what a pain it is to get out of the measuring spoon or cup. Not only is this a potentially messy proposition, it can result in incorrect measurements if some of the ingredient remains in the spoon or cup, which can throw off the recipe.
There are a couple of brilliant hacks for making measuring these kinds of tacky substances more easily. One such hack is to line the measuring cup or spoon with plastic wrap, which will act like a barrier and will enable the substance to glide right off. This is effective, though it can be somewhat challenging if you are measuring a smaller quantity.
Another way of keeping these sticky substances from adhering to the measuring spoon or cup is to lightly coat it with cooking spray or use it to measure out the oil in the recipe before you add the tacky substance. Lastly, if the wet ingredients are designed to be added to the dry ones in a recipe, you can press the measuring device into the dry ingredients and fill the hole that is left behind with the sticky substance to incorporate it.
8. Conflating ounces with fluid ounces
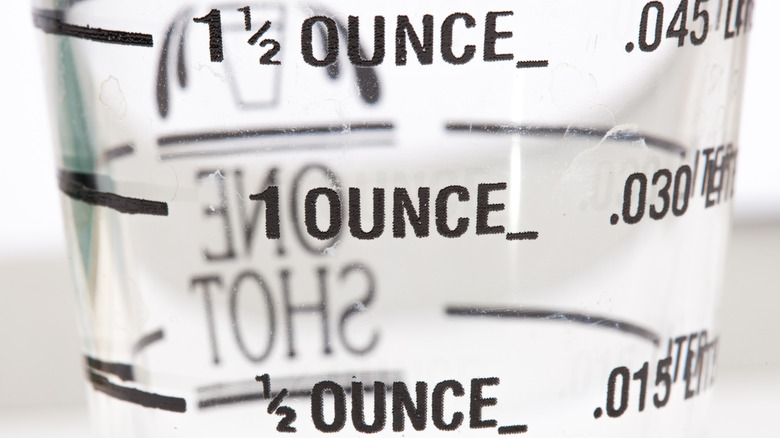
When reading a recipe, it is critical to not conflate fluid ounces with ounces. The former is a unit of volume, while the latter measures weight. For reference, 1 fluid ounce is equivalent to 2 tablespoons or 29.57 milliliters, while 1 ounce equals 28.35 grams. As you can see, conflating one with the other could completely ruin a recipe.
While it may be simple to conceptualize this when dealing with a true liquid or solid, what about an ingredient that falls somewhere in the middle, like honey, maple syrup, or molasses? This can seem a little trickier, but according to the FDA's Food Labeling Guide, anything that is considered a solid, semisolid, or that is viscous must be indicated in terms of weight, not volume. This means that these more ambiguous products should be measured using ounces, not fluid ounces, unless otherwise indicated on the instructions in the recipe.
9. Measuring ingredients at the wrong temperature
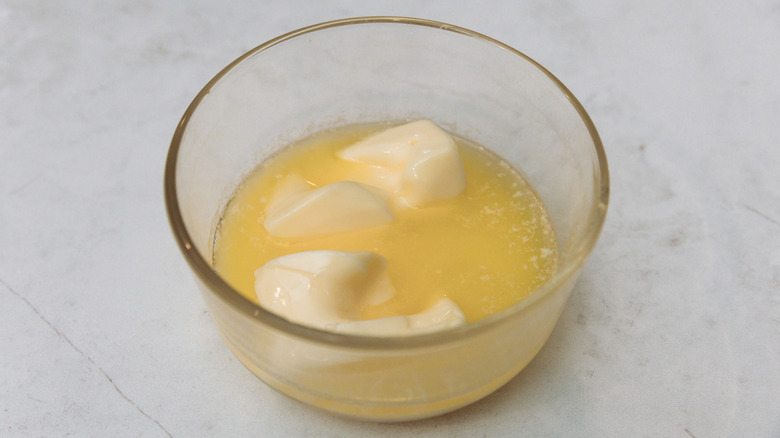
Another factor that should be considered when measuring ingredients for baking is the their temperature when you incorporate them. While their weight or volume won't change due to the difference in temperature, how these ingredients impact the overall structure of the finished dish will. For example, room temperature eggs are easier to beat into stiff peaks than cold ones, while taking the chill off of buttermilk will prevent melted butter from seizing in pancake or cake batter.
Typically, I measure ingredients when I remove them from the refrigerator and only allow what I need to come to room temperature if that is what the instructions on the recipe require. I do this to reduce the potential for an entire container of milk or carton of eggs from spending too much time in what is typically called the "temperature danger zone."
To illustrate this, if 6 tablespoons of butter need to be softened, you will want to measure this out and then place the ingredients aside until they have achieved the desired texture. The same goes for the eggs, fat, or any other liquids in the recipe. The unused container should be returned to the refrigerator for safe storage.
10. Not sifting dry ingredients
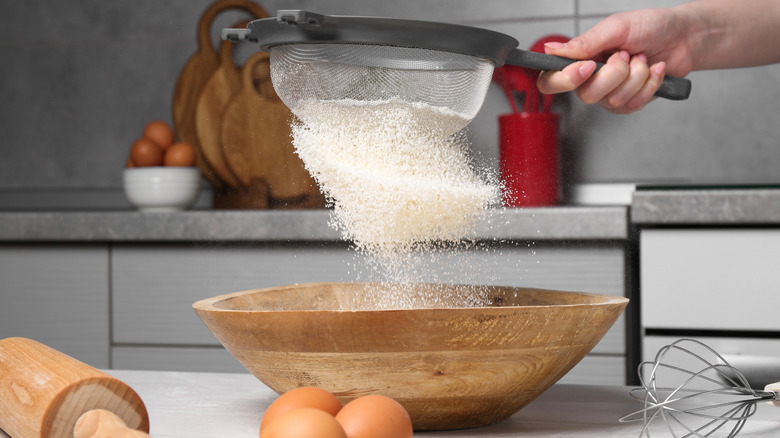
In decades past, ingredients like flour used to be more coarsely milled and ran the risk of being polluted with bugs and other impurities. Sifting would allow for these to be removed before baking. Though, flour today is far more finely processed and cleaner, it may still be an important step to sift it before adding it into your favorite cake or cookie recipe.
Sifting flour accomplishes a few things. First and foremost, it removes any clumps that may have formed over time as the flour has sat in storage. It also aerates the flour, making it less compact. Both of these features can produce more accurate measurements, preventing any random air pockets from forming and making baked goods lighter and fluffier. This same methodology can be applied for other dry ingredients like cocoa powder, powdered sugar, etc.
To sift flour or other dry ingredients, you can use a handheld sifter or you can do so by passing them through a fine mesh sieve. I recommend sifting the ingredients into a separate bowl and then using the "spoon and level" method to measure them before adding them to the recipe.