How To Sharpen A Knife With A Whetstone For Finely-Honed Precision
The sharpness of your knife can really make or break your experience in the kitchen. Slicing and dicing tomatoes or cleaning the silver skin off a big hunk of meat are chores that can be made daunting and borderline soul-crushing by a dull edge, whereas a properly sharpened knife can turn any chopping task into something fun and enjoyable.
When you first purchase a new knife, it will be immaculately sharp, but to keep that razor edge that makes chopping, slicing, dicing, and filleting so enjoyable, you have to maintain it regularly. There are all sorts of tools designed to make knife sharpening easier, especially for home cooks who might not have a chef instructing them on how to use the more daunting whetstone. But using a whetstone really isn't all that complicated, and once you get the technique down, it's the best way to keep your knife in tip-top shape.
Varying qualities of whetstones (which are also called water stones) can easily be purchased online, from Amazon to more professional websites like Sharpening Supplies. This guide can help you decide what grit to purchase and how to use a whetstone so your knives are always in great shape.
How to choose a grit
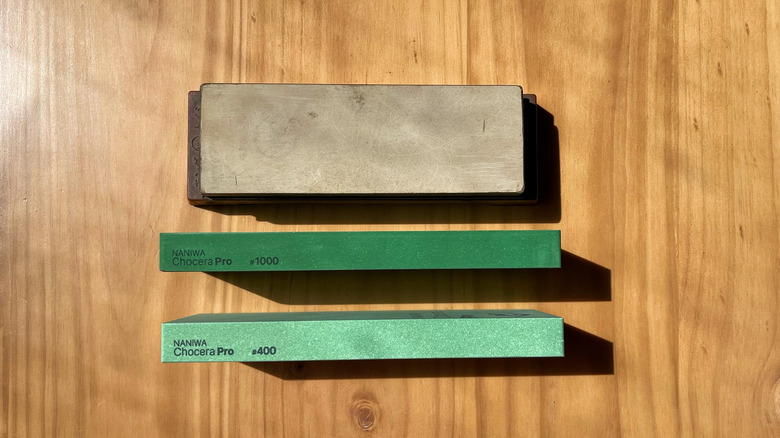
The first step in learning to sharpen your knife is to find and purchase the stone that best suits your needs. Grit refers to the coarseness of the stone — the larger the grit number, the smoother the stone will be, and the smaller the grit number, the more coarse the stone will be. A 1000 grit stone is the most universal. It's just coarse enough to sharpen your knife well but not so coarse that it will remove an unnecessary amount of steel from your blade — after all, when you sharpen your knife, you are removing steel to create a new edge, so over time the size of your blade will slowly shrink
A 400 grit stone would be used for knives that are chipped, have blunted tips, or are very, very dull. You wouldn't want to use a 400 grit stone for everyday sharpening, or you might end up whittling your chef knife down to a skinny boning knife. On the flip side, a 6000 grit stone would be used to polish the edge of the knife, but it will do very little in the way of actually sharpening a dull knife. The in-between grits, such as 2000 and 3000, would be used for those who want an extremely refined edge to their knife, especially for Japanese steel, but for the home cook, a 1000 grit stone will do the trick just fine.
Gather everything you'll need
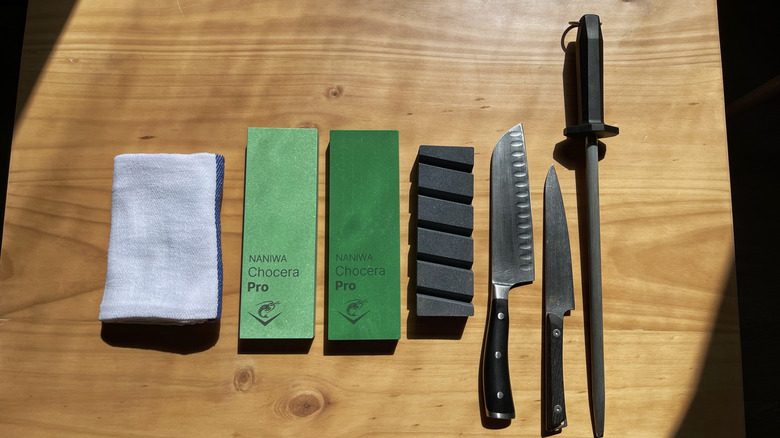
To sharpen your knife, you'll need a damp towel, your whetstones, something to soak your whetstones in, like a crockery or baking dish, the knives you wish to sharpen, and ideally a flattening stone and honing steel.
These pieces of equipment may seem intimidating at first, and the price tags might make you wonder if you really need them. But a good quality whetstone (and a flat stone to maintain it) will take good care of your knives for years to come. Plus, as soon as you try out your newly sharpened blade on something that used to give you grief, you'll know it was all worthwhile.
Step 1: Soak your stones
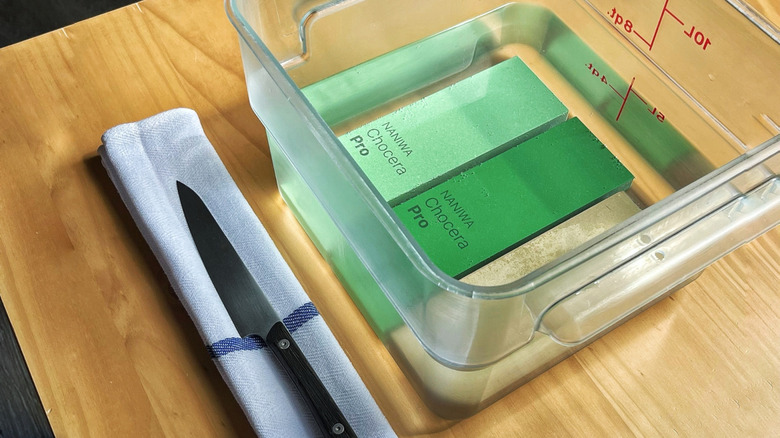
To effectively use a whetstone, you must use water. Thus, the first and most important step is to soak your stones for at least 15 minutes before you begin sharpening, and continually use water as you sharpen your knife. This will allow the silt of the stone to run over the blade of your knife and give it that razor edge without particles of steel building up.
If you use your stone without water, the surface will eventually become coated in metal from your blade and render it totally useless (or even counterproductive).
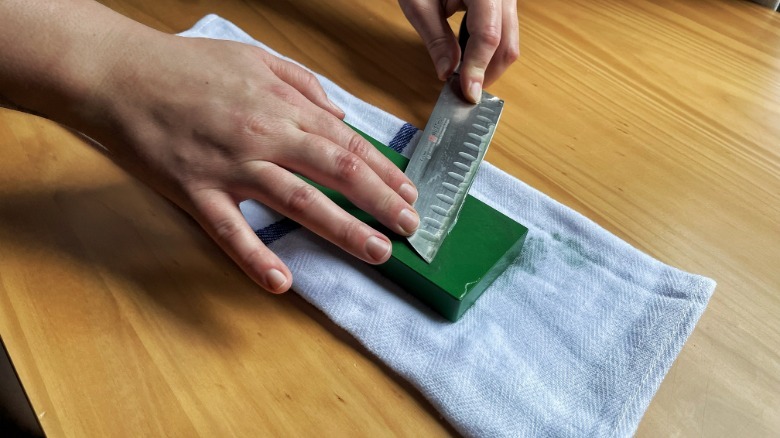
Step 2: Prepare your station
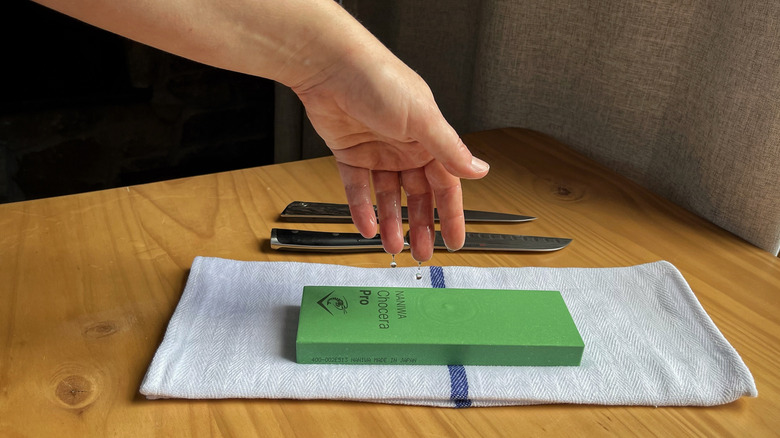
Once your stones have soaked for 15 minutes or longer, lay down a folded towel on your work surface and place your stone on top of it. Ideally, the towel will be slightly damp (or it will become damp as you continually drip water on it) and hold your stone in place. Sometimes your stone will come with a base piece of rubber or plastic you can attach to the bottom, but you will still want to place it on top of a damp towel to prevent slippage.
Step 3: Find the right angle
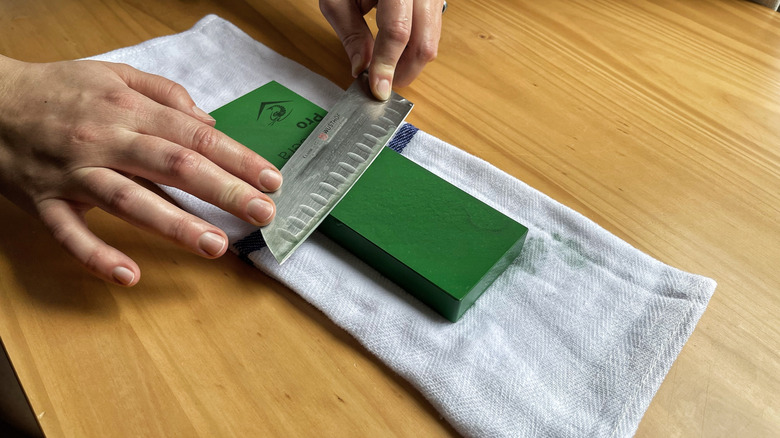
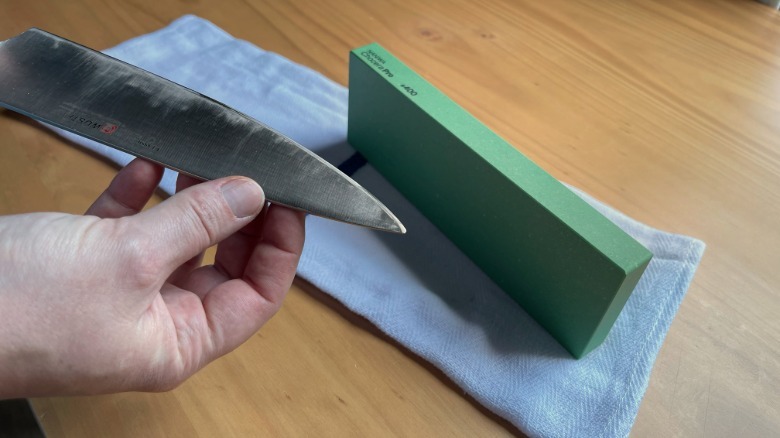
To sharpen your knife, you will need to hold it at a 15-20 degree angle. If it's your first time sharpening a knife, knowing the correct angle may seem intimidating, but as you practice, it will come to you more and more naturally until you don't even have to think about it.
Start by placing your knife flat against the stone. Then, lift the back into the sharp edge until you feel it catch — the natural angle of the blade will comfortably hug the stone. Observe how the edge appears on your knife (a narrow, consistent line) and make sure it appears the same as you continually sharpen.
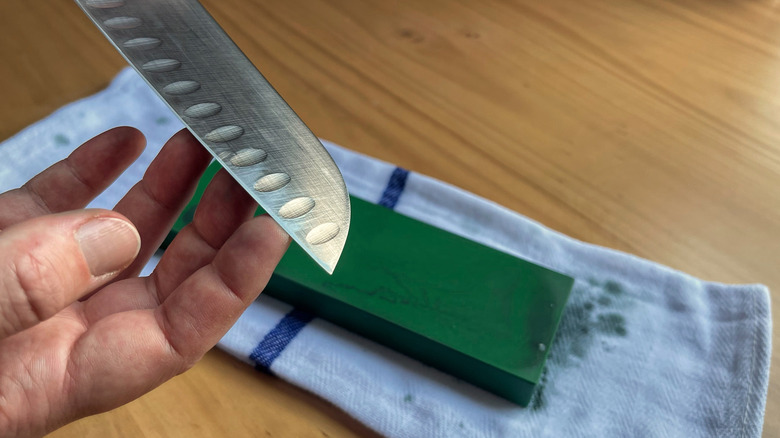
Step 4: Count your strokes
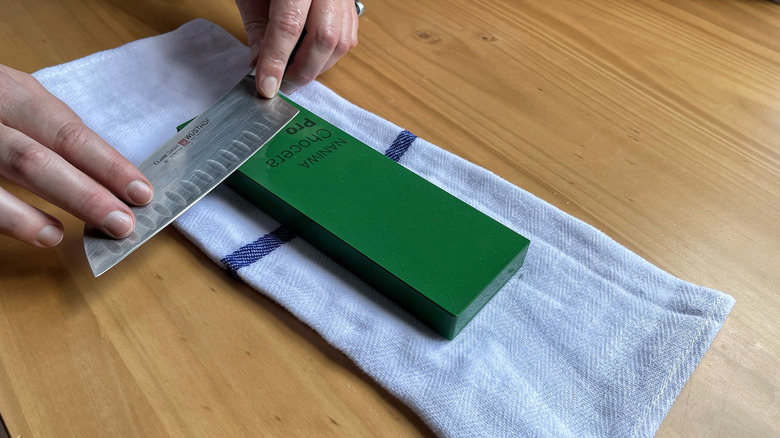
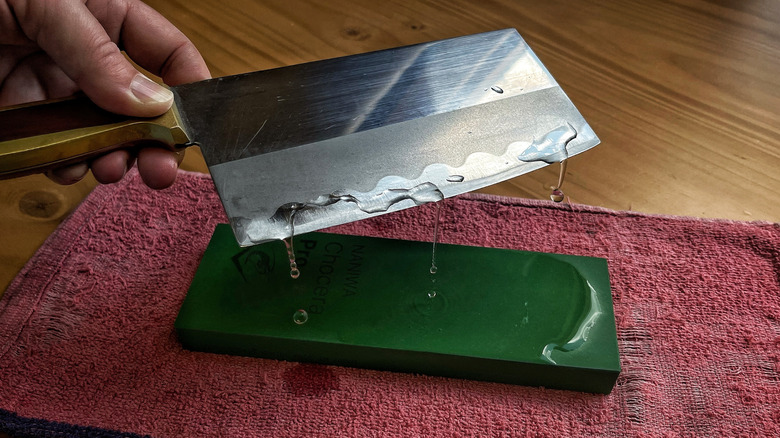
Start with the base of the knife at the bottom of your stone, with the edge facing away from you. Hold it at a comfortable 15-20 degree angle and push the blade up the stone and to the side, finishing on the tip of the knife. Each stroke should cover the knife from base to tip to sharpen the whole blade evenly.
As you slide your knife along the stone, mentally count each stroke. You'll want to sharpen each side evenly to create that perfect edge. You'll notice the water on your stone will begin to turn murky as the top of the stone is cut away by your knife. This is exactly the effect you're looking for, so keep adding water to your stone as you sharpen.
Step 5: Feel for the burr
Once you've done about 20-40 strokes, feel the edge of your knife opposite to what you've been sharpening. You should notice a small wire edge, which forms as the steel is pushed from one side to the other. This means that half of your knife has been given a new edge — once you feel this burr, flip the knife over and continue the same process on the other side, making sure to count the same number of strokes on each side.
Step 6: Switch to a finer grit
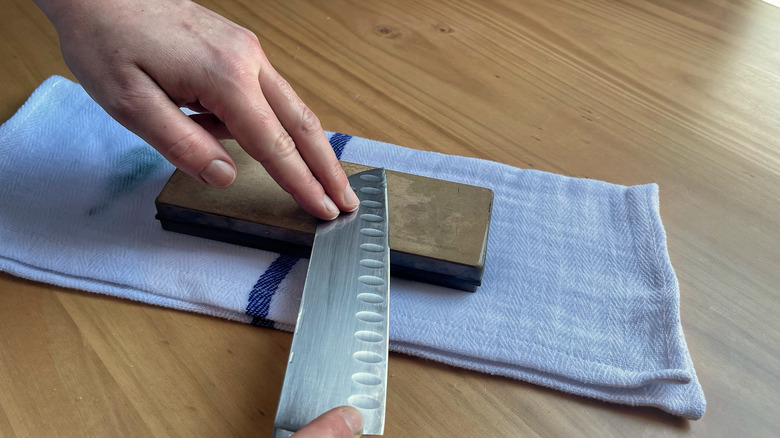
Once you've completed the same number of strokes on each side and your knife is looking sharp, you can swap out the stone you've been using for a finer grit. If you've been using a 400 grit stone on a very dull blade, switch to your 1000 grit stone to continue refining the edge. If you've been using a 1000 grit, now is the time to break out something finer, such as a 3000 or 6000 grit, which will add a refined polish to your blade and create a flawless edge.
When you use a finer grit, such as a 6000, it will have more of a smoothing effect rather than taking away steel to create a new edge. Thus, you won't feel for the burr in this step as you would with a coarser grit. Just give it about 20 strokes on each side until it's beautifully smooth.
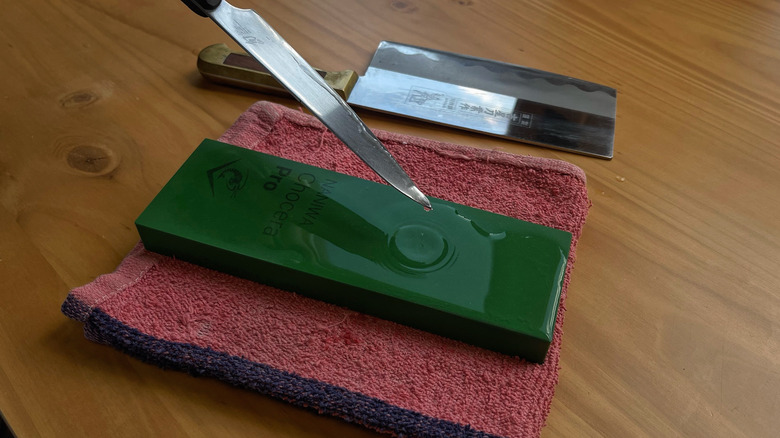
Step 7: Hone your blade
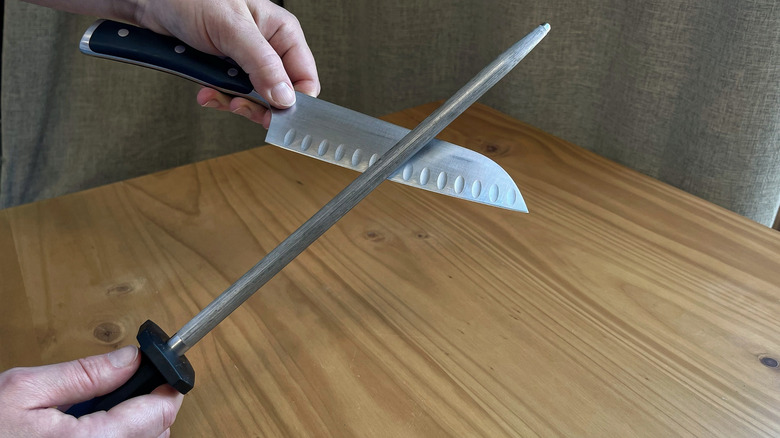
By now, your knife should be looking and feeling nice and sharp. You can wipe off your knife blade, rinse your stones in clean water, and set them aside to air-dry.
Grab your honing steel to give your blade that final touch. Using the same 15-20 degree angle you practiced on your whetstone, drag the blade from the base to the tip down your honing steel in one fluid motion. Alternate sides as you do, giving it about 10 strokes on each side.
Finally, grab a tomato or an onion and dice it like a pro with your finely-honed blade. Practice getting a good grip on your knife, and make sure to keep your fingers tucked — a newly sharpened chef's knife is nothing to play with.
Maintain your stones
When you first buy a whetstone, it will be perfectly flat, but as you use it over time, you may notice it becomes uneven in certain places as you rub away the surface with your knife. Having a flattening stone on hand will easily remedy this and is all you need to keep your stone in perfect sharpening shape.
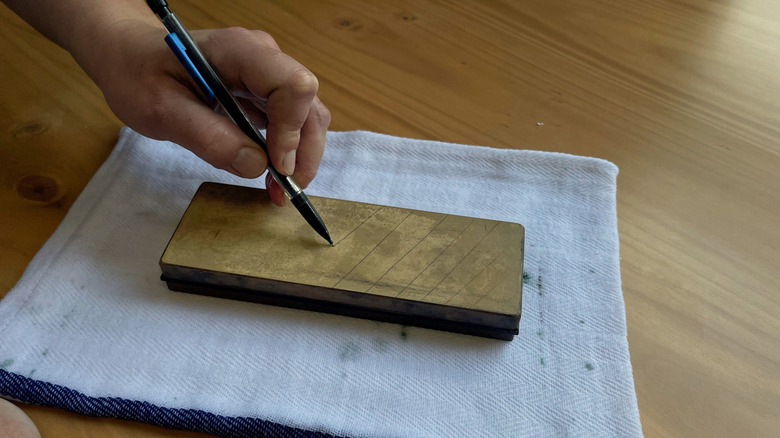
A flattening stone typically comes either as a diamond stone or a 220 grit stone with deep grooves running through it. These grooves capture the water necessary to rub away the surface of your whetstone. To begin, first soak both the whetstone you need to flatten, as well as the flattening stone. Then, using a pencil, draw a grid pattern over your whetstone.
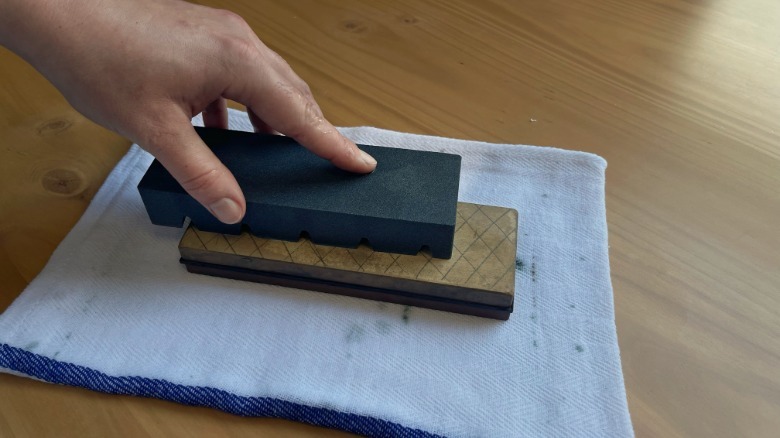
Place the grooved side of your flattening stone over the whetstone and begin rubbing it down in smooth, straight strokes, adding water as needed to ensure it doesn't stick. You'll want to make sure you cover the whole stone and hit all the corners, as the corners are typically the areas that become most uneven.
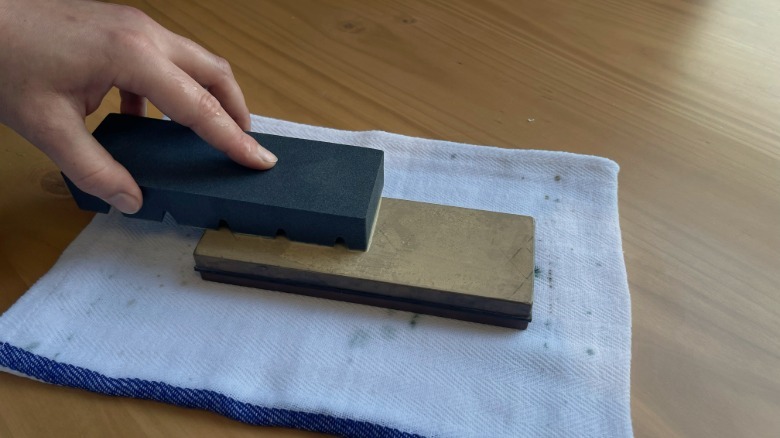
Your pencil-drawn grooves will begin to disappear as the surface is leveled. Continue evenly scrubbing the entire whetstone until the lines are completely gone. You can also double-check your whetstone from the side to ensure it looks completely flat.
How often to sharpen your knives
Knowing how often to sharpen your knives is largely up to the user. It depends on how frequently you use them and for how long. For the most part, you can maintain your knives for daily use by giving them a quick (and convenient) hone on a honing steel, but if your blade is crushing tomatoes rather than slicing them even after a hone, it's probably a sign that you need to break out your whetstones and sharpen your knife.
For the home cook who doesn't cook very often, you could get by with sharpening your blade once or twice a year. On the flip side, the professional chef will likely sharpen their knife every week, especially if they are working with fish or proteins that require exact precision. Use your best judgment and find what works for you.