Steamed Milk Isn't The Same As Boiled Milk. Here's The Difference It Makes In Your Coffee Beverages
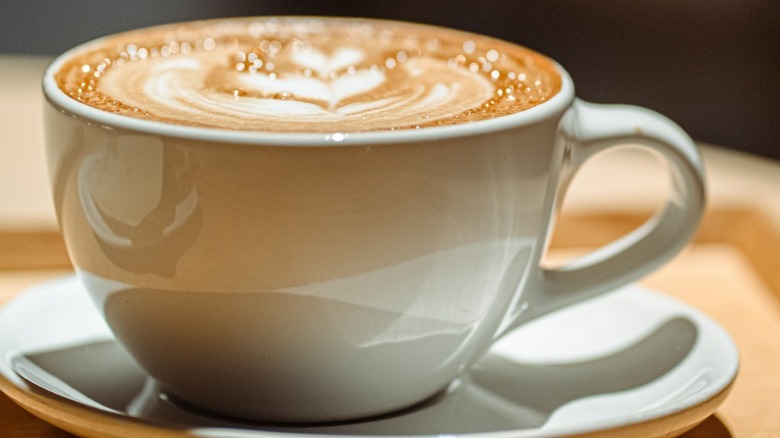
Forget syrups, whipped cream, or sprinkles of cinnamon — milk, and its alternatives, is arguably the second-most important ingredient at any coffee shop. If you've ever tried to create your own fancy coffee drink by heating up some milk on the stove or microwave, you've probably learned this the hard way. See, it's not just the type of milk or that it's hot, and it's not all about crafting cool coffee art either. In many cases, the amount of milk and how it's heated actually defines the type of coffee beverage you're getting (excluding Americanos or regular old cups of joe, that is). Cappuccino? That's equal parts steamed milk, foamed milk, and espresso. Latte? That's espresso with a lot of steamed milk and a floater of foam on the top. If you boil milk or heat it with any other method besides steaming, you're just not going to get the froth these different beverages require.
Furthermore, the only way to get proper steamed milk (or the foam that comes with it) is by using a steam wand. Injecting steam directly into the milk breaks down the milk's fat content and creates super tiny bubbles, giving the milk a velvety feel that's both delicious and suitable for crafting the perfect latte art. Milk proteins hold these bubbles together, which are what makes the milk feel luxuriously creamy. Another bonus? The steam's heat breaks down the lactose (milk sugar), so the milk tastes sweeter on its own — no sugar needed!
Tips to perfectly steam milk for coffee drinks
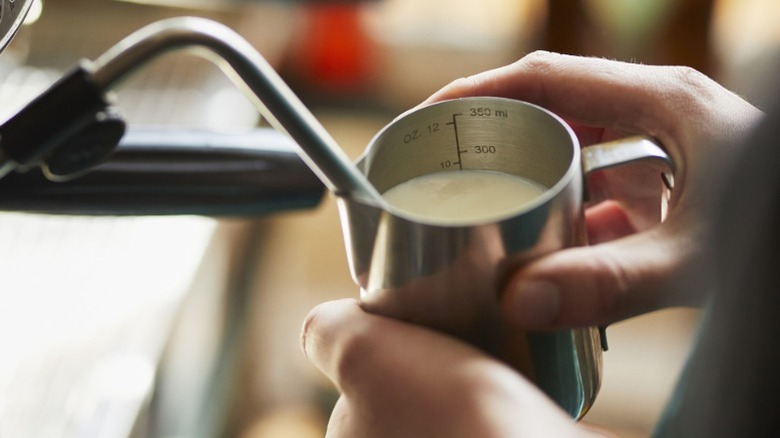
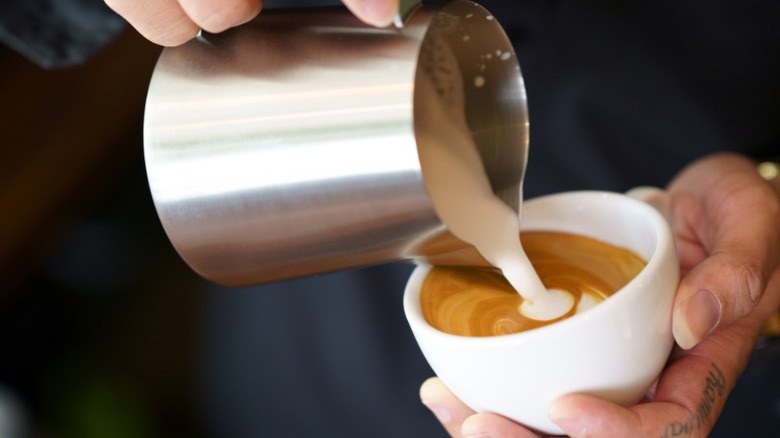
Steaming milk the correct way is crucial for latte art — good latte art, that is, unless you're fine with a blotchy mess. Of course, you'll also want to steam it just long enough to avoid any unpalatable flavors or textures. Now, to get started, you will need to have the right tools on hand. This means a having an actual steam wand as well as a metal pitcher with a handle (which is a cup that's actually designed for steaming). You don't want to ruin your regular glasses and cups, and you certainly don't want to burn yourself in the process.
Once you've got your tools in place, it's time to get steaming! The amount of milk you use will depend on the type of coffee drink you're making, as will the amount of foam desired (for example, a wet versus dry cappuccino). So, you'll want to look up your coffee beverage of choice carefully before proceeding. You'll also want to avoid fully submerging the steam wand lest you have trouble getting the amount of foam you want or worse. Instead, keep it just below the surface and only dip lightly during steaming to heat things evenly. Likewise, you're also going to want to keep the temperature between 155 and 165 degrees Fahrenheit. Whatever you do, don't boil the milk, or you'll have to start all over (burned milk just doesn't taste good).
Choosing the right milk for steaming
While you're learning how to use a coffee steamer, you'll also want to set yourself up for success by choosing the right type of milk. Now, obviously, the first part of this decision will depend on any allergies or dietary preferences you have. But if you're fine with lactose, the best dairy milk to use for steaming is whole milk. This is because whole milk strikes the ideal balance of fat, protein, and sugar to create that desirable velvety mouthfeel when it's steamed. Not willing to go full fat? Opt for 2%, as that will still foam really nicely.
As for dairy alternatives, there's some things to consider here as well, especially if you want to top your beverage with some nice swirls. As you may have heard from a barista or two in your life, it can be tough to create latte art, much less get a good foamy layer on a coffee drink with certain types of milk substitutes. This is because not all dairy-free milk options froth the same, so if you're seeing dairy alternatives, look for almond, soy, or oat milk, specifically those rated for barista use. And, just remember that practice makes perfect! Steaming milk properly can be challenging to get right at first, but keep trying and practicing your pours. With the right tools and a little patience, you should be getting perfectly balanced coffee drink — and coffee art to finish it — in no time.