Make Your Own Pop-Tarts At Home. All You Need Is A Premade Pie Crust
Whether you're a Frosted S'Mores devotee or all about our fave, Frosted Cherry, there's no denying the nostalgia of opening an envelope of Pop Tarts. They're a sweet breakfast treat that first hit the market in 1964, which might come as a bit of a surprise to Gen Xers and millennials who grew up munching on them in front of Saturday morning cartoons in the 1980s and '90s. As far as the actual structure of a Pop Tart goes, however, at least from a culinary standpoint, they're really not all that complicated. They're simply two layers of pie dough with a tasty filling and sometimes a frosted topping. In fact, with just some premade pie crust, you can make pretty much any flavor of Pop Tart you want at home, and you won't have to worry about breaking your teeth trying to rip open the foil package.
Don't get us wrong, Pop Tarts do what they do very well. But there's something really fun about recreating childhood classics at home. Not only that, but homemade Pop Tarts are endlessly customizable, and you can use any sort of ingredients you'd like (might we suggest blueberry cheesecake?). Creating and decorating them is also a great group activity, and an easy way to get kids excited about baking without having to follow a complicated recipe.
Focus on the filling
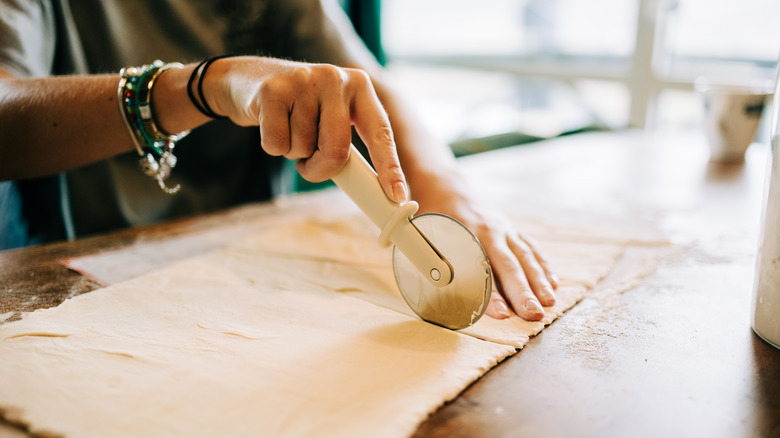
The hardest part about making any sort of hand pie from scratch, like a Pop Tart, is getting the dough to just the right consistency. This is where pre-made dough comes in clutch. It's got the perfect moisture balance, and it's already rolled out to the ideal thickness. Just cut two layers to size and put whatever you want in between. There are, however, a few pitfalls to be aware of when you're ready to make the filling.
First, make sure that whatever filling you use isn't too runny. Think of the texture of a store-bought Pop Tart; the beauty of it is that you can eat it with one hand, and that's what you want to achieve with your own homemade version. If you're using fresh fruit, chop it into small pieces or pulse it in the food processor and add a teaspoon of flour or cornstarch. When the mixture heats up in the oven or toaster oven, the extra starch will gelatinize and thicken the mixture. This also works for fillings like Nutella, or pistachio cream (yes, you can make a Dubai chocolate-style Pop Tart).
Also, make sure that the seams all around the Pop Tart are properly sealed so that the filling doesn't spill out when it's in the oven. A simple egg wash brushed around the edges of the layers before they're pressed together helps a lot, plus you can use the leftover for the top of the pastry.
Don't forget the frosting
Once you've got your homemade Pop Tart filling and the two layers of dough in place, your work is not done. Make sure to poke a few small holes around the top to vent the steam; this is called docking, and even store-bought versions have these to prevent the pastry from exploding when the filling heats up during cooking.
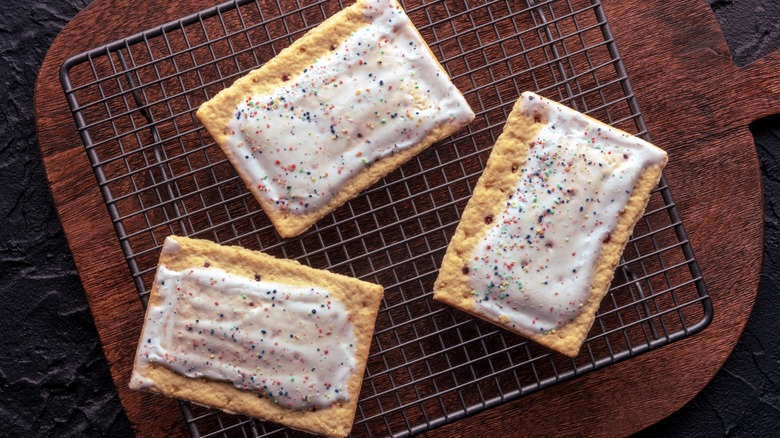
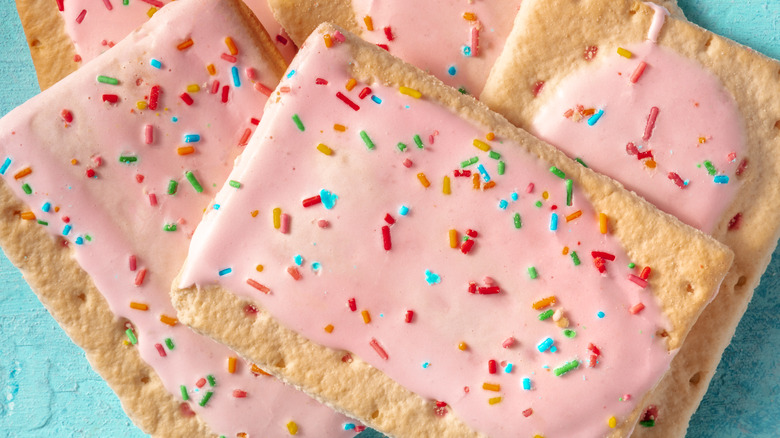
Finally, the texture and consistency of the frosting also matters. If you examine a store-bought Pop Tart, you'll notice that the frosting tends to be a glaze that hardens to create a shiny surface. While you don't need to crack the code on Kellogg's secret formula, you should at least follow suit so that your Pop Tarts don't turn into a big mess when you go to reheat (freshly made tarts should be frosted only after they've baked and cooled first).
Mixing whatever topping you have in mind with some powdered sugar is probably the most foolproof way to go, because this finely milled sweetener contains cornstarch, which will gelatinize and thicken when it gets hot. If your topping is already pretty sweet, in the case of melted chocolate or jelly, just use a teaspoon of plain cornstarch to get the same effect. Candy melts from the craft store are also a great frosting option. And of course, don't forget to add some rainbow or chocolate sprinkles for the full Pop Tart experience!