How To Prep Beef Tenderloin For Roasting, Locking In Moisture With Just Twine

The beef tenderloin is best known as the source of filet mignon and chateaubriand, two steakhouse cuts prized for tenderness. But while it might be most famous for the steaks it yields, the whole cut makes for a brilliant roast in its own right. As its name suggests, tenderloin is naturally tender, but it's not uniform in shape. The rear end of the cut, known as the head, is wider and thicker, while the other end (the tail) tapers off to a narrow point. Without properly addressing the disparity in thickness, the tail will overcook before the rest of the meat has had a chance to come up to temperature. There's a simple solution, though: trussing the meat.
Using a little kitchen twine, you can compact the tenderloin into a uniform cylinder, so that it cooks evenly all the way through. It's not just about aesthetics; it's a question of moisture retention. This is the same principle used in rotisserie cooking — it's much easier to achieve consistency with an even shape.
How to truss your tenderloin
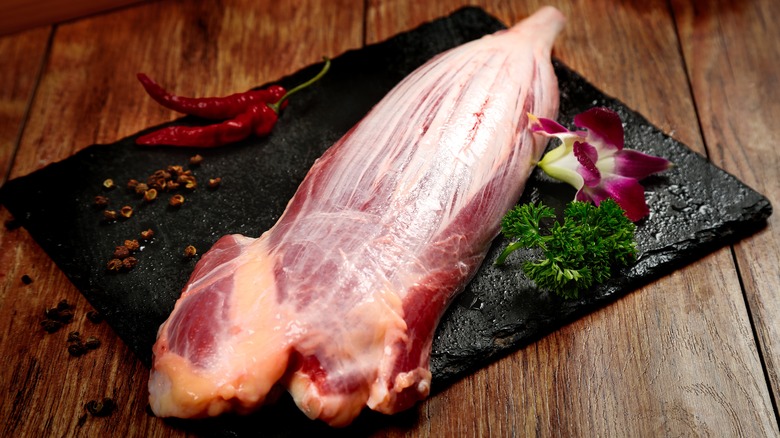
Before trussing your tenderloin to prep it for roasting, you'll need a big board, a sharp knife, and a basic understanding of the geography of the joint. Start by removing the chain — the sinewy piece of meat that runs down the side of the tenderloin. This should come apart easily from the main joint, and any usable meat can be trimmed from the chain and reserved for dishes such as soups or stir-fries, or cooked down to make a delicious beef sauce to go with your final roast.
Once the chain is removed, trim away the silverskin, an outer membrane that tightens and becomes tough during cooking. Then, remove excess fat until you're left with a smooth, uniform torpedo of beef. There are two approaches to trussing. One is to cut off the narrow end and cook it separately, as you would a steak. Alternatively, fold the tail back on itself to match the thickness of the central part of the steak. Then, use kitchen twine to hold everything in place, trussing the tenderloin every inch and a half, keeping the tail locked in place, and preventing it from bulging out during cooking. The meat should be snug but not too tight.
Take your tenderloin to the next level with these pro tips
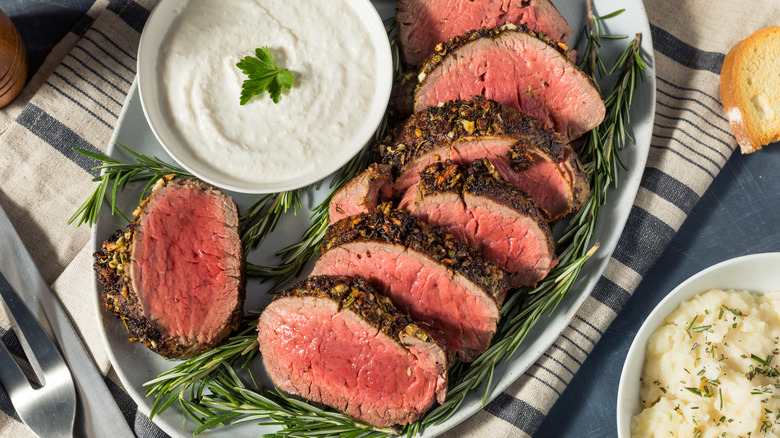
Once the tenderloin is prepped, there are two common approaches to cooking it: the traditional sear-then-roast method and the reverse sear. In the sear-then-roast method, the evenly shaped tenderloin is seared in a pan on a high heat to develop some color on the outside, then roasted in the oven on a medium-high heat to finish cooking. The reverse sear takes the opposite approach, with the tenderloin roasted at a low temperature before being seared briefly at the end.
Both methods make for a delicious final product, but searing won't "lock in moisture," a long-held myth. Carefully controlling the internal temperature of the meat while it cooks is the key to a juicy roast. While more experienced cooks can rely on touch, beginners and home cooks are better served using a meat thermometer inserted into the thickest part of the roast, the most reliable way to determine doneness. Since the tenderloin is such a lean cut, it's best cooked rare, with an internal temperature around 120 to 125 degrees Fahrenheit. Allow the meat to rest before slicing so the juices redistribute, resulting in an even, perfectly pink roast.