12 Tips You Need When Cooking Ham
Whether it's layered on a sandwich crafted with thick, artisan sourdough, tangy honey mustard, and Swiss cheese or sliced hot out of the oven and partnered with homemade mashed potatoes and green beans, ham is one of the sweet meats that lives rent-free in our hearts and tummies for breakfast, lunch, and dinner. Of course, there are countless kinds of pre-made hams available for you to easily pick up and serve for your next meal, but where's the fun or culinary prowess in that?
Making a ham at home may seem as easy as popping it in the oven, glazing it with the provided packet, and slicing it when it comes time for dinner, but there's actually quite a bit more nuance to crafting and creating the perfect ham than there may appear. From choosing the right kind of ham (bone-in, fresh, country, etc.) to knowing what to serve with this sweet meat, here are tips and tricks you need when cooking ham.
1. Choose the right ham -- city, country, or fresh
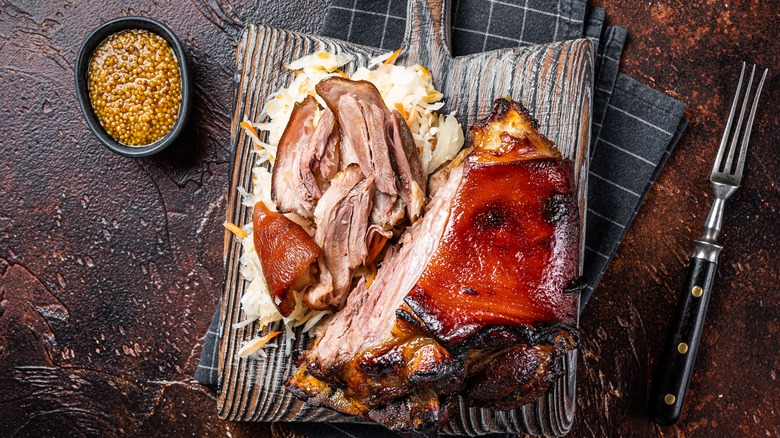
It may come as a surprise, but there's more to ham (and to life) than the usual spiral-sliced, bone-in variety you see piled in the meat area of your grocery store. There are city hams, country hams, and fresh hams to choose from. The first, and likely most common kind of ham is a city ham; this is the variety you'll see fully cooked, cured in water and salt, and ready to heat and eat.
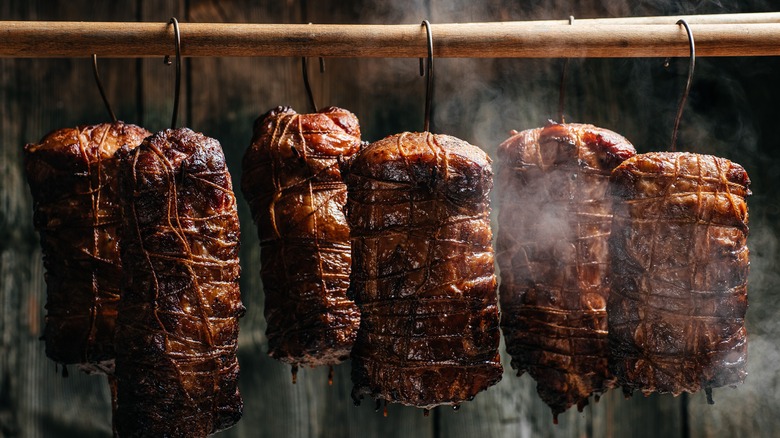
The second kind is a country ham, which is cured and dried with only salt, hung to dry, uncooked, and is fairly difficult to track down at the average grocery store. These can also be smoked in addition to being dried with salt or soaked in water and then cooked, and are usually served in thin slices like a prosciutto. Lastly, you can opt for a fresh ham but may have some difficulty finding one. They're uncured, uncooked, and completely raw — ready for you to put your finishing touches on them. All three varieties of hams are usually sold as the shank or butt of the pig.
2. Boneless vs. bone-in
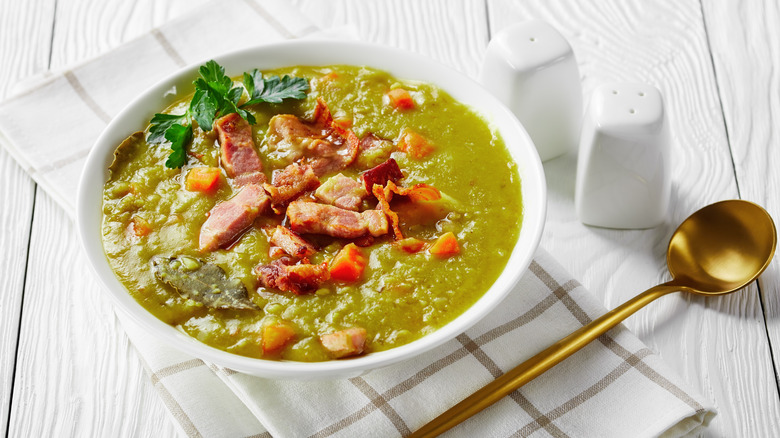
Once you've decided whether a city, country, or fresh ham is the variety for you, you'll need to decide whether you want a boneless ham or a bone-in ham. There are pros and cons to both, of course. A bone-in ham tends to be more flavorful — as most meats with bones in are. Think of chicken thighs on the bone, drumsticks, and even beef ribs. All carry far more flavor than their boneless alternatives. Additionally, ham on the bone means that after you've fed your crowd, you can use that bone (and any leftover meat) to create classics like split-pea soup, navy beans, and more.
On the flip side, a boneless ham — although significantly less flavorful than the bone-in variety — does offer some good qualities. First and foremost, it's much, much easier to cut and serve than the bone-in variety. You won't have to work around a giant bone peeking out of your ham. There will likely still be leftovers, but you won't have that delicious ham bone ready for your next soup or slow-cooking adventure.
3. Check the water content

It may sound strange of us to advise you to check the water content of ham, but the amount of liquid in your porky product can actually affect everything from taste to cooking times. City hams can take on water while they're being brined, but they can also be injected with water by the purveyors to up the weight and, thus, charge the consumer a bit more. There are a few different ways this is communicated to the customer, so acquainting yourself with the language used on the ham's packaging can help you make the best choice.
First, you may see a product just marked "ham." This means no additional water has been added. Second, you'll see products marked "ham with natural juices" which indicates that the pork contains about 7-8% added water. Third, there's "ham, water added." This means that the ham itself can contain 10% added water by weight. Lastly, you may see "ham and water product," which can contain any percentage of added water. This will be the least "hammy" tasting and is likely best avoided. They can also have an odd texture — less like meat and more like tofu.
4. Estimate how hungry everyone is
You've snagged your bone-in, spiral-sliced, city ham — no water added. But will it be enough to feed the crowd you have popping over for dinner? It's best to treat the ratio of ham to people the same way you'd treat other meats, like turkey at Thanksgiving or steak for your Cinco de Mayo party.
The general rule of thumb is to allow for about one to one and a half pounds of ham per person if you've purchased a bone-in ham. If you've grabbed a boneless ham, go down to about half a pound to one pound per person. So, if you've got 12 people coming over, grab a 12 to 18-pound bone-in ham or a 6 to 12-pound boneless ham. If you want leftovers, though, be sure to pad those numbers by at least a pound or two. It'd be a travesty to not have enough meat leftover to create your grandmother's famous split pea soup, right?
5. Skip the marinade

We've talked at length about brining your chicken, tenderizing your steak, and even soaking and marinating your pork in Dr. Pepper. But one meat that you want to skip the marinating step for is ham. Most hams — namely, city and country hams — have already been brined, salted, and/or smoked. Country hams are usually soaked in water again before being cooked. City hams sometimes have additional water added, as we stated earlier. All that said, marinating again would be kind of a waste of time. Either of these varieties is going to be juicy and delicious even without the extra step of marinating.
A simple glaze is all you'll need for a ham once it's headed into the oven. The fat content of ham, too, will keep it juicy, so adding more salt and liquid via a marinade isn't necessary. If, however, you've either landed a fresh ham or are determined to pay homage to your grandmother's ham recipe and, thus, need to marinade, there are several options. The most popular concoctions usually lean on either soda — like root beer, cherry-flavored, or cola — or pineapple juice.
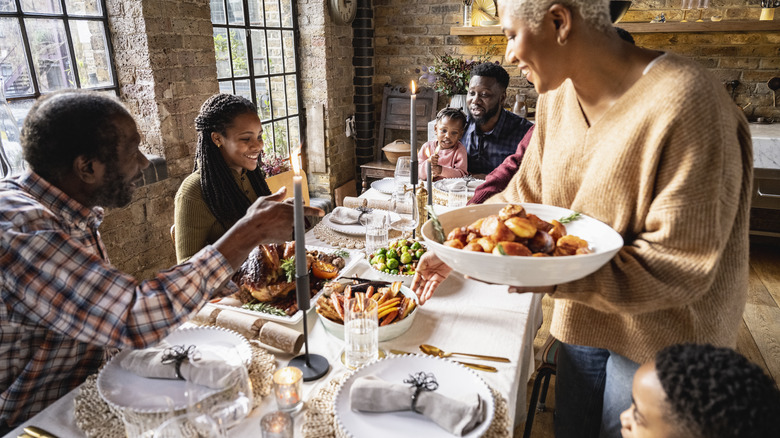
6. Consider your sides
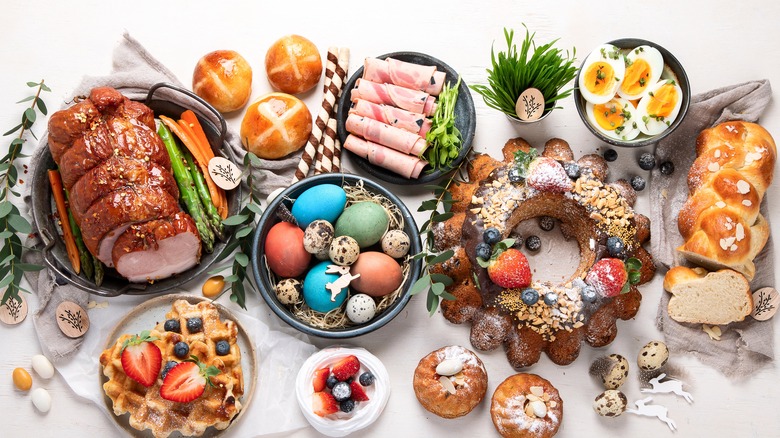
Once your ham is prepped and ready, it's time to consider what you'll serve alongside it. The sides that go best with ham vary by season, so your additional dishes all depend on when you're serving this hunk of butt.
If you're planning on serving ham in the spring — say for Easter — or just a seasonal brunch or lunch, there are several fresh and light options. Asparagus is in season between late March and June, so serving up the roasted or blanched stems alongside your ham is a great option and its earthiness is complementary with your salty ham. Deviled eggs are also a classic option and are just as at home during a ham-focused brunch or dinner.
If your ham dinner is set for winter, cozier dishes are necessary. Cold-weather vegetables like broccoli should stand in for asparagus, as can a hearty kale salad studded with apples, pecans, and sharp cheddar. Macaroni and cheese — the homemade variety with a thick and cheesy bechamel and perhaps a crust of baked bread crumbs — feels like the right move and is worth using as a cheesy bed for a few slices of ham. And, it goes without saying that potatoes and ham pair together like peanut butter and jelly and can be adapted to fit the season. Au gratin potatoes are a beautiful addition to your spring table while a classic mashed potato works perfectly for winter.
7. Cook at the right temperature and preheat your oven
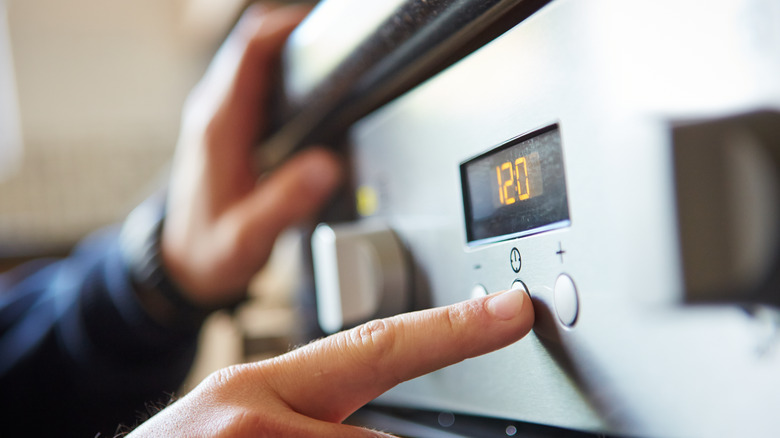
Time to get down to business — ham business, that is. Now that you know your menu, have educated yourself about it, and have gotten the right (see: perfect) ham, you're ready to start prepping to cook this hunk of meat. Preheating your oven is the first, and perhaps most important step of cooking your ham.
In addition to helping properly and efficiently cook your ham, it's also a matter of safety. Preheating your oven can prevent the growth of microbes and dangerous bacteria on your meat. The temperature between 40 and 140 F allows for some funky, nasty stuff to grow, and ensuring that your oven is preheated and that meat going in won't linger in the danger zone is best practice. So, once your oven is preheated to about 325 F, you're ready to place your prepped ham. Also, make sure your ham is fully defrosted. Putting in a semi-frozen or fully frozen ham will place it in that danger zone, again, and runs the risk of not serving a hot, delicious main dish.
8. Prep your ham
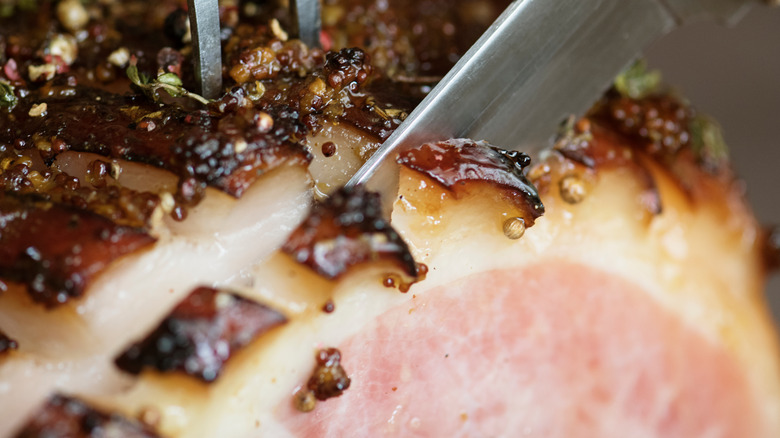
As your oven preheats, it's time to address the elephant — er, pig — in the room. Unlike roasting a chicken or braising a hunk of brisket, ham needs a little more prep, knifework, and love before it goes into the oven. This can come as a surprise to some since most hams are already cooked and you're essentially just heating them.
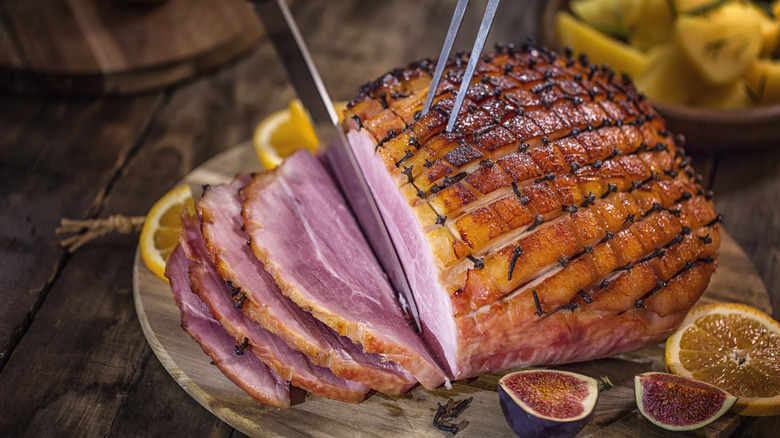
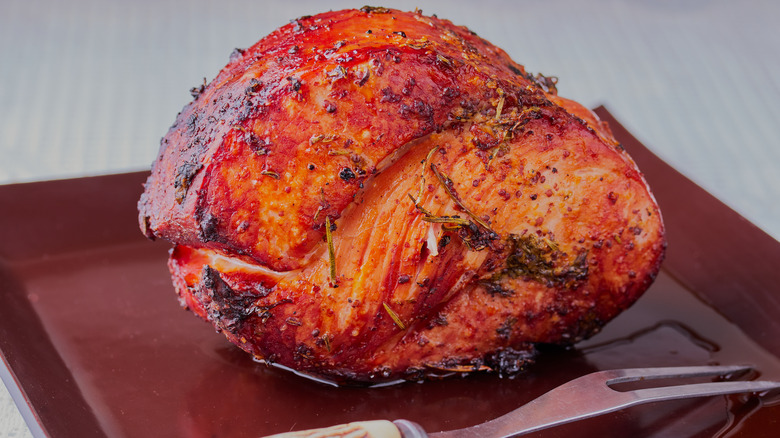
First, if it isn't already, you'll want to score the top of your ham. Scoring means creating that perfect diamond, criss-cross pattern you see on every centerfold ham in any culinary magazine or cookbook. To achieve the look, take a very sharp knife and cut into your ham between ¼ inch and ½ inch deep. Go all the way across, then repeat going the opposite way, giving yourself that diamond effect. The scoring will allow your glaze to snuggle into and penetrate the skin of the ham.
Secondly, once you're finished scoring your ham, you'll want to move your ham to a roasting pan, then cover the entire thing in foil. Doing so will essentially steam the ham, keep it from drying out, and ensure the meat is tender. You'll be lifting the foil occasionally to baste and glaze your ham, so make sure it's not too tight or you'll run the risk of burning yourself every time you need to move it.
9. Low and slow is the way to go
Ham is a bit more of an exercise in patience than other meals. Despite it being smoked or precooked in most cases, ham isn't usually the meat you see on a weeknight dinner table. Rather, it's the star of holiday meals, buffets, and nice get-togethers thanks to its easy prep but low and slow cooking demands.
Low and slow cooking for your ham will ensure a juicy, evenly cooked meal without running the risk of drying out or your glaze burning. Unlike chicken, your ham doesn't need to reach a crazy high internal temperature to ensure it's safe to eat. Hence why a low and slow approach is best here. The ideal internal temperature for perfectly cooked pork is around 145 F, so set your oven for between 250 and 325 F. Place your scored, covered ham into the oven, and cook for 20 minutes per pound. So, if you've snagged a 10-pound ham, plan to cook for around three hours and twenty minutes.
10. Be generous with glazes and basting
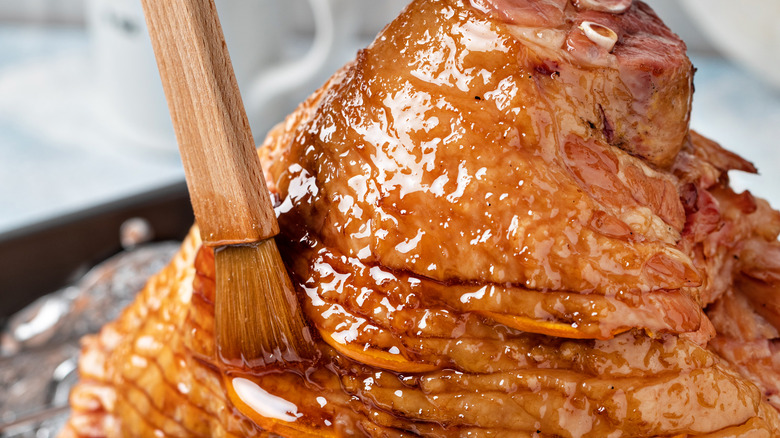
Although a marinade is not needed for your ham — which has likely already been brined and or soaked in water — a glaze most definitely is. If your ham came with a small foil packet containing a glaze, discard it and make your own. You'll be able to control what goes into it and will have more to use when it's time to brush it on. The purpose of a glaze is to add even more depth of flavor to your ham, along with a lovely caramel color and sticky sweet texture. Delicious glazes run the gamut from those utilizing everyday items like cola to bourbon brown sugar glazes that'll take things up a notch or three.
Once you've found a recipe for your glaze, the next step is knowing when and how to apply it. Unlike with a marinade or basting jus, glazes shouldn't be added to your ham until the meat has reached around 120 F — arguably the best time to add them and with only about 20 minutes of cooking time left. Because glazes frequently have a high sugar content, adding it earlier could mean a burnt caramel-like sticky substance on your pan and an acrid taste on your meat. When it is time to glaze, remove the foil from your ham and baste it with a basting brush and your glaze. Make sure to get the glaze into the scoring you've worked on and all over the ham itself. Then, return the ham to the oven without the foil on it.
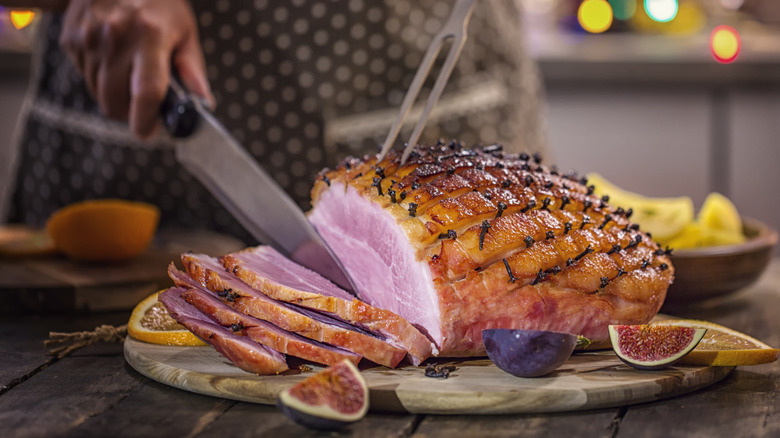
11. Let your ham rest
Once your ham is ready to leave the oven, it's of the utmost importance that you allow it to rest before slicing into it. You wouldn't pull a steak off of the grill and immediately slice into it or pull a roast chicken from the oven and offer your guests a leg, wing, or thigh right away. The same goes for ham.
Once you remove your ham from the oven, you should loosely cover it with foil and leave it to rest (and finish steaming) for 15 to 20 minutes. Doing so will allow the juices to travel back from the outside of the ham into the center and distribute evenly throughout the meat. You can also, at this juncture, baste the ham one final time with any remaining glaze you have for a final burst of flavor. After about 20 minutes, you can slice into the ham and serve it. If it's a spiral-sliced ham, you only need to follow the pre-scored slices and serve them on a platter. If it's not pre-slice or spiral, slice around the bone (if there is one) and serve.
12. Have a plan for the leftovers
Hopefully, you made enough delicious, sweetly glazed ham to have a plethora of leftovers. Leftover ham can be stored in the refrigerator for up to five days. You can also freeze slices and pieces of your ham, which can be a lot easier to grab and go when it comes to making future sandwiches or recipes.
As far as what to make, the possibilities are pretty endless. If you have guests staying over, try using that leftover ham in a recipe for a classic quiche Lorraine or ham and cheese strata — both of which can be made quickly and easily for a delicious breakfast. Of course, the easiest route is to use those slices of ham for a delicious ham and cheese sandwich, which you can also take to the next level by creating a Monte Cristo sandwich with fried ham and Swiss cheese.
But perhaps the most well-known route to take with ham leftovers — especially the ham bone (which you should be saving) — is to create a split pea and ham soup. This slow-cooking soul-warmer can be made in a Crockpot or stock pot on the stove and only requires a bit of prep and additional ingredients of onions, carrots, butter, and chicken stock. Whatever you choose to create, having leftovers from your ham is a wonderful gift for additional dinners or quick and easy meals.