13 Tips To Make Your Baked Potatoes Taste Like They Came From A Restaurant
Spuds are truly having a moment these days, and restaurant chefs are bringing their potato expertise to the table practically everywhere. In most restaurants, an ordinary tater becomes a crispy, fluffy, and downright delicious meal accompaniment with seemingly minimal effort. But, if you have tried to duplicate perfection at home with little to no success, chances are a key step, or important detail has been overlooked.
Regardless of whether you want a traditional-style spud to balance out your dinner or are contemplating turning a baked potato into the star of the show, there are more than a few ways to go about this. That said, the secret to making restaurant-quality baked potatoes begins well before you add an array of toppings to your steaming hot spuds. So, to ensure parallel quality at home, here are some helpful tips to make your baked potatoes taste like they came from a restaurant.
1. Use Russet potatoes
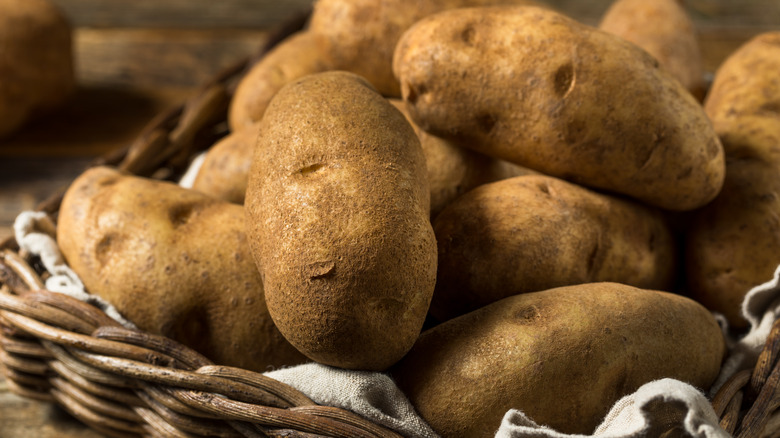
Before attempting a baked potato recipe at home, you need to make sure you are using the right potatoes. A single trip to the grocery store or farmers market will have you face to face with a large selection of spuds — likely everything from Yukon Gold and Red Gold to All Blue and Purple Majesty. Yet, there are typically no signs that point a person in the right direction for selecting the correct potatoes for this dish in question. Any experienced cook will tell you, however, that Russet potatoes are your best option for achieving roasted goodness when baking taters.
Available all year round, these oblong, starchy gems have the ideal consistency for baking. With a wonderful texture, hearty shape, and non-overpowering flavor, step one is definitely grabbing some Russet potatoes. When shopping for your Russets, it is highly recommended that you choose spuds that are a decent size (opt for uniform potatoes as this will allow for more even cooking). Your spuds should feel dense and be all-around smooth to the touch. In general, shoppers should avoid buying potatoes with bruising, damaged or broken skin, greenish coloring, and those that have already started growing eyes. Of course, you can use sweet potatoes (also known as Jewel Yams) if you prefer here — just make sure they meet the same criteria.
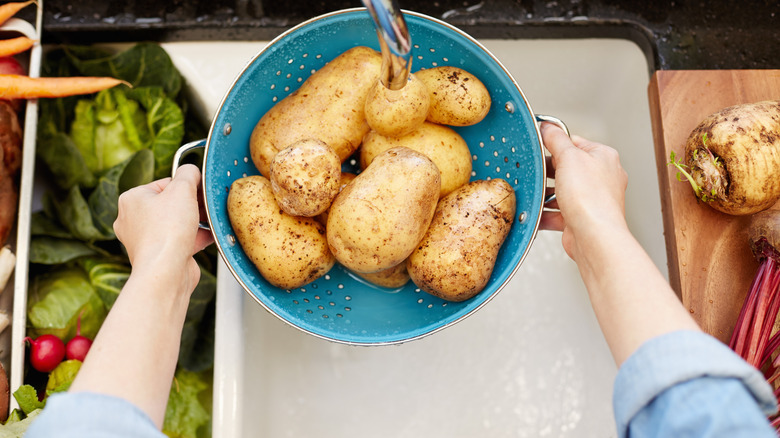
2. Clean and tenderize your spuds
Once you have your Russets in tow, it is time to prepare them for baking. Most dining establishments opt to bake potatoes in the oven, so if the goal is to have roasted spuds that rival the ones you can order at a restaurant, then you should also use your kitchen range. However, it is worth noting that the prepping process for cooking Russets via the stove is slightly different than if you were to microwave or grill your potatoes. Even so, you want to start out by rinsing your spuds under cold water — a vegetable brush or scrubber is handy here. For extra clean potatoes, you can submerge them in a white vinegar bath (one part vinegar and three parts water) for a few minutes.
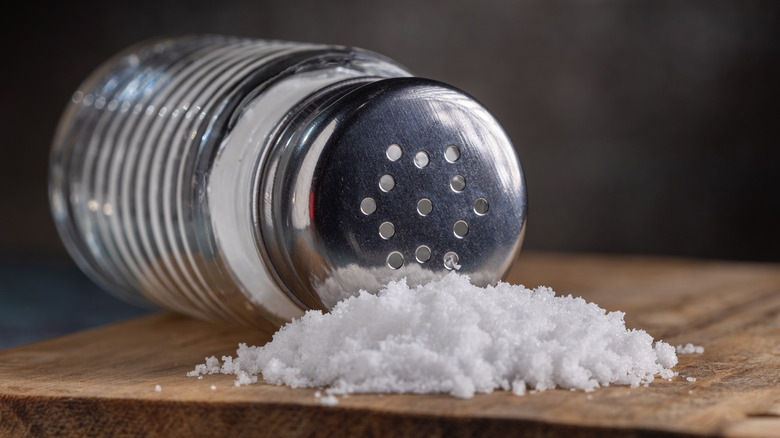
After thoroughly washing and, giving your spuds a quick soak, next pat them dry. Here is where you want to take an additional step for oven-baked spuds, especially, and add kosher salt to the mix. You can further clean and tenderize your spuds by giving them a generous sprinkle. The added salt brings out the flavors of the potato skin. Plus, a dash of salt helps another must-have ingredient produce some of the most crispy, golden brown baked potatoes that are truly restaurant-worthy.
3. Coat the outside before cooking
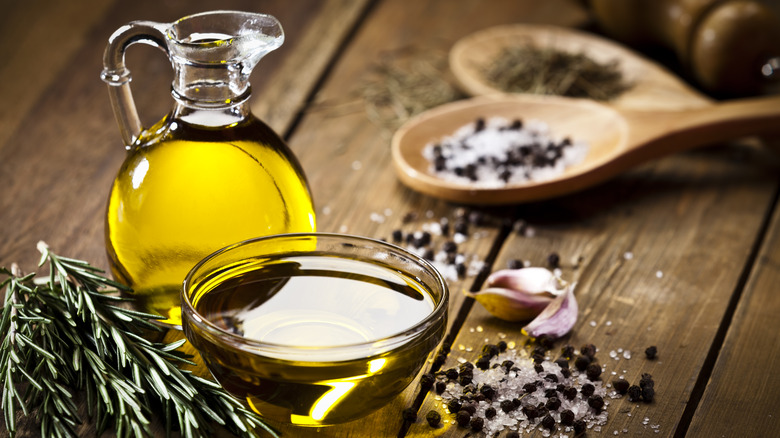
Since most restaurants skip the foil in order to achieve a perfect oven-baked finish, you should, too. Sans the foil, chefs typically coat the outside of the potatoes with some olive oil. As briefly mentioned, drizzling the well-seasoned outer shell with olive oil creates an even crispier outside that compliments the extra fluffy inside of the potato. If you are not the biggest fan of cooking with olive oil, however, you can substitute it with just about any oil, such as vegetable, peanut, sesame, grapeseed, sunflower, or canola oil. Melted butter can also be used as an oil alternative.
That said, coating the outside of your potatoes before cooking is still very much a personal preference. Russet potatoes often get crispy on their own when baked, so if you do not want the extra calories or do not like the taste of oils in your foods, there is no harm in skipping this step. But, if you have no issues with adding oil, then for restaurant-quality baked spuds, it is highly recommended that you give your taters a light coating before you cook them. And if you are worried about adding too much oil, make sure you use an oil spritzer or brush to avoid going overboard.
4. Prep for your chosen cooking method
Of course, there is more than one way to bake a potato. For most people, the easiest and quickest way to whip up some first-rate baked spuds is in the microwave. Some may decide to use their slow cooker or crock pot, and depending on the weather, foodies may even prefer to cook their taters on the grill. All of these are acceptable ways to make a baked potato. Still, there is just something about an oven-baked potato that is next level, and the professionals tend to agree.
Even if you decide to cook your Russets without the oven, it is important to prep your spuds for your chosen cooking method. This means cleaning, seasoning, poking holes with a fork, and taking into account when things differ in the recipe. For instance, when cooking your potatoes in the microwave, you may cover them with cloth, microwave-safe wrap, or nothing at all. When grilling or slow-cooking your taters, you must wrap them in aluminum foil for the bulk of the cooking process. There are also different tips and tricks, and each method has its own cooking time and temperature requirements. So, remember to prep your spuds with your preferred cooking method in mind.
5. Cook at 425 to 450 F for almost an hour
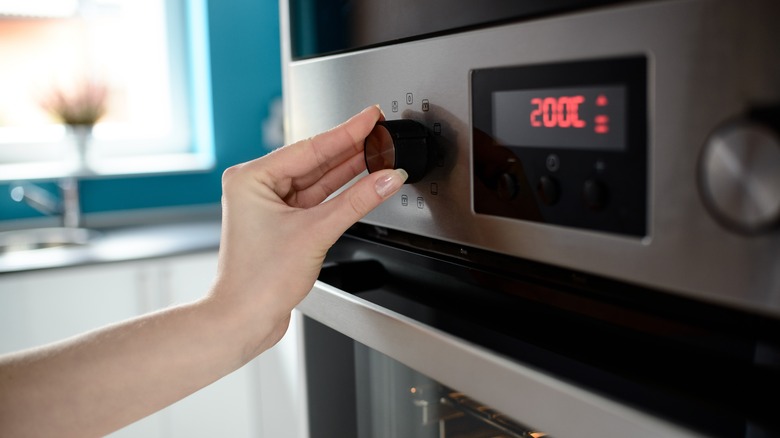
In order to achieve restaurant potato perfection, cooking your spuds in the oven is still the number one option. So, once you have prepped your taters for your preheated kitchen range, it is time to pop them in. As a rule of thumb, 425 F is the normal setting for your oven here, but if you need some wiggle room, you can go as high as 450 F. Once your range reaches the right temperature, you can place your potatoes directly on the rack or on a thin baking sheet.
Your baked spuds should be ready in roughly 45 minutes to an hour. If you happen to be dealing with extremely large potatoes, they generally take a little longer than an hour, and even up to 75 minutes. Flip your spuds at least once halfway through to ensure an even cook. Ideally, your delicious baked potatoes should be golden-brown and slightly soft when done. To determine if your Russets are cooked all the way through, regardless of their size, use your kitchen thermometer — the internal temperature of your potatoes should be around 208 to 211 F.
6. Use your oven's grates or a wire rack
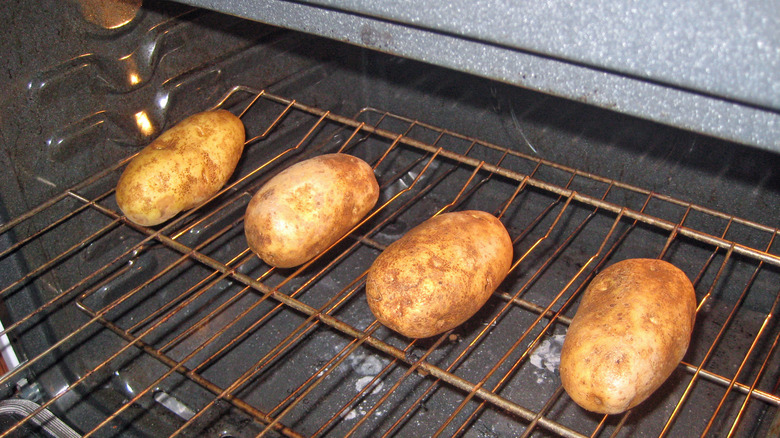
When cooking in the oven, it may feel odd at first to put your potatoes directly on the grates without anything to support them underneath. People are often accustomed to placing their taters on a baking sheet with parchment paper or wrapping their spuds in foil. But one of the reasons why restaurant baked potatoes taste so good is because kitchens know that using wire racks or oven grates allows all sides of the spuds to be exposed to hot air.
Using a sheet pan or even foil only increases the likelihood that your potatoes will not be cooked evenly. For home cooks who still need space between their potatoes and oven – a separate wire rack placed in a rimmed baking sheet or dish allows for a similar effect and does not leave your spuds with hard spots or overcooked sides. However, it is worth noting that your wire rack needs to be top of the line. Otherwise, your baked potatoes will not reach their full potential. Keeping all this in mind when you place your taters on a wire rack or oven grate, try not to crowd the potatoes together — instead, make sure you give them enough space so they can all cook uniformly.
7. Immediately slice open potatoes to let out steam
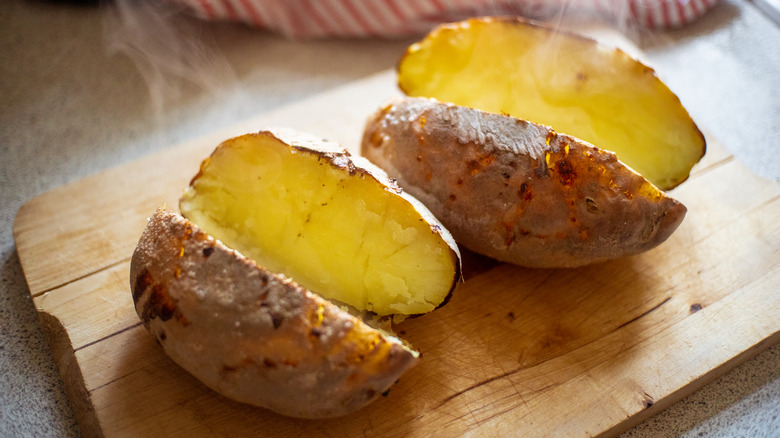
Letting the steam out of your freshly baked potatoes is just as important as poking holes in them with a fork before cooking. The principle here is the same — you do not want your spuds to explode inside or out of the oven. Like most potatoes, Russets are full of moisture, which inevitably turns into piping-hot steam during the cooking process. Therefore, you should always take the time to release the water vapors even further after baking for fear of erupting hot potatoes, as well as a few other reasons.
When you slice open or score baked potatoes, you also prevent them from being waterlogged, help maintain that crispy outer shell, and keep those spuds from losing that great fluffy texture.No one wants a soggy and lackluster potato at home or in a restaurant. So once you have determined your potatoes are done, do yourself a favor and slice your oven-baked taters open immediately to let the steam out. You can score your spuds by making small shallow cuts or by simply running a sharp knife down the length of the potato.
8. When microwaving, the quantity and size of your potatoes matter
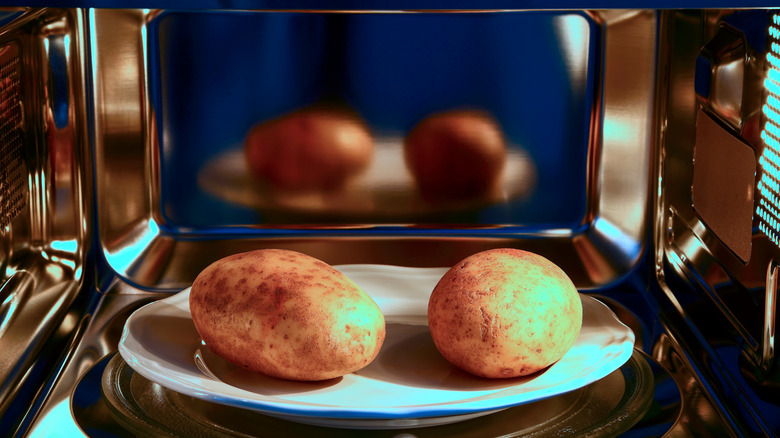
For those up for the challenge of making baked potatoes taste like they came from a restaurant with only the help of their microwave, there is hope. In just under 20 minutes or less, you can take your properly prepped spuds and turn them into fluffy delights. Here, prepping is pretty straightforward, and after cleaning your potatoes with water, you can skip patting them dry. Instead, poke your spuds with a fork and place them on a microwave-safe plate.
The cooking time for Russets varies depending on their quantity and their size. But, typically, four decent-sized taters take about 15 minutes in the microwave. Alternatively, two average-sized baked spuds need about 10 minutes at 100% power. Overall, if your potatoes are a bit larger or similar to the size you can get in most dining establishments, you will need to add a few more minutes to the total cooking time. Once done, drizzle a little oil and salt before slicing them open and adding your toppings.
9. Add cooked potatoes back on the grill to crisp them up
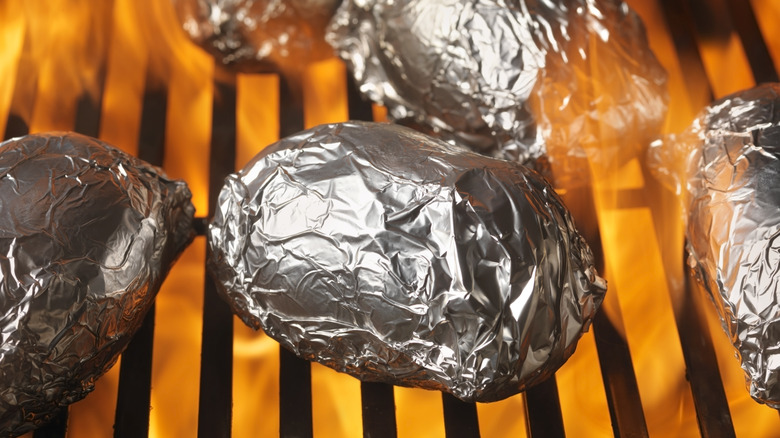
If you decide to charbroil your potatoes, on the other hand, then the standard rules apply — clean and thoroughly dry them, season with salt and oil, prick all sides with a fork, and double wrap them in heavy-duty foil (if you so choose). While prepping your taters, preheat your gas barbecue to about 400 F (350 F or less is fine for charcoal or regular grills). A couple of average-size spuds usually take one hour to grill, and you will want to flip them over at least once around the halfway mark.
After reaching an internal temperature of around 210 F, remove the foil and place the potatoes back on the barbecue. Cooking your spuds over a slightly lower direct heat for 1 to 2 minutes per side will give them that crispy finish you crave. If you prefer not to use aluminum foil here, however, a grill temp of around 450 F or higher works best, and in about 12 minutes or so, your potatoes should be done. For the best-grilled spuds sans the foil, you will want to pre-cook them for a little over 2 minutes per tater (flipping them after a minute) in the microwave.
10. Don't be afraid of the air fryer
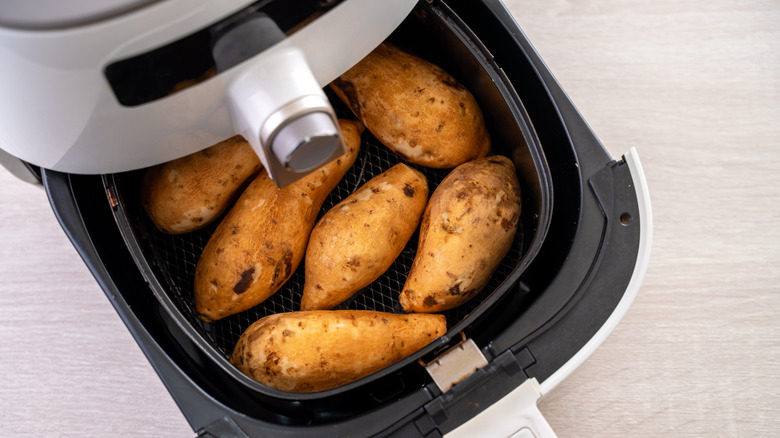
With all this talk of ovens, microwaves, and grills, you might think restaurant quality cannot be found in your handy air fryer — well, think again. Like with other recipes modified for the air fryer, baked potatoes can be whipped up in no time at all with your countertop cooker. Simply scrub, dry, season, coat, poke, and pop your Russets into a preheated air fryer at 400 F for 45 minutes (for 3 or more standard-size potatoes).
Remember to account for their size and quantity when figuring out your total cooking time, and your baked spuds will be hot, fluffy, and ready for toppings in less than an hour. Of course, you should still slice your potatoes and give them a quick rest before plating. But this fool-proof, set-it-and-forget-it method definitely helps to speed things along in the kitchen without sacrificing texture, flavor, or any of that starchy goodness.
11. Slam down your potatoes
Yet another bake potato tip that helps elevate your home cooking is slamming down your spuds. A tried-and-true favorite of Martha Stewart, slamming down your potatoes once you have cooked them is almost guaranteed to give you amazing restaurant-quality vibes at home. Though typically done with piping-hot taters fresh from the oven, you can slam down your spuds, no matter the cooking method, on the nearest hard surface or countertop for a light and airy baked potato.
Even so, if you want to follow Martha's recipe to the letter, she typically cooks her taters in an oven at 400 F for roughly an hour after the standard oven-baking prep work. Once done, you will need a kitchen towel to help smash and keep your spuds intact during this fun process. After bursting them open, you can dress your well-fluffed baked potatoes with butter and any other toppings you fancy.
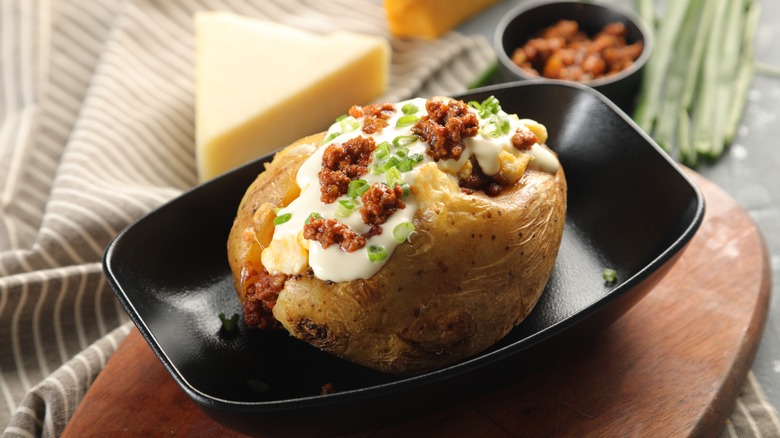
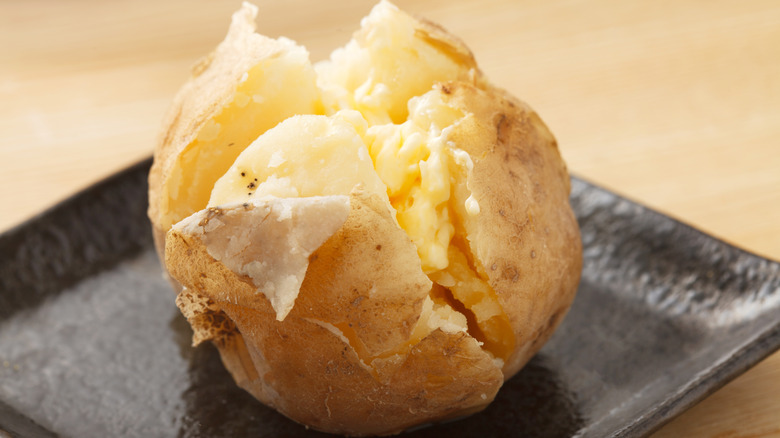
12. Choose your toppings wisely
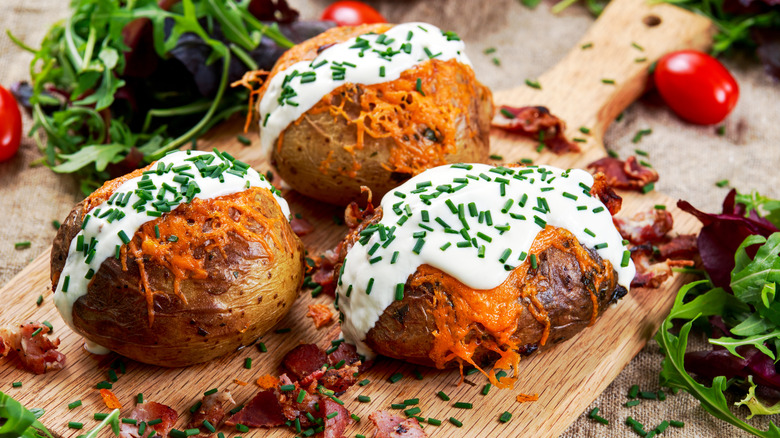
Now that you have perfected the art of baking potatoes, it is time to choose your toppings wisely. With more options and flavor combinations than you can imagine, there is no reason you cannot dress up your spuds however you see fit. Everything from ranch dressing, steak bites, and caviar to butter, sour cream, and chives can adorn your baked taters. Restaurants have a few tried-and-true classic toppings, but every place dresses its potatoes differently, and you should do the same.
What's more, you can also turn them into twice-baked potatoes or use your oven-roasted spuds as a base for a hearty meal. For a twice-baked potato, you will need to mix in your desired toppings (bacon, cheese, broccoli, and so on) with the scooped-out flesh of your cooked taters, re-assemble, add more cheese to the top, and then pop them back in the oven for 15 more minutes. But, as long as you end up with a flavorful bite to eat, there is no wrong way to go here.
13. Plate up and enjoy
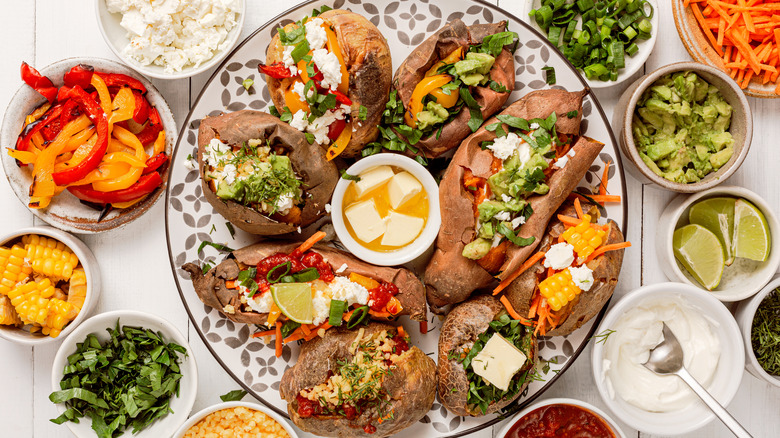
Baked potatoes are truly an art form that you can interpret any way you like and when you cook them properly, the possibilities are practically endless. Your spuds can be an amazing side dish that adds to your overall meal or the main attraction topped with your favorites. You can even smash your Russets and plate them with an array of add-ons in the form of a baked potato dinner board.
Ultimately, you can create baked potatoes that wow and taste like they came from a fancy dining establishment at home with just a few alterations. You can even stick to your preferred cooking method and still come out on top if you take the time to prep like the pros. And once cooked just right, a crosscut here, a push there, and a step outside your cooking comfort zone will have you serving up a hot, authentic restaurant-style baked potato before you know it.