Avoid These Mistakes Everyone Makes When Roasting Chicken
Chicken is a main staple in myriad kitchens, with novice to experienced cooks testing the most innovative ways to prepare it for any dinner table. Sure, Gordon Ramsay, Ina Garten, and other culinary connoisseurs have expert takes on their epic experiments with this lean meat. However, new chefs are taking their first steps out of their cooking comfort zones to take on the challenge of chicken, especially roasting it. What happens when mistakes are made?
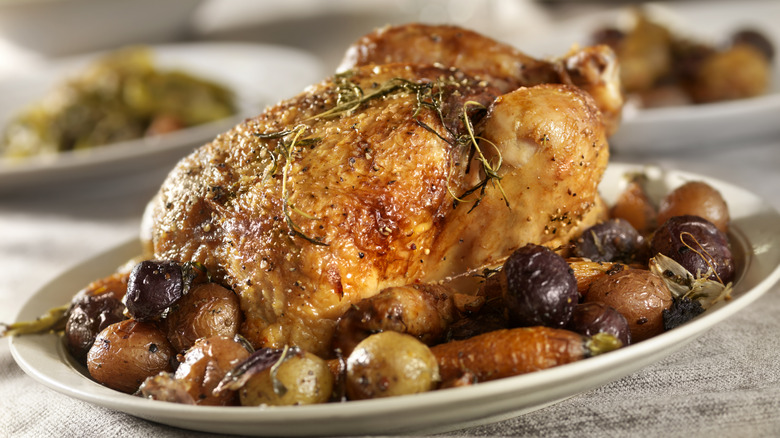
It seems important to know that a mistake can still make way for a ravishing roasted chicken entree (whether the poultry is paired with bread, aromatic vegetables, or other side pieces). The chicken starts off as a blank canvas — until a chef adds some culinary color to it. It takes a fair amount of risk, skill, and creativity to bring and balance bold flavors to create an incredible roasted chicken dish that makes a believer of any critic. Chefs may incur a few mistakes along that road of culinary risk — and here are a few of those common blunders.
Failing to trust in the truss technique
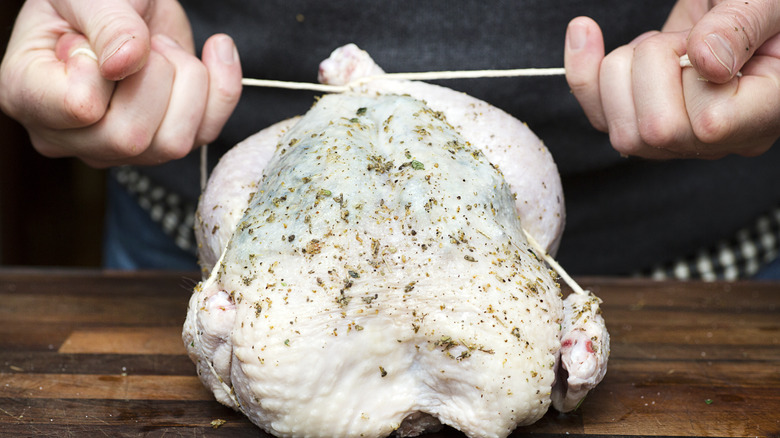
An unevenly cooked chicken can sour any great dinner or party, but one simple yet effective tool can solve that problem. Chefs can use one multi-faceted item — any twine commonly found around their home — for a perfect cook. The key trick is to use the twine to truss or tie chicken legs together during the prep stage. But what is the best kind of twine for this job?
There are several types of string that make shorter work of daily tasks; however, tying up a chicken ready for roasting takes a specific type of twine. Professional chefs agree that butcher's twine, commonly referred to as cooking or kitchen twine, is the appropriate choice for trussing poultry. The string is flexible and heat-resistant. Butcher's twine is perfect for trussing poultry, tying roasts to ensure they keep their shape, securing stuffed meats, and tying off a bundle of herbs. Twine is also a time-saving investment; this is a method that will help with the truss and take away any more of your fuss!
Forgetting that the pan makes the poultry
Chicken is often the main star of any meal, packing a collection of herbs, salt, heat, acid, and spices that can please any palate. Roasting offers an option to elevate your chicken — literally!
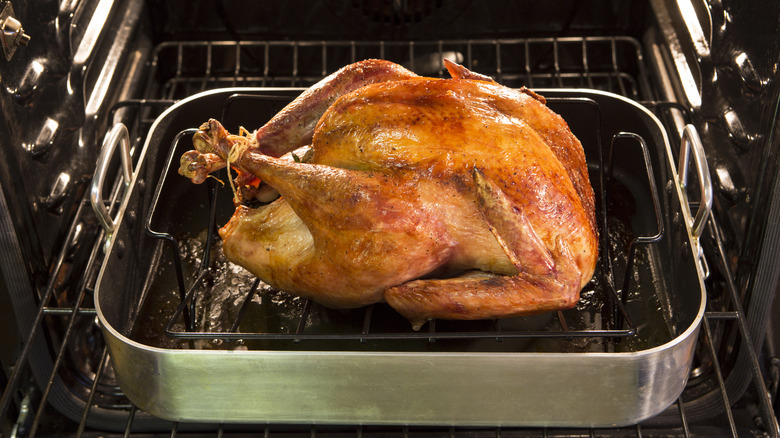
Cooks can purchase a roasting pan with a rack that will keep their bird from touching the bottom. Why, you ask? It is an unofficial rule among chicken lovers that the longer that the chicken sits on the bottom during the roast, the more moisture it soaks up during the allotted cooking time. Those who place their chicken on the rack will avoid a soggy mess if the poultry is left sitting too long in the pan's juices.
The best roasting pans have racks that can be easily adjusted to suit taste; you can place your poultry in the optimal spot to ensure circulation to create juicy and savory chicken. The high-utility piece of cookware proves its worth in the kitchen when put to the roasting test. While a roasting pan is essential for roasting large birds or a classic honey-glazed ham, you can also use it to roast potatoes and any manner of vegetables. You can also use a roasting pan for baked pasta dishes and other casseroles, including Thanksgiving dressing or stuffing, as well as cakes, rolls, and other baked goods.
Not taking time to turn your bird
Your bird needs to absorb dry heat from all sides of your oven. Cooks may forget that the chicken needs to be turned while roasting for the most succulent bite. A quick turn will allow the chicken's natural juices to flow to create a tender bird, but the timing of this move is crucial.
What factors influence the timing? Physics — mainly how your oven transfers heat to food — is a fine point of consideration when figuring out the time aspect. When hot air is dispensed in your oven, it will rise to the top; this action results in having a hotter temperature at the oven's top versus its bottom. The disparity can vary for particular ovens — which means a chef has to know his or her oven well enough to judge how quickly or slowly food may cook fully.
However, one can apply a general rule and take it with a grain of salt here. Many experienced cooks recommend that a good time to turn your poultry is when you are nearly in the final stretch of cooking time. A guideline of 10-20 minutes left on your timer proves to be sufficient, give or take a few minutes.
Cooking a naked chicken

You can — and should — create a rub for your chicken. The bird will be an under-performer if left bland. The flavor potential will take a big fall, and the taste will fall flat on the tongue. Your bird will also fail to develop a brown exterior for a divine appearance deserving of a central place on your dining table. Additionally, the skin will lack firmness or crunchiness.
Before placing your bird in the oven, your prep time should include a seasoning session. This is a chance to dry (or wet) brine your chicken. If you seek to create a full-bodied seasoning solution for your roasted chicken brine, a unique herb-and-spice blend will bring a bounty of flavor. Your salt, garlic, spices, and other herbs will cling to the bird's body, including the cavity, if rubbed with gusto. Dried herbs will do the best job here, too. Herbs such as cumin, thyme, or rosemary can brighten and balance the flavor.
Of course, marrying a fat such as butter or a rich store-brought olive oil with acidic lemon juice to sprinkle on the skin is a wise move, too. It proves beneficial to give your bird some time to soak up the seasoning in your fridge before heading to your oven. And hey, while you wait, you can think about how your elbow grease effort will be rewarded when your bird basks in a brown coating after cooking time.
Letting the wings go free

The delicate chicken wings can burn from the high heat in the oven. Soaring temperatures wreak havoc in several ways, including turning your oven into an arid desert for the wings. Under those dry and damaging conditions, this part of your chicken will lose its appeal. Burnt wings will lack luster and tenderness. The fix is simple and effective here.
A good way to address this need is to tuck the chicken wings under or behind the body. You can truss or tie them up with the kitchen twine before tucking them too. The wings should be tightly bound to the body and slightly hidden or obscured to avoid the heat. This way, the wings will be shielded, yet heated throughout your cooking time. The resulting wings should be crisp and appetizing. You can rest assured that your homemade chicken wings — with the right flavor and position next to the chicken — can pack a punch.
Scouting the wrong oven spot

Roasted chicken recipes or cookbooks may miss specific reminders about the heating disparities that may happen when you cook food in the various spots in the oven. Some spots may allow for lower heat points than others: You can test whether food cooks faster when on the bottom or top rack and when closer or further from the oven walls. If the food is placed in a slower heating area, the cooking time could run longer than expected. Alternatively, if the food is placed in a quicker heating area, it could burn viciously. A fickle oven may even have a thermostat that allows for a wider range of temperatures, meaning the heat may substantially rise and fall during the roast.
Before roasting, you can set a goal to get to know your oven and its heating and cooling quirks. Finding the right spot in your oven for optimal heat circulation takes some intentionality. It may be time to take your oven off autopilot and adjust your thermostat to a higher or cooler temperature depending on how your food is generally faring in a particular spot during the cooking cycle. Buying and heating bread is a simple solution to identify hot and cold oven spots that will help, too.
Under-appreciating the breast

Several issues can arise when cooking chicken without attention to the breast. If the breast is kept down too long, its texture may even be altered and without a crisp coating when it has no time to shine in the oven. The opposite can also inflict damage: Cooking the chicken breast side up the whole way can dry it out. The whole chicken, including the breast, must get the appropriate amount of heat exposure and time to roast evenly in your oven depending on the temperature, which can vary.
The breast can also be roasted on its own with the proper instructions. This piece of the chicken is extremely lean, and best when cooked with the skin at room temperature, as Gordon Ramsay shared with MasterClass. His signature recipes and style can inspire those who seek to strengthen their skill with roasting the breast. Additionally, when it comes to experiences with cooking chicken, practice makes for better poultry.
Opening the door too often

Curiosity is a natural feeling during a cooking experience, from checking out ingredients closely to inspecting the finished dish. However, curiosity may cause the all-too-frequent opening of our oven door to look at our culinary creation while it is under construction. The dread of an open door brings a disruption to the cooking process. This underestimated action of peeking in your oven, if overdone, interferes with the oven heat and cooking time. You may add more minutes or have a harder go at achieving a stable temperature range in your oven when the door opens too much.
There is a lesson in patience in letting our roast, well, keep roasting without all the interruptions. It is tough to avoid this common kitchen mistake, but it is an achievable goal. You can stick to opening only when needed to rotate the pan, flip your bird, and take out the chicken at the end of the cooking cycle. If there is a purpose for the open door, it makes sense to follow through on it.
Roasting without reducing the temperature

Concerns about your oven temperature come up when making sure that we avoid overcooking the roasted chicken. An overcooked bird can be tough and juiceless. When the chicken roasts for longer than intended at a high temperature, it can lack moistness. Your carefully choreographed moves in the kitchen can include heading over to your oven controls and hitting the reduce temperature button during your roast.
It is important to know that temperature is different from heat. A temperature reduction is the right move to avoid bird burnout, but too drastic of a dip in temperature may mess with your cooking process. The roasting temperature can differ and should be higher at the start of your cook for a whole roasted chicken; your recipe should guide what temperatures are set during the roast. Once the bird has been in the oven at the reduced temperature, an instant-read thermometer will indicate when the chicken has reached the standard 165 F and signal that the cooking time has reached completion.
Drying out chicken during cooking time

A dry chicken can make for an unhappy diner just as much as a soggy chicken. Of course, you can pair a less mouthwatering chicken with a special sauce for a savory finish. However, it misses the moist mark, making for stiff pieces. The chicken then becomes harder to eat and enjoy and looks less appealing to the eye. Given that many people desire food that looks good on the plate, a barely moist bird may be without many fans.
If the goal is to achieve roasting gold using a roasted chicken recipe, perfecting a maneuver to moisten your chicken allows you to reach for the roasting stars. A basting technique will make for a juicy bird, allowing a liquid such as melted butter or broth to soak the chicken's surface. A time-saver option is good for busy cooks who can buy already-basted poultry. You can expect that a basting solution was added to the chicken at a specific percentage based on the weight of the chicken and within strict limits, according to the United States Department of Agriculture's Food Safety and Inspection Service. You can also try to keep the moisture in the pan by covering it with store-bought Reynolds foil.
Not resting after roasting

Yes, you did all the hard work of preparing and polishing your bird for its big debut (with the help of your high-performance oven). It is easy to forget why cooked chicken needs to rest after leaving the oven. This time allows the chicken to stay moist and tender before anyone cuts into it. If this downtime is skipped, interrupted, or cut short, the chicken's juices could spill everywhere when cut. Additionally, you sacrifice good flavor when the juices run all over the cutting board or table. The real risk of deleting this downtime is that dryness and a duller taste can be the result.
It may help to think of the rest as the grand finale of your roast. The chicken will continue cooking as the temperature rises during this rest. Thus while you rest and your oven rests, your bird can rest too. Good resting places for your chicken are a rack or board on your table or counter, whether the bird is covered or uncovered. Resting times will vary depending on the desired tenderness level of your chicken.
Fast-cutting fingers after cooking

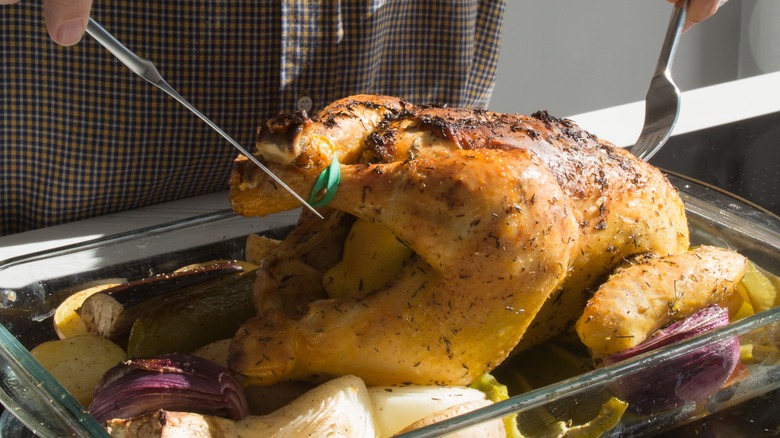
The moment of carving your chicken is worth the wait because it will be safer to cut after rest time. The resting process will involve the chicken taking on a more solid shape — which helps to achieve simple cuts. If carving is done too prematurely or quickly, it proves difficult to slice the chicken into thin stripes. If one has to work harder to carve the chicken using a sharp knife, the risk of injury can increase and become a serious issue. It is also important to allow the cooked chicken to cool and be at a comfortable temperature before carving it.
It takes a bit of organization and understanding of the chicken's anatomy to carve it well. Like most actions during cooking, carving requires some close attention and precision to do correctly. You want to go slow especially if you are a beginner and be careful about where placing your fingers on the knife and chicken. A recommended starting point is to cut the thigh and legs. A sharp knife will allow for clean cuts, but you can use your hands to separate the pieces and pull them further from the breast. You can snap off the wings and take your time to slice the breast after it.